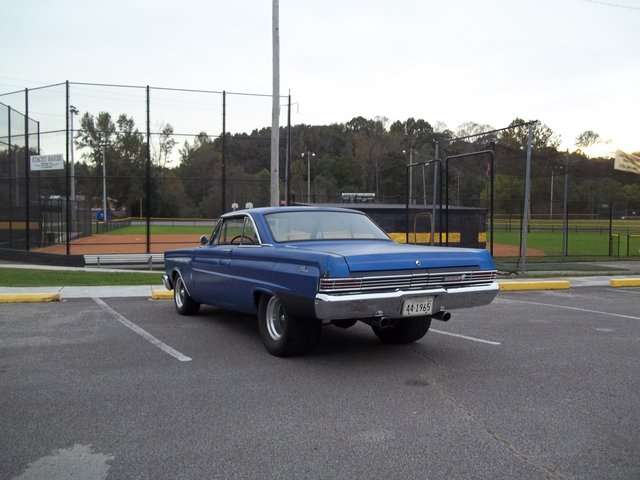
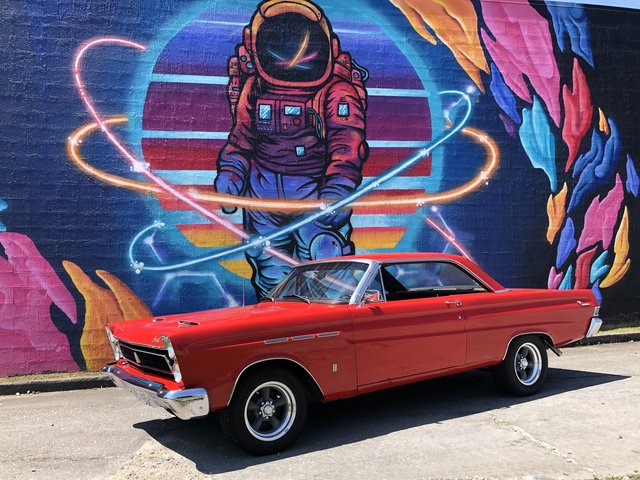
'64 Hood Modification Question
'64 Hood Modification Question
I am having thoughts of filling in the hood ornament spot on my hood, what would be the best way to do that? Would it work to make a patch from a junk hood and weld in? Or could it be filled with something that would not pop out or crack?
If anyone has a junk '64 hood and wants to get rid of a a small chunk of the front edge that I could make a patch out of I might be interested in it (if I go that way)
See Ya,
Mike
If anyone has a junk '64 hood and wants to get rid of a a small chunk of the front edge that I could make a patch out of I might be interested in it (if I go that way)
See Ya,
Mike
-
Lou's Comet
- Posts: 1540
- Joined: Sat Nov 26, 2011 8:56 pm
- Location: Jeannette, Pa.
Re: '64 Hood Modification Question
Welding it in would work. Hoods have a tendency to warp quicker than other body panels tho, so keep it as cool as you can. Blowing air, heat fence, or a wet rag.
You could also glue the patch with panel adhesive, 08115. Which is probably the way I would go.
Either way I think you would be fine.
Lou
You could also glue the patch with panel adhesive, 08115. Which is probably the way I would go.
Either way I think you would be fine.
Lou
- ArkansasComet
- Posts: 97
- Joined: Wed Dec 14, 2016 4:50 pm
- Location: Arkansas
Re: '64 Hood Modification Question
I would recommend welding it but agree with Lou that the hood does warp easy, I warped my first '65 hood pretty good when I tack welded my scoops on.
My brother used fiberglass & bondo (before we owned a welder) to shave the emblems on his '56 Ford & they eventually cracked & popped out so that method doesn't work.
I know the '64 & '65 hoods are different but if a section from a '65 hood might work let me know, I can cut you a piece from my old hood.

"Auto racing began 5 minutes after the second car was built." - Henry Ford
Re: '64 Hood Modification Question
So I watched a couple of videos on this and it looks good stuff, or at least 3M presents it that way. My question is what is the shelf life of it after I use it the first time, it looks to be expensive to get started with the gun, etc needed and I can't imagine to would take much glue a patch on there so I would need to save up any left in the tube until I needed it again.Lou's Comet wrote:You could also glue the patch with panel adhesive, 08115. Which is probably the way I would go.
It might work but there is a bit of fillet along the front edge of a 64 hood I don't think a 65 has but that might not make a difference because the indention is not very deep, I will try and post a picture of the spot later.ArkansasComet wrote:I know the '64 & '65 hoods are different but if a section from a '65 hood might work let me know, I can cut you a piece from my old hood.
So yes I am thinking about going ahead and getting my hood modified and painted satin black as a small project I can do while waiting to get the bigger stuff going.
See Ya,
Mike
Re: '64 Hood Modification Question
Lou introduced the panel adhesive to me & we are now best friends. I used it anywhere that wasn't structural, on parts of a lower quarter install & trunk seal gutters too, just to name a couple. that fact that welding creates rust & places where you cant get to the back side of what you welded makes the adhesive better because it is also sealing up the 2 pieces at the same time & no warpage. it is sandable & paintable. the only draw back is the price of it & price of an applicator gun. I was able to borrow a gun from a buddy. but if you have lots of panels to replace it would be worth it.
on my seal gutters I had 2 planes to glue together. I used clamps on the lower lever & screws on the upper. then when it was dry I took out the screws & dabbed some more adhesive in the screw holes. & also used it for seam sealer , another thing I learned from Lou.


on my seal gutters I had 2 planes to glue together. I used clamps on the lower lever & screws on the upper. then when it was dry I took out the screws & dabbed some more adhesive in the screw holes. & also used it for seam sealer , another thing I learned from Lou.


Re: '64 Hood Modification Question
That is cool to see John, I need to replace parts of my trunk lip as well, now i am getting convinced to just get the set including the gun, I think I saw it on Amazon for around $90 give or take.
See Ya,
Mike
See Ya,
Mike
Re: '64 Hood Modification Question
Not sure about shelf life but it is a 2 part epoxy type & has special mixing tips for the cartridge that are one time use only. then just clean the ends of the cartridge if it needs it so any that got together of the 2 parts is wiped off & it's good for a pretty good while but not sure how long. I think 2 tips come with it. but my buddy said his paint rep could get more for free. I think for just a small job as yours you could figure out a way to squeeze out equal amounts of each part & mix by hand. & buy the gun later. it has plenty of work time.
I dont know how good it is but eastwood has a panel adhesive that is cheaper & doesn't need a double barrel gun but since I had some big panels to do I didnt want to chance it.
I dont know how good it is but eastwood has a panel adhesive that is cheaper & doesn't need a double barrel gun but since I had some big panels to do I didnt want to chance it.
- ArkansasComet
- Posts: 97
- Joined: Wed Dec 14, 2016 4:50 pm
- Location: Arkansas
Re: '64 Hood Modification Question
That does look like cool stuff, thanks for sharing! I could find a few uses for that on my project!

"Auto racing began 5 minutes after the second car was built." - Henry Ford
Re: '64 Hood Modification Question
Johno that trunk lip looks new. Does somebody repop it or did you get lucky and find some good pieces? Interesting epoxy how long has it been on your car? I'm assuming no cracking,lifting ect.ect. What is the consistency like when it is dry? I guess I'm asking if it has a little give or not.
Matt
Matt
Re: '64 Hood Modification Question
It gets pretty hard. bout like seam sealer I guess.nothing has cracked or come loose. Lou used it for seam sealer & I did too . It's been on for a couple years I think. I got the lips from Cometheaded Joe ,he parted out a 4dr. I sand blasted it is why it looks new in the first pic. Lou can tell you more about the adhesive than I can, I think he has used it for a while. but if you glue 2 sheets together it will tear on the single layer before coming apart. I did a little test. there may be test on youtube. I even used it on parts of my floor install.
-
Lou's Comet
- Posts: 1540
- Joined: Sat Nov 26, 2011 8:56 pm
- Location: Jeannette, Pa.
Re: '64 Hood Modification Question
I was told The shelf life is a year, whether opened and used or not. I take a sharpie and write the date I get it on the tube.
Get the gun to mix it right. Unseal tube, put it in the gun, pull the red plastic seal and install the tip. I squeeze out about a 1.5" strip onto some scrap cardboard to make sure it is mixed good,, then use the adhesive on whatever I am working on. Plus later you can check the sample on the cardboard to see if adhesive is hard instead of sticking finger into repair.
Works sweet, say you are putting a repair panel on. Prep the car, cut out the rust or bad spot, fit the new panel. For the seam you want .5" - 75" bare metal around the edge of the repair area on car and the same around the edge of the panel.
You want to use something rough for the adhesive, 36 grit or coarser on a angle grinder. I use new sand disc to get nice rough area, I gan feel the scratches with my finger.
Put a bead on both parts where the bare metal strip is. Take a tin brush and spread the adhesive out over these areas so bare metal is completely covered. Then put a bead on either part and clamp/screw together.
.........make sure you test fit everything and have a plan how you are clamping/attaching panels together before adhesive......
After clamping let sit for 24 hours, then remove clamps and if you used any screws remove them and fill the holes with adhesive. After everything dries sand. I use epoxy primer over it after sanding and before any plastic or surfacer.
Also if you use screws in the process use hex head!! The glue will make getting the screws out a little tougher than normal and Phillips/straight head screws can become a pain to get out after the adhesive sets. BTDT lol
Good stuff been using it along time with great results. Tried some other brands but the 3M is my favorite.
The coolest thing about it(other then it's adhesive power) is as John says you don't have to worry about bare metal and rust behind your repair where you can't get to it to cover it.
When I put a repair panel on, say a rear wheel arch on a pickup truck. I take the inside on panel down to clean metal with 80gritt. Do the edge where the adhesive will be going with 36. Then I take 3/4" masking tape around the sealing edge.
Spray the back of panel with 2 coats of epoxy, then after epoxy is dry I remove the tape and have my edge to glue. When you clamp it the adhesive squeezes out and seals the seam. no worries.
When I weld do the same prep but use weld thru primer on the edges and when it burns the paint off on the inside can't always get back there to coat/protect the weld. worries. Lol
After using the adhesive leave the tip on the cartridge, when the adhesive hardens up it will seal the cartridge until next use. Then just use a new tip. I think the tips are around $1.50 ea. I always use tips to mix it.
Know a lot of people that use it and they all love it.
Lou
Get the gun to mix it right. Unseal tube, put it in the gun, pull the red plastic seal and install the tip. I squeeze out about a 1.5" strip onto some scrap cardboard to make sure it is mixed good,, then use the adhesive on whatever I am working on. Plus later you can check the sample on the cardboard to see if adhesive is hard instead of sticking finger into repair.
Works sweet, say you are putting a repair panel on. Prep the car, cut out the rust or bad spot, fit the new panel. For the seam you want .5" - 75" bare metal around the edge of the repair area on car and the same around the edge of the panel.
You want to use something rough for the adhesive, 36 grit or coarser on a angle grinder. I use new sand disc to get nice rough area, I gan feel the scratches with my finger.
Put a bead on both parts where the bare metal strip is. Take a tin brush and spread the adhesive out over these areas so bare metal is completely covered. Then put a bead on either part and clamp/screw together.
.........make sure you test fit everything and have a plan how you are clamping/attaching panels together before adhesive......
After clamping let sit for 24 hours, then remove clamps and if you used any screws remove them and fill the holes with adhesive. After everything dries sand. I use epoxy primer over it after sanding and before any plastic or surfacer.
Also if you use screws in the process use hex head!! The glue will make getting the screws out a little tougher than normal and Phillips/straight head screws can become a pain to get out after the adhesive sets. BTDT lol
Good stuff been using it along time with great results. Tried some other brands but the 3M is my favorite.
The coolest thing about it(other then it's adhesive power) is as John says you don't have to worry about bare metal and rust behind your repair where you can't get to it to cover it.
When I put a repair panel on, say a rear wheel arch on a pickup truck. I take the inside on panel down to clean metal with 80gritt. Do the edge where the adhesive will be going with 36. Then I take 3/4" masking tape around the sealing edge.
Spray the back of panel with 2 coats of epoxy, then after epoxy is dry I remove the tape and have my edge to glue. When you clamp it the adhesive squeezes out and seals the seam.
When I weld do the same prep but use weld thru primer on the edges and when it burns the paint off on the inside can't always get back there to coat/protect the weld.
After using the adhesive leave the tip on the cartridge, when the adhesive hardens up it will seal the cartridge until next use. Then just use a new tip. I think the tips are around $1.50 ea. I always use tips to mix it.
Know a lot of people that use it and they all love it.
Lou
-
Lou's Comet
- Posts: 1540
- Joined: Sat Nov 26, 2011 8:56 pm
- Location: Jeannette, Pa.
Re: '64 Hood Modification Question
I have done wheel arches on trucks 4/5 years ago with the adhesive that I still see and have had no failures... lifting/cracking. One truck we glued a panel in the bed over a hole, really did no prep other than wire brush the edge and glues it, quickie patch for insp on work truck. It stuck for over a year.Loner wrote:Johno that trunk lip looks new. Does somebody repop it or did you get lucky and find some good pieces? Interesting epoxy how long has it been on your car? I'm assuming no cracking,lifting ect.ect. What is the consistency like when it is dry? I guess I'm asking if it has a little give or not.
Matt
When it dries it gets hard, a little give but not much. I always put a strip on some scrap poster paper first to make sure it is mixed. After it sets you can bend the strip/bead a little bit back and forth but not much or it will snap.
When it dries and you sand it, it sands nice and like fine filler.
Lou
Re: '64 Hood Modification Question
I have a couple of jobs I'm going to try it on. One the guy doesn't want me to pull all of the interior out of his car for a small floor patch. I'm thinking this may be just the stuff to use. No sparks!!!
Thanks guys
Matt
Thanks guys
Matt
- Jims65cyclone
- Posts: 2764
- Joined: Sun Nov 23, 2014 10:29 pm
- Location: Lexington, SC
Re: '64 Hood Modification Question
Lou,
I'm trying to visualize your description of a body panel repair. Do you cut the patch 3/4" larger than the hole being repaired and overlap the patch over the original panel, then blend with filler after it dries? Or do you cut the patch to edge match the hole flush and use a back-up strip of metal behind the repair to splice the two pieces together?
Jim


