Lavron's '64 Build Thread

Re: Lavron's '64 Build Thread
So is there a magic number of posts before I unlock pictures or a gallery
Re: Lavron's '64 Build Thread
Let's see if 10 is a magic number.
Re: Lavron's '64 Build Thread
I do not think there is.Cobraguy wrote:So is there a magic number of posts before I unlock pictures or a gallery
You can go to http://cometcentral.com/photos/ and register for an account there, and do direct links.
See Ya,
Mike

Re: Lavron's '64 Build Thread
Thanks means a lot to mepopscomet wrote:you've done good !!! pop
Been under the weather of a few days now, I need to get well because I am officiating a wedding Saturday, and they probably don't want me to hack and cough through their ceremony
Trying to rest up today and see if it will help but went out and mocked up my master cylinder this morning.

That was pretty easy
That went so quick I decided to figure out how I would mount my clutch master, I made a pattern out of poster board and traced the base of the master on it, I think I can make it work right where the original clutch rod went through the firewall. (the red circle is the hole for the original rod)

Again for anyone interested in it, it is a Toyota Land Cruiser clutch master (can't remember the year, it posted someplace in this thread or on the Forum) also from RockAuto, it is a AISIN CMT-032.

I think I will make a 3/8" backing plate for it and I think the rod will reach the clutch pedal lever, I will have to drill a new hole for it and possibly mount it to one side.
Anyone know if I take the spring off the clutch pedal when I go hydraulic? Right now the pedal will pop to the floor if you press it.
See Ya,
Mike
Re: Lavron's '64 Build Thread
American Powertrain insisted the pedal spring be removed with their Hydramax install. That spring is supposed to be an assist spring, not a return spring apparently from what their guru told me.
Dan
Dan
Long time search complete, 65 Cyclone project in progress!

Re: Lavron's '64 Build Thread
Thanks Dan.
Just so I will know and anyone who cares the clutch master is for a 1986 Toyota Land Cruiser 4.2L V6, it was $26.99
You haven't seen it yet but the slave cylinder is a 1992 Isuzu Rodeo 3.1L V6, it is Centic part number 13943005 (139.43005), it was $9.94
I looked the brake master up and it is a 1981 Lincoln Town Car, it was $24.79 and I think it has a 1" bore.
See Ya,
Mike
Just so I will know and anyone who cares
You haven't seen it yet but the slave cylinder is a 1992 Isuzu Rodeo 3.1L V6, it is Centic part number 13943005 (139.43005), it was $9.94
I looked the brake master up and it is a 1981 Lincoln Town Car, it was $24.79 and I think it has a 1" bore.
See Ya,
Mike
Re: Lavron's '64 Build Thread
Hey Mike, I used the hyd unit from the Third that everything else came from in my swap.lavron wrote:
Anyone know if I take the spring off the cnewlych pedal when I go hydraulic? Right now the pedal will pop to the floor if you press it.
See Ya,
Mike
I just put the cylinder on the end of the clutch rod, with some testing had to put a new stop on the pedal as it had too much stroke, spring is still in there, works great.
I'd rather do it myself if it's done right or not,,,isn't that what hotrodding is all about

Re: Lavron's '64 Build Thread
SASSY wrote:Hey Mike, I used the hyd unit from the Third that everything else came from in my swap.
I just put the cylinder on the end of the clutch rod, with some testing had to put a new stop on the pedal as it had too much stroke, spring is still in there, works great.
Well I guess it will work one way or the otherbigdan wrote:American Powertrain insisted the pedal spring be removed with their Hydramax install.
Brakes have always been an issue on my Comet from the day it came home and they were the reason it got parked, so I am glad to be working on those now. It looks like my goal for month 4 is brakes and hydraulics, I ordered brake line and a Wilwood proportioning valve, don't know if I need anything like residual valves, but I think I have everything else.
I will also be mocking the engine/trans in there soon, I hope, and getting all the mounts built for them.
See Ya,
Mike
Re: Lavron's '64 Build Thread
A proportioning valve is a good idea even though they’re not always needed with 4-wheel discs. That’s dependent on how the front, rear, and MC are matched up though. Non-factory mix & match ya might need it! 
There’s a lot of info out there on residual valves. Using disc I’ve only seen 2-lb’ers...many say they’re only necessary when the MC is below caliper level to prevent drain-back. I used one on my rear discs based on advice from a number of folks who’ve used those type calipers. Shucks, looks like Dan used ‘em front and rear on his Falcon. Easy enough to try ‘em out I guess!!
In a manual system it/they can help maintain more consistent braking/help with pedal travel.
'cause Johno says you gotta have a sig pic!
Re: Lavron's '64 Build Thread
Don't ever be mistaken into thinking I know what I'm doing! In all seriousness i had good results with the RPV's on a previous manual brake build, so i incorporated them this time also. They're easy enough to delete later if they're not needed.
Looking good, Lavron. Keep it up!
Dan
Looking good, Lavron. Keep it up!
Dan
Long time search complete, 65 Cyclone project in progress!
Re: Lavron's '64 Build Thread
Surely you are jokingbigdan wrote:Don't ever be mistaken into thinking I know what I'm doing!
I got the proportioning valve today, my brakes were definitely mismatched.Rocket989 wrote:A proportioning valve is a good idea even though they’re not always needed with 4-wheel discs.
Well I am all manual, I want to build my right leg muscle up.Rocket989 wrote:In a manual system it/they can help maintain more consistent braking/help with pedal travel.
Sometimes I need a practice run before I do my final, or I need to see what does not work, so it was with my clutch master, mounting it low definitely does not work, it has no stroke and it bumps into everything, so installed it twice today, and it is pretty nigh perfect now

Sorry the picture is a little dark, the first spot was great to mount too, was flat and I added a second layer of steel, but that was about it, the lid hit the brake master, the push rod hit the steering column and I could only push the pedal about 3" down, I was looking at making a lever like Modern Driveline sells so I was up under there measuring, again, and calculated the master had about 2.5" of stroke, IIRC, and that was about what the mount for the original clutch rod had too. This was when I decided I had to mount the master higher, now everything worked great, the only thing was the firewall is not real flat there, oh well, I can deal with that
Here is how it all looks under the dash.

I drilled a new hole in the clutch pedal lever and used a grade 8 bolt and spaced it over to line everything up, it operates very smoothly, the pedal is the right height and the travel is about right.
Here it fully depressed.

I did take the big return/assist spring off because it was in the way and was fighting me
I guess the extra holes will get rubber plugs in them
See Ya,
Mike
Re: Lavron's '64 Build Thread
If I did this right there's a pic of my oil pan with a template for mods
Re: Lavron's '64 Build Thread
A short day today and probably the end of the week for me to work on the Comet, everything is about the wedding this Saturday for now.
I did get out and do a little this morning, I know I said I was going to rubber plug my extra hole in the dash but decided that I already had steel, a grinder and some bolts, so I just made a plate to cover it, I also made a rubber gasket out of the same shower liner stuff I made the gasket for the steering column.

While I was at it I bolted the plate on the firewall (the steering column plate) with bolts and nuts, I will probably cut them off shorter later on because I need to pull the plate back off and put some sealer around it and then I guess I can just attach it permanently.
I also stripped everything off the firewall and started getting the stuff out from under the dash, a project I seem to have been avoiding (has been a home to rodents, or a toilet home) they pretty much chewed all the cardboard stuff up under there.

I need to finish disconnecting all the rest of the wiring harness and get the rest of stuff off on the drivers side but just ran out of time for today (plus it is really hot and humid, supposed to cool down this weekend). I got that stinky jute padding out of there and guess I will just put something like a cheap alternative to Dynamat insulation back up under there.
I do have a question, and I know put the cart before the horse all the time but I would like to get the firewall painted (I am going to use spray-on bedliner) before I run my brake lines, but the outer fender panels are not ready, you think it would be ok to paint the firewall (even though I will have to touch it up) or just clean it up and prime it, run my brake lines and then pull them back off when I am ready to paint?
See Ya,
Mike
I did get out and do a little this morning, I know I said I was going to rubber plug my extra hole in the dash but decided that I already had steel, a grinder and some bolts, so I just made a plate to cover it, I also made a rubber gasket out of the same shower liner stuff I made the gasket for the steering column.
While I was at it I bolted the plate on the firewall (the steering column plate) with bolts and nuts, I will probably cut them off shorter later on because I need to pull the plate back off and put some sealer around it and then I guess I can just attach it permanently.
I also stripped everything off the firewall and started getting the stuff out from under the dash, a project I seem to have been avoiding (has been a home to rodents, or a toilet home) they pretty much chewed all the cardboard stuff up under there.
I need to finish disconnecting all the rest of the wiring harness and get the rest of stuff off on the drivers side but just ran out of time for today (plus it is really hot and humid, supposed to cool down this weekend). I got that stinky jute padding out of there and guess I will just put something like a cheap alternative to Dynamat insulation back up under there.
I do have a question, and I know put the cart before the horse all the time
See Ya,
Mike
Re: Lavron's '64 Build Thread
I think you need to use the direct link, like this;Cobraguy wrote:If I did this right there's a pic of my oil pan with a template for mods
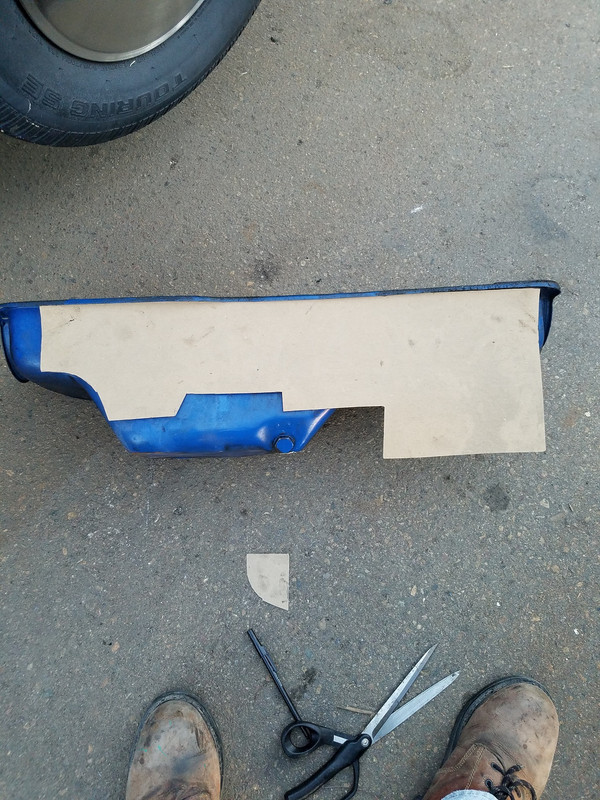
Just copy the link under share (the second one down) and add the IMG tags.
That is interesting, I thought more would need trimmed up than that. I will mocking mine in the car again soon and will see what I end up with.
See Ya,
Mike