Lavron's '64 Build Thread

The Era of The Square Body Racing Comets
lavron
Site Admin
Posts: 4710
Joined: Sat Nov 01, 2003 9:17 am
Location: Missouri, Ozarks
Contact:

Re: Lavron's '64 Build Thread

Post by lavron »

tomb22 wrote:Glad to see you putting your engine together. To me that was the real fun part of building a car.
I enjoy doing engine stuff as well, probably my favorite stuff to do :roll: I have to say, even though it is frustrating at times, finding parts for this rarer six is part of the fun, I am not sure why all the parts I can interchange are rare too :P like the HSC Taurus rods are almost impossible to find and I could use 260 V8 one piece valve spring retainers but none are available a second choice is 4.0L V-6 retainers and none of those are available (I may check at the old, local parts store) I may just use my original 2 piece retainers, I am not building a race car, after all.

I guess I will order a set of FE lifters this week, I can choose either Mellings or Sealed Power, anyone have any bias against either of those manufactures? (the Mellings are a few dollars cheaper, but not enough to be a deciding factor)

See Ya,
Mike
Mike's build thread
viewtopic.php?f=9&t=13058
Image

User avatar
Jims65cyclone
Posts: 2764
Joined: Sun Nov 23, 2014 10:29 pm
Location: Lexington, SC

Re: Lavron's '64 Build Thread

Post by Jims65cyclone »

Your "Frankenstein" car is coming along, Mike. I can just imagine when the time comes to fire it off for the first time. It will be late at night, there will be a raging thunderstorm with lightening bolts flying. A squadron of kites will be flying up amongst it all with their leads going into your garage where there is the buzzing and crackling sounds of high voltage arcing. Suddenly, there is an explosion and a blinding flash of sparks! The airbags inflate and the engine roars to life! IT'S ALIVE!! IT'S ALIVE!! BWA-HA-HA-HA-HA!!!

Then the villagers show up with their pitchforks and blazing torches and make you turn it off and go to bed. :lol: :lol: :lol: :lol: :roll:

Jim
Image

lavron
Site Admin
Posts: 4710
Joined: Sat Nov 01, 2003 9:17 am
Location: Missouri, Ozarks
Contact:

Re: Lavron's '64 Build Thread

Post by lavron »

Jims65cyclone wrote:Then the villagers show up with their pitchforks and blazing torches and make you turn it off and go to bed.
Probably be villager, just one and you don't want to get on her bad side :roll:
Jims65cyclone wrote:Mike. I can just imagine when the time comes to fire it off for the first time.
I might just record the occasion :P

Sometimes I catch a break, by not breaking anything :roll: I took my rear glass out today, didn't chip it, crack it or break it into tiny little bits. I have dad's truck sitting in the shed so I put the glass in the cab on the seat.
Image

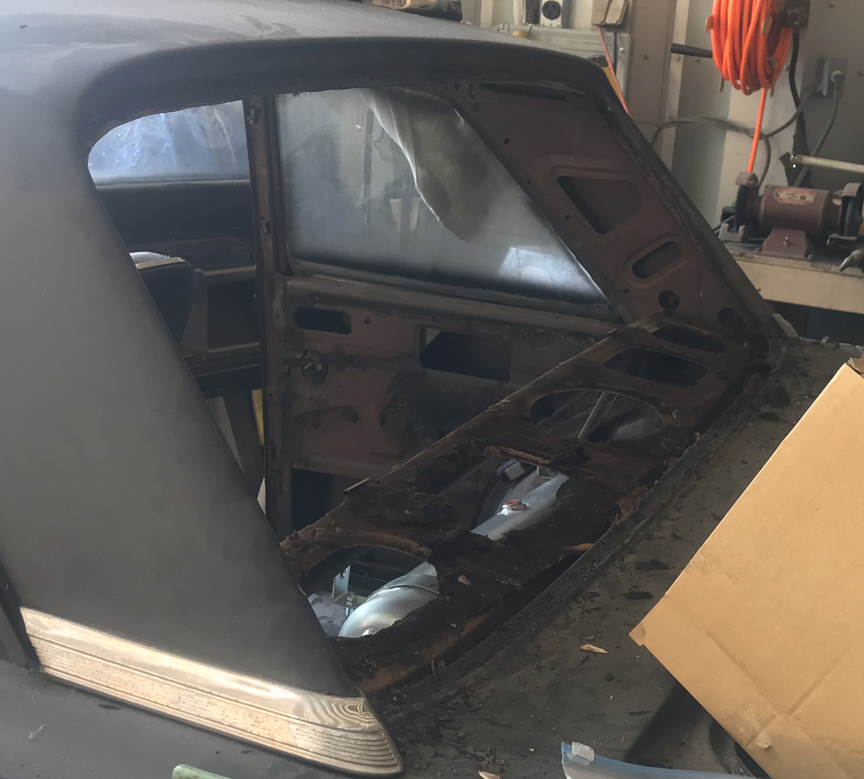
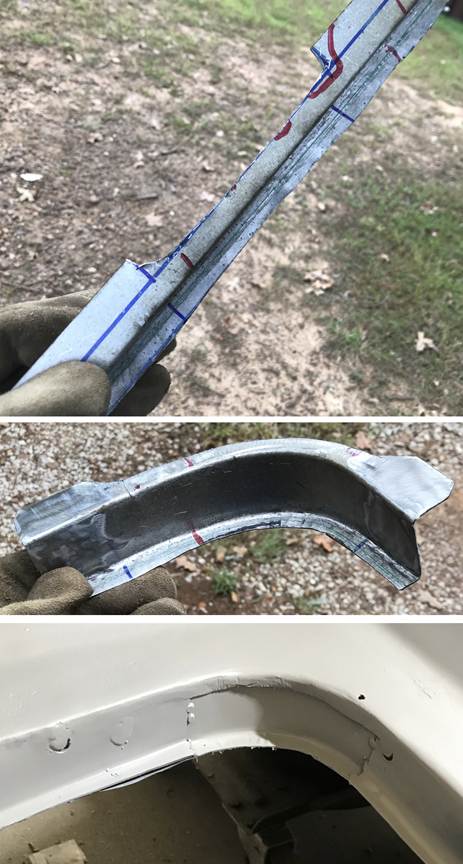
The second break I got was my window frame/channel is mint, looks like 1964 factory fresh (like this all the way around) That black insulation(?) that is under the package tray was nasty, it just turned to dust basically. Also that grey sealer is good stuff, still sticky (very) after 55 years.
Image

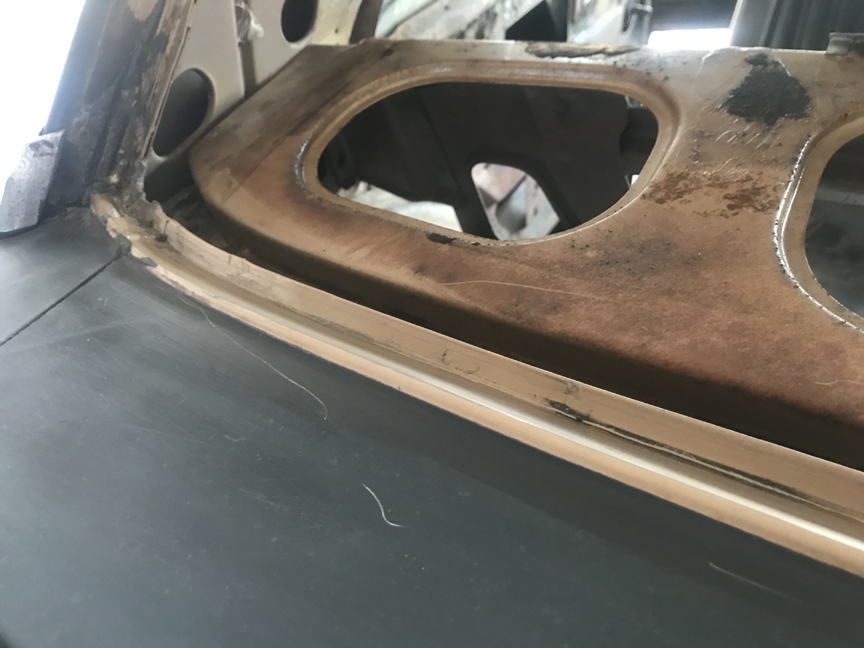
I don't know if this is an area that is prone to rot or not but I survived somehow, finally something I don't have to repair :roll:

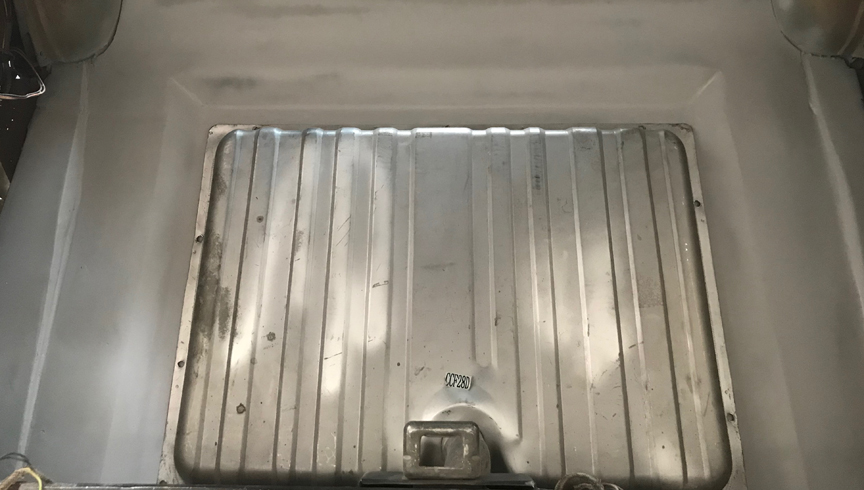
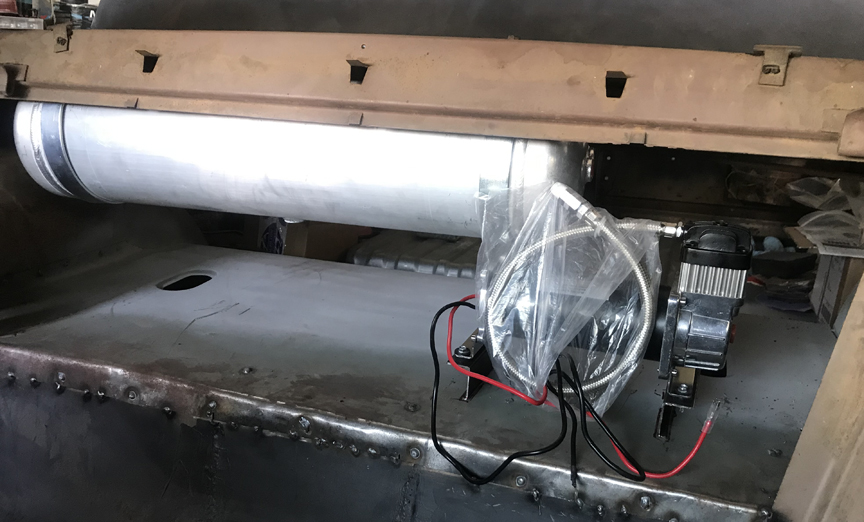
I also got the air tank mocked up into the car, I know you can't see it here but it is bolted to the rear package tray, I need to find some flat topped bolts to replace the bolts I have sticking out of the package tray I know I have seen them someplace.
Image

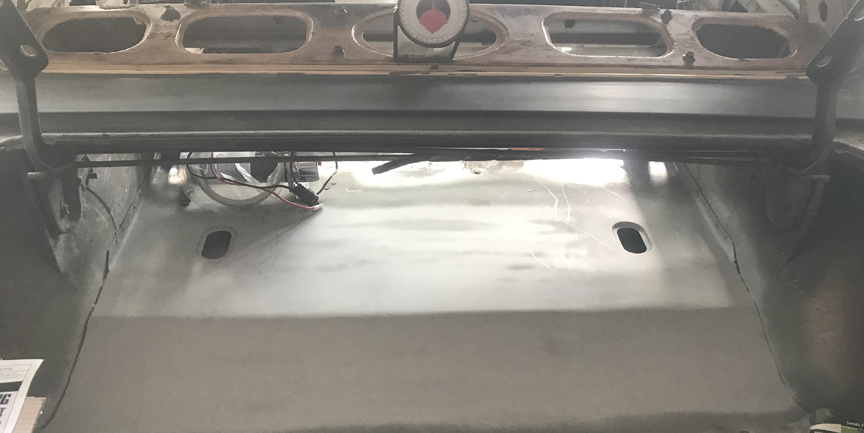
It really tucks up in there I would like to think it will be hidden but there is a bunch of plumbing to go on there so no such luck.

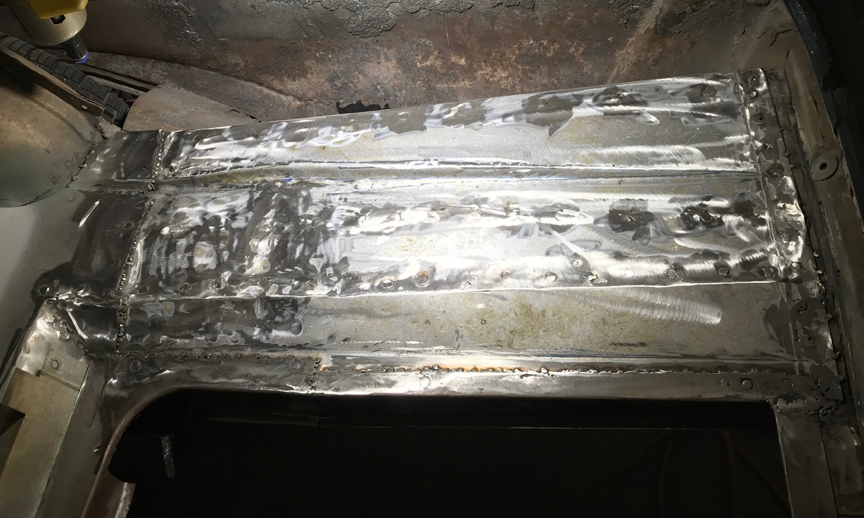
I cut some little mounts for the compressor to sit on and I will weld them to the floor. This is so I can get nuts on the bottom of the bolts in the base, right now it has self tappers holding the compressor, I will tack it and remove the compressor and then final weld it down.
Image

I am going to try and find some aluminum plate to divide the trunk from the cabin and will make it screwed in so access to the compressor will be a little easier than having to crawl into the trunk.

Will probably get the rest of the air ride components at least mocked in and get my rear bags reinstalled so I can get the back of the car off of the jack stands again.

See Ya,
Mike
Mike's build thread
viewtopic.php?f=9&t=13058
Image

lavron
Site Admin
Posts: 4710
Joined: Sat Nov 01, 2003 9:17 am
Location: Missouri, Ozarks
Contact:

Re: Lavron's '64 Build Thread

Post by lavron »

Ground welds, sanded and welded the compressor bracket down in the trunk, got it all primed in self etch, that was about all the heat I could take today. :oops:

See Ya,
Mike
Mike's build thread
viewtopic.php?f=9&t=13058
Image

popscomet
Posts: 9689
Joined: Sat Jan 01, 2011 11:19 pm
Location: Jacksonville, Arkansas

Re: Lavron's '64 Build Thread

Post by popscomet »

what did you do about the oil pump gasket??….POP
Image
pop/glenda

lavron
Site Admin
Posts: 4710
Joined: Sat Nov 01, 2003 9:17 am
Location: Missouri, Ozarks
Contact:

Re: Lavron's '64 Build Thread

Post by lavron »

popscomet wrote:what did you do about the oil pump gasket??….POP
I haven't done anything yet, I thought a little sealer between might work ok from everything I have read use it sparingly, I assume if I avoid the little nipple that goes up into the engine (or vice-versa) I should be ok as far as keeping silicone out of the oil system (as much as I can)

Some stuff I read said you don't need anything there, most said a thin layer should do the trick, seemed to to be a lot of "if they sent one I use it, if not I don't and sometimes I forget to put it in with no problems" I also read (and can't find one) you can't buy them separate.

See Ya,
Mike
Mike's build thread
viewtopic.php?f=9&t=13058
Image

popscomet
Posts: 9689
Joined: Sat Jan 01, 2011 11:19 pm
Location: Jacksonville, Arkansas

Re: Lavron's '64 Build Thread

Post by popscomet »

to each their own,,have you ever taken a piece of an old shoe box or ceral box and by using a small ball peen hammer and tap gently ,you can make the perfect gasket..I've even used a piece of a grocery sack,,POP has made plenty of gaskets thru out the yrs ,,my DAD taught me that little trick as a boy.I do not like to use just sealer...JMO....has always worked for me...pop
Image
pop/glenda

lavron
Site Admin
Posts: 4710
Joined: Sat Nov 01, 2003 9:17 am
Location: Missouri, Ozarks
Contact:

Re: Lavron's '64 Build Thread

Post by lavron »

popscomet wrote:have you ever taken a piece of an old shoe box or ceral box and by using a small ball peen hammer and tap gently ,you can make the perfect gasket..I've even used a piece of a grocery sack,,POP has made plenty of gaskets thru out the yrs
I have not, but I may now :P Thanks for the suggestion Pops that is why I post stuff up here, I value the opinions/directions of the guys on here over anything I might find out on the web.

See Ya,
Mike
Mike's build thread
viewtopic.php?f=9&t=13058
Image

User avatar
SASSY
Moderator
Posts: 5134
Joined: Sat Jan 07, 2006 12:32 am
Location: Wynndel, BC CANADA

Re: Lavron's '64 Build Thread

Post by SASSY »

popscomet wrote:to each their own,,have you ever taken a piece of an old shoe box or ceral box and by using a small ball peen hammer and tap gently ,you can make the perfect gasket..I've even used a piece of a grocery sack,,POP has made plenty of gaskets thru out the yrs ,,my DAD taught me that little trick as a boy.I do not like to use just sealer...JMO....has always worked for me...pop
I second that.
I also picked up a package that contained several different types of gasket material, but forget where I got it.
I think my dad (heavy equipment operator by trade) told me years ago that they made orings with bulk rubber line and a special glue, anybody else ever hear of this?
(official thread theft post)
I'd rather do it myself if it's done right or not,,,isn't that what hotrodding is all about

Image

popscomet
Posts: 9689
Joined: Sat Jan 01, 2011 11:19 pm
Location: Jacksonville, Arkansas

Re: Lavron's '64 Build Thread

Post by popscomet »

since we have hi-jacked MIKE'S thread for awhile,,several times instead of using any type of sealer,I would use wheel bearing grease...another trick my dad showed me,,,I reused the same intake gaskets on my 55 crown vic many times,going from 3x2 to 2x4 to single 4bbl..just coat both sides with grease,the 351 in wife's 56 ford was put together with grease only,as we did not want any sealer squeezing out and showing,,this was back in the early 90's.....I never glue a manual fuel pump gasket,coat with grease and install......you'd be surprised at want you can do with nothing !! pop
Image
pop/glenda

lavron
Site Admin
Posts: 4710
Joined: Sat Nov 01, 2003 9:17 am
Location: Missouri, Ozarks
Contact:

Re: Lavron's '64 Build Thread

Post by lavron »

popscomet wrote:since we have hi-jacked MIKE'S thread for awhile
Dang I hate when that happens :P

I had a small goal today, get the rear airbags reinstalled and hooked up, plus do a little mockup on the air ride plumbing, took a while :roll:

The person that designed these recessed pockets certainly wanted to make my job harder, not sure what I will do if I ever have to switch bags after the gas tank is installed, lay in the trunk I guess :roll:
Image

I should have made the openings back about a 1/4" - 1/8" because the socket will barely go on the rear bolt. I also had to make a custom socket to tighten the fittings down into the bags, it worked ok but I wish I would have looked around for a deep well socket to modify (I guess that Buffalo socket I bought in HS is not a collectors item :? )

Car back on it's own suspension, will wait and see if it leaks down any.

I did get a little mocking done on the air ride and now I have to order some additional fittings :roll: I guess that is no surprise, you figure out in your head how it will all fit but when you start putting it in you find out some things don't fit like you imagined.

See Ya,
Mike
Mike's build thread
viewtopic.php?f=9&t=13058
Image

redhotcomet
Posts: 349
Joined: Mon Jan 27, 2014 2:22 pm
Location: Saskatchewan, Canada

Re: Lavron's '64 Build Thread

Post by redhotcomet »

SASSY wrote: I second that.
I also picked up a package that contained several different types of gasket material, but forget where I got it.
I think my dad (heavy equipment operator by trade) told me years ago that they made orings with bulk rubber line and a special glue, anybody else ever hear of this?
(official thread theft post)
Yes, I have done this before. The glue is just your regular crazy/super glue. The glued joint does end up being the weak spot but it does work in low pressure applications.
1964 Caliente hardtop, 302/T5/8.8"

Image

lavron
Site Admin
Posts: 4710
Joined: Sat Nov 01, 2003 9:17 am
Location: Missouri, Ozarks
Contact:

Re: Lavron's '64 Build Thread

Post by lavron »

I got the right trunk floor all ground today and welded in another part, all I need now is the get the corner part (next to the gas tank) made and welded in and add a little filler in a couple of spots before priming it.
Image

Next I will move back over to the left side and get it finished up (mostly adding the rounded corner as well)

About to get the trunk floor wrapped up.

See Ya,
Mike
Mike's build thread
viewtopic.php?f=9&t=13058
Image

lavron
Site Admin
Posts: 4710
Joined: Sat Nov 01, 2003 9:17 am
Location: Missouri, Ozarks
Contact:

Re: Lavron's '64 Build Thread

Post by lavron »

Got the trunk floor pretty much finished today, I made the little corners, they did not turn out too bad considering it was the first time I ever used a shrinker/stretcher.
Image

The floor is not the prettiest thing in the world but I think it will be ok for a trunk floor, at least it is solid and remember it will be painted with bed liner.
Image

The final thing that needs to happen in the trunk, besides seam sealing and painting, is replacing the right trunk drop (or patching the lower end of it) I am going to wait on painting the floor until I get a chance to flip the car up and check my welding underneath in case there is some refining I need to with the welder I don't want to have to repaint the floor (I did prime the floor to prevent rust).

I got a few more air ride fittings and started hooking up/laying out my air lines, I have a few more on the way I forgot to get and it looks like I will need a few more tees and the like to get it all done, but I am getting there.

I need to hit it hard and heavy on getting the intake ready to be cast, the guy that is helping me cast it just had foot surgery so I am waiting for him to heal up right now, but as soon as he feels up to it I want to be ready.

So much still to do, I try not to think about it too much and just work on one thing at a time (as much as I can) I have bought a lot of wiring supplies but still have not started on that task. :roll:

See Ya,
Mike
Mike's build thread
viewtopic.php?f=9&t=13058
Image

User avatar
SASSY
Moderator
Posts: 5134
Joined: Sat Jan 07, 2006 12:32 am
Location: Wynndel, BC CANADA

Re: Lavron's '64 Build Thread

Post by SASSY »

Floor looks AWE!!some.
I hear ya on Things to do and getting bogged down thinking about them.
I like the way you focus on a section/area at a time while preparing for the next.
Keep up the great work!
Fred
I'd rather do it myself if it's done right or not,,,isn't that what hotrodding is all about

Image

Post Reply