Lavron's '64 Build Thread
Re: Lavron's '64 Build Thread
Them's big ole bump stops alright - should have NO problem getting the job done!! 
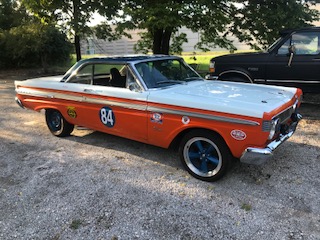
'cause Johno says you gotta have a sig pic! 
Re: Lavron's '64 Build Thread
I was thinking this morning that my Comet is an SUV in the back; it has an Explorer rear, Mitsubishi Montero shocks (I think that is an SUV), and giant 4X4 bump stopsRocket989 wrote:Them's big ole bump stops alright - should have NO problem getting the job done!!
See Ya,
Mike

Re: Lavron's '64 Build Thread
Looking at modifying to fit a '70 Mustang 22 gallon gas tank into the Comet, this is the tank dimensions I got off the web (maybe CJ Pony Parts).

I drew the size out on the floor of the trunk, it shouldn't take much to make it fit.

The outside mark is the flange and the inside one is the hole, I have to replace most of the left side floor anyway, and then center the tank.

I know I will have to modify the filler neck as well and not sure how I would do that yet but should not be too difficult.
I think I found the tank on eBay including the pickup for around $100 shipped.
See Ya,
Mike
I drew the size out on the floor of the trunk, it shouldn't take much to make it fit.
The outside mark is the flange and the inside one is the hole, I have to replace most of the left side floor anyway, and then center the tank.
I know I will have to modify the filler neck as well and not sure how I would do that yet but should not be too difficult.
I think I found the tank on eBay including the pickup for around $100 shipped.
See Ya,
Mike
Re: Lavron's '64 Build Thread
Notification that my rear shocks shipped today from Texas, should get them this week.
In the mean time, I moved forward, I took all this stuff off.

The only real bear was the right bump stop mount, for one thing they are hard to hold the wrench and use the ratchet simultaneously, I broke 3 or so bolts on that side and figured getting the left one off would take the rest of my time today, nope, the left side came right off, I think part of it was there was a lot of road tar or undercoating on the left side and it protected the threads of the bolts, once I scraped the tar away they unbolted easy.
The export braces were not too bad but if I was doing it again I would just cut them at each end and leave most of the upper ends on there, live and learn. I will probably be welding a piece of angle up there to mount some custom made bars.
End of the work time today I was left with cleaner engine bay (less cluttered).

I probably spend almost as much time sweeping dirt out as anything, maybe one day I won't have top do that constantly but I am trying to keep where I am working swept up and clean, I have mostly been putting my tools up every time as well.
Getting closer to cutting those shock towers out but next time I may tackle the steering column removal.
See Ya,
Mike
In the mean time, I moved forward, I took all this stuff off.
The only real bear was the right bump stop mount, for one thing they are hard to hold the wrench and use the ratchet simultaneously, I broke 3 or so bolts on that side and figured getting the left one off would take the rest of my time today, nope, the left side came right off, I think part of it was there was a lot of road tar or undercoating on the left side and it protected the threads of the bolts, once I scraped the tar away they unbolted easy.
The export braces were not too bad but if I was doing it again I would just cut them at each end and leave most of the upper ends on there, live and learn. I will probably be welding a piece of angle up there to mount some custom made bars.
End of the work time today I was left with cleaner engine bay (less cluttered).
I probably spend almost as much time sweeping dirt out as anything, maybe one day I won't have top do that constantly but I am trying to keep where I am working swept up and clean, I have mostly been putting my tools up every time as well.
Getting closer to cutting those shock towers out but next time I may tackle the steering column removal.
See Ya,
Mike

Re: Lavron's '64 Build Thread
MikeGetting closer to cutting those shock towers out but next time I may tackle the steering column removal.
See Ya,
Mike
Are you going to use an exhaust manifold or header? If header, are you buying one or making it yourself? If you are going to make it yourself, I would suggest building it after you cut the shock tower out but before you weld in your shock tower replacement panels. After I welded mine in, I was looking at it and thinking, boy that was silly, I could have made header fab a lot easier by waiting to weld the
new shock tower plates in.
Re: Lavron's '64 Build Thread
I have the header already, I am going to do a little modification on it howeverloman wrote:Are you going to use an exhaust manifold or header? If header, are you buying one or making it yourself?
After I get the front crossmember in I will probably mock up the engine and transmission and get all my mounts built and then see about getting the block out to the machine shop.
I really need to get down to my buddy's and borrow his plasma cutter, if he will let me keep it long enough I will do my floor patching and rebuild my torque boxes while I have it.
See Ya,
Mike
Re: Lavron's '64 Build Thread
Got the old steering box and column out today, not too bad a job.

Since I had the column out I dug out my Mustang column I bought several years ago, the Mustang column is longer that the Comet column.

But everything is the same except the slot for the dash mount.

I don't want my steering wheel closer to me so I decided I would mod the column because I could not see how to remove the shift linkage from the Comet Column and thought modding it would be faster.

I used an old piece of angle iron and scribed lines up from the original to match the location on the Comet column. I lined the two columns up and used a square to mark across the where the ends of the slot are and scribed lines. It is a 1/4" slot so I measured in 1/8" on each side and scribed the center line and end lines, center punched where the lines intersected an drilled pilot holes, my drill still walked a little but when I enlarged the holes up to 1/4" I used the step drill and tilted it a little to get them closer to where they needed to be, then I just used the cutoff wheel (mostly, I had to use the jigsaw to finish the cut because I needed a smaller wheel) and cut between the holes, I then used a flat file to clean around the edges of the slot.
It is not perfect but the bracket covers it anyway.
Final thing I did was sand the column down and put a coat of primer on it, it won't be complete until I cut the bottom off and add the shaft bering/adapter to convert it over to attach to the rack & pinion.

Rod & Custom had a kit to convert the column so I will probably get one of those on order.
See Ya,
Mike
Since I had the column out I dug out my Mustang column I bought several years ago, the Mustang column is longer that the Comet column.
But everything is the same except the slot for the dash mount.
I don't want my steering wheel closer to me so I decided I would mod the column because I could not see how to remove the shift linkage from the Comet Column and thought modding it would be faster.
I used an old piece of angle iron and scribed lines up from the original to match the location on the Comet column. I lined the two columns up and used a square to mark across the where the ends of the slot are and scribed lines. It is a 1/4" slot so I measured in 1/8" on each side and scribed the center line and end lines, center punched where the lines intersected an drilled pilot holes, my drill still walked a little but when I enlarged the holes up to 1/4" I used the step drill and tilted it a little to get them closer to where they needed to be, then I just used the cutoff wheel (mostly, I had to use the jigsaw to finish the cut because I needed a smaller wheel) and cut between the holes, I then used a flat file to clean around the edges of the slot.
It is not perfect but the bracket covers it anyway.
Final thing I did was sand the column down and put a coat of primer on it, it won't be complete until I cut the bottom off and add the shaft bering/adapter to convert it over to attach to the rack & pinion.
Rod & Custom had a kit to convert the column so I will probably get one of those on order.
See Ya,
Mike

Re: Lavron's '64 Build Thread
There is a guy on a truck page on FB that is making lower column bearings for older ford trucks. they are same size as old ford cars. it is a much better part than most that you'll find. I think it is $40 + shipping
his page
https://www.facebook.com/pg/DRB-Machine ... e_internal
.
his page
https://www.facebook.com/pg/DRB-Machine ... e_internal
.
- Attachments
-
- 29315193_149874012499294_8438077645574473385_n.jpg (69.77 KiB) Viewed 3088 times
-
- 29342338_149871419166220_5389555262211800284_n.jpg (59.14 KiB) Viewed 3089 times

Johno
Re: Lavron's '64 Build Thread
Those look pretty nice John, but I didn't see anything to convert the shaft over to 3/4"DD, Rod & Custom's kit includes the bearing and the shaft modification parts for $58poboyjo65 wrote:There is a guy on a truck page on FB that is making lower column bearings for older ford trucks. they are same size as old ford cars. it is a much better part than most that you'll find. I think it is $40 + shipping
his page
https://www.facebook.com/pg/DRB-Machine ... e_internal
https://rcmotorsportsinc.com/shop/p/25
I have to say thanks to Pop's son Dwayne for promoting R&C at Pigeon Forge to me this year, everyone here is a great resource for finding stuff.
BTW. just for future reference, does anyone know on the column dash bracket, does the alignment pin go up toward the steering wheel or down toward the floor, I did not pay attention when I took it off
See Ya,
Mike
Re: Lavron's '64 Build Thread
Up towards the column!! Those are fine looking bearing assemblies...something at some point will get me to create a FB account!! 
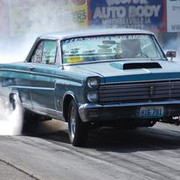
'cause Johno says you gotta have a sig pic!
Re: Lavron's '64 Build Thread
That looks like a well made bearing. I dont understand the rest of that kit. surely it doesn't use carter pins. Is this to to make the end of your shaft a DD shaft? my column shaft needed to a 3/4DD that for a rag joint . I milled it off with a grinder. it is already a 3/4'' shaft . what am I missing?lavron wrote: Those look pretty nice John, but I didn't see anything to convert the shaft over to 3/4"DD, Rod & Custom's kit includes the bearing and the shaft modification parts for $58
https://rcmotorsportsinc.com/shop/p/25
See Ya,
Mike
--------------------------------------------------------------------------------------------------------------------------------------------------------------------------------------------
Edit: Ok I found the instructions,the pins are just for back up,,, you're suppose to weld the coupling to both shafts. I would throw that part up on the shelf & just cut & mill your shaft like I did. after you get your length right,,, if you take your time with a grinder & mark the end with a sharpie & whittle it down to a perfect fit to the DD ujoint.
but the collar lock you will need.
Johno
Re: Lavron's '64 Build Thread
Yes I had thought about that doing it that way as well, I don't guess those bearings you originally posted came with any sort of locking collar?poboyjo65 wrote:I would throw that part up on the shelf & just cut & mill your shaft like I did. after you get your length right,,, if you take your time with a grinder & mark the end with a sharpie & whittle it down to a perfect fit to the DD ujoint.
See Ya,
Mike
Re: Lavron's '64 Build Thread
No just the bearing. I used the bearing & lock collar from a 77 ford truck with 3 on the tree column. I had to surgically remove it. in my hatred for drilling out spot welds that I developed, I learned to cut around them if the piece was a donor using a cutoff wheel,then grind them down. that way it didnt leave a hole in the part I wanted to save.
Btw, from what I gather it is best to get the u joint as close to the firewall as possible. since it is such a sharp angle down to the rack, this helps reduce the angle.
Btw, from what I gather it is best to get the u joint as close to the firewall as possible. since it is such a sharp angle down to the rack, this helps reduce the angle.
Johno
Re: Lavron's '64 Build Thread
Probably get the R&C bearing and try what you suggest of just grinding my own DD on the end, if I screw up I can go back and cut the shaft off and use their adapter.poboyjo65 wrote:No just the bearing. I used the bearing & lock collar from a 77 ford truck with 3 on the tree column. I had to surgically remove it. in my hatred for drilling out spot welds that I developed, I learned to cut around them if the piece was a donor using a cutoff wheel,then grind them down. that way it didnt leave a hole in the part I wanted to save.
Btw, from what I gather it is best to get the u joint as close to the firewall as possible. since it is such a sharp angle down to the rack, this helps reduce the angle.
I will put the column housing back in there and cut it nearer the firewall (being as it is really long anyway) that will help me determine how long to cut the steering shaft.
I guess I will see if I can find a GM wire plug (and a wiring diagram) to use on the end the wires since most wire harnesses come with that plug on them
See Ya,
Mike
Re: Lavron's '64 Build Thread
I would go ahead & get the u joint so you can use it to test fit as you grind. I got the very end to fit first then whittled my way back until it would go all the way in. that way you won't get it too small. yea mock up is the best way to measure, you can't hardly go wrong that way.
Johno