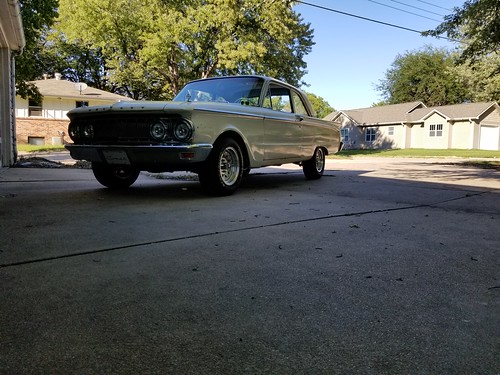
Lavron's '64 Build Thread

The Era of The Square Body Racing Comets
lavron
Site Admin
Posts: 4710
Joined: Sat Nov 01, 2003 9:17 am
Location: Missouri, Ozarks
Contact:

Re: Lavron's '64 Build Thread

Post by lavron »

Went ahead a dove in a little farther on repairing the right torque box. I cut out most of the rusty stuff and started cutting up the Mustang torque box, it won't end up fully factory appearing but I guess that won't matter much not trying to win any concourse titles :roll:

The bad thing is there was a rusty hole in the side of the subframe that was worse than I thought, so I went ahead and cut it out and made a patch.

Image

Need to get the frame cleaned up so I can weld it in. The radius on the patch is not quite as round as the frame but I think it will work out ok, I made the patch from another piece of scrap from the shed framing It is almost the same thickness as the frame if not exactly the same. I may not fully weld the bottom right now because the car is pretty close to the floor currently, I think I can do the side welds fine.

See Ya,
Mike
Mike's build thread
viewtopic.php?f=9&t=13058
Image

lavron
Site Admin
Posts: 4710
Joined: Sat Nov 01, 2003 9:17 am
Location: Missouri, Ozarks
Contact:

Re: Lavron's '64 Build Thread

Post by lavron »

Got my refund back for the aluminum driveshaft, found another on eBAY for $10 more (free shipping as well) off of a 34,000 mile Crown Vic Police Car, looks like it was in a little accident in the picture.

Image

The other I had ordered was from a 130,000, or so, mile car so maybe this one will be better, it does have the yokes, still not sure the AOD yoke fits the T5 I have been reading and some say yes, some no, some say it will fit but the splines are not deep enough or the splines are embedded up the shaft so far there is very little engagement. Understand some of this was also talking about replacing a steel driveshaft in a Panther body and I guess the police trans had a longer tail shaft. I guess I am saying I have not found a definitive answer on the web.

I will also have to figure out what size the bolts are on the 8.8 rear, I didn't get any with it when I bought it because someone had already removed the driveshaft.

See Ya,
Mike
Mike's build thread
viewtopic.php?f=9&t=13058
Image

lavron
Site Admin
Posts: 4710
Joined: Sat Nov 01, 2003 9:17 am
Location: Missouri, Ozarks
Contact:

Re: Lavron's '64 Build Thread

Post by lavron »

Got the patch welded in the subframe and started building the torque box.
Image

I just ended up building my own torque box parts so far, the Mustang box is just too different. I used shed framing scraps again.
Image

I have some cutting to do on the old box and adding tabs to the new one. I know the old box looks bad but it is solid metal, I guess because it is heavier gauge metal than other parts.

Of course the toe board covers all of this up.

See Ya,
Mike
Mike's build thread
viewtopic.php?f=9&t=13058
Image

Lip Ripper
Posts: 1870
Joined: Wed Jun 06, 2012 6:47 am
Location: Lake Placid, Florida

Re: Lavron's '64 Build Thread

Post by Lip Ripper »

Your making gains. Keep on chuggin.

Have you ever seen one of those Crown Vicky sub frames mounted under a 60's Ford truck? It is unbelievable how they mate, and the sway bar is huge. A buddy here did it to a 65 then slapped a Paxton on top.
66 Cyclone GT; 245/60R15's on 15x8's and 215/70R15's on 15x7 Magnum's.
There's nothing like the sound of a pushrod V8 singing at the top of her lung's.

lavron
Site Admin
Posts: 4710
Joined: Sat Nov 01, 2003 9:17 am
Location: Missouri, Ozarks
Contact:

Re: Lavron's '64 Build Thread

Post by lavron »

Lip Ripper wrote:Your making gains. Keep on chuggin.

Have you ever seen one of those Crown Vicky sub frames mounted under a 60's Ford truck? It is unbelievable how they mate, and the sway bar is huge. A buddy here did it to a 65 then slapped a Paxton on top.
Thanks.

Yes I have seen folks take old police cars and put them under pickups, I am surprised at how well they fit, if I had a lot of money and time I would do it :roll:

See Ya,
Mike
Mike's build thread
viewtopic.php?f=9&t=13058
Image

User avatar
SASSY
Moderator
Posts: 5146
Joined: Sat Jan 07, 2006 12:32 am
Location: Wynndel, BC CANADA

Re: Lavron's '64 Build Thread

Post by SASSY »

lavron wrote:
Lip Ripper wrote:Your making gains. Keep on chuggin.

Have you ever seen one of those Crown Vicky sub frames mounted under a 60's Ford truck? It is unbelievable how they mate, and the sway bar is huge. A buddy here did it to a 65 then slapped a Paxton on top.
Thanks.

Yes I have seen folks take old police cars and put them under pickups, I am surprised at how well they fit, if I had a lot of money and time I would do it :roll:

See Ya,
Mike
Friends of mine are doing just that but the whole frame shortened under a 57 short box Ford pickup. Its been in the family for 3 generations and has always been called,,,, Fred 8)
I'd rather do it myself if it's done right or not,,,isn't that what hotrodding is all about

Image

62Cometman
Posts: 80
Joined: Tue Oct 03, 2017 4:47 pm

Re: Lavron's '64 Build Thread

Post by 62Cometman »

Original Ford based T5 transmissions do use the same slip yoke as the C-4, AOD, T-10 standard 28 spline, however the later model crown vics used the 4R70W transmission which while being 28 spline is a larger diameter.
62 Comet 170, dagneham trans, 2.8 7.25 rear 260 T5 8 inch swap planned for the future.

Image

lavron
Site Admin
Posts: 4710
Joined: Sat Nov 01, 2003 9:17 am
Location: Missouri, Ozarks
Contact:

Re: Lavron's '64 Build Thread

Post by lavron »

62Cometman wrote:Original Ford based T5 transmissions do use the same slip yoke as the C-4, AOD, T-10 standard 28 spline, however the later model crown vics used the 4R70W transmission which while being 28 spline is a larger diameter.
Thanks for that, so I guess you are saying I will need to run down a yoke?

I got the top of the torque box finished, welded in and some cold galvanizing sprayed on it, not real pretty but then again no one can see it :roll: As you can see I got toe board patch trimmed out and temporarily screwed down.

Image

I would have liked to have flanged the upper edge but there was no way to do that and get it under the floorpan. Also I trimmed it a bit narrow on the outside edge but the original had a pretty wide gap there, I guess seam sealer will have to finish it out (like they did at the factory) I will get the patch back out of there, punch a bunch of holes around the edge and on the floor edge, clean up the old seam sealer and paint and weld it in next. I still have the bottom of the torque box to make but I can go ahead and get the floor finished so I can put my air ride controller back in and raise the car back up so I can get under there comfortably again (I took the controller out because I was afraid of damaging an air line)

See Ya,
Mike
Mike's build thread
viewtopic.php?f=9&t=13058
Image

62Cometman
Posts: 80
Joined: Tue Oct 03, 2017 4:47 pm

Re: Lavron's '64 Build Thread

Post by 62Cometman »

More than likely yes but id wait and see what arrives first cause ive been proven wrong before, the car is looking great BTW i gotta get going on my own project and get the floors fixed even though i went through all the hassle to fix the carpet and insulation this summer. :roll:
62 Comet 170, dagneham trans, 2.8 7.25 rear 260 T5 8 inch swap planned for the future.

Image

lavron
Site Admin
Posts: 4710
Joined: Sat Nov 01, 2003 9:17 am
Location: Missouri, Ozarks
Contact:

Re: Lavron's '64 Build Thread

Post by lavron »

62Cometman wrote:More than likely yes but id wait and see what arrives first cause ive been proven wrong before, the car is looking great BTW i gotta get going on my own project and get the floors fixed even though i went through all the hassle to fix the carpet and insulation this summer. :roll:
Thanks, I should have it by next week so I am in no hurry to buy other stuff I won't use, I assume the yoke from the top loader 3 speed is different but I would think the C4/AOD yoke should be an easy find in the junk yard.

I got my front floors pretty much finished today, I still need to do some sealing mostly on the drivers side, I am hoping the rear floor pans are ok, I may move all the stuff out of the car and get back there and clean them top and see if there are any issues.

Here is the front passenger welded, sealed and a quick shot of primer to keep away the rust until I can get the whole floor painted with POR15.
Image

I recently bought one of those oscillating saw/scraper/sanders and it worked really well at scraping the old seam sealer off, a lot faster that using a flat chisel and a hammer in some cases.

Next, before I finish the bottom of the torque box, I think I will make a permanent mount for the air ride controller box, eventually I am going to build a console, so I will take that into consideration when designing the mounting location.

On the thought of the bottom of the torque box I need to look around for a piece of metal big enough I do have the gas tank skid plate off of the Jeep but it is at least 1/8" steel, however it is rounded already so I wouldn't have to bend it if the angles are right, making it heavier don't bother me. I was wondering about drilling some drain holes in the bottom when I build it as well, I think one thing that might have kept the drivers side from rusting out was the hatch on the bottom allowing the water out?

See Ya,
Mike
Mike's build thread
viewtopic.php?f=9&t=13058
Image

lavron
Site Admin
Posts: 4710
Joined: Sat Nov 01, 2003 9:17 am
Location: Missouri, Ozarks
Contact:

Re: Lavron's '64 Build Thread

Post by lavron »

It is that time again, here is my summary for the 6th month and what I have gotten done so far;
June 15th - July 15th; Pushed into the shed, removed all the drivetrain (front and rear suspension, engine, transmission, exhaust) started installing rear 4-link.

July 15th - August 15th; Finished the rear 4-link install (98%) and started on front M2 install.

August 15th - Sept 15th; All suspension components installed, steering installed, airbags installed at least to test.

September 15th - October 15th; Got both the master cylinders mounted, the pedals and firewall mount cleaned up, wiring harness completely stripped out, cleaned up the firewall and painted, mocked up the engine and transmission and built the mounts for both, mocked up my front seats, front brake calipers installed.

October 15th - November 15th; Ran all my brake lines, finished steering wheel, built the air ride control box and tested the air ride, repaired drivers torque box, toe board and floorboard, started repairing the passenger side floorboard.
CURRENT: November 15th - December 15th; A bit slower month with other things gaining priorities but I did get some done. Installed the cable accelerator pedal and mount. welded the old accelerator rod hole up in the firewall. Built the top of the right torque box and finished the patches on the right floorpan finishing up the floor repairs in the front of the car. I have been doing other stuff and collecting parts up, mostly electrical components (will post up my plans on that sometime and what I have gotten in) I did order an aluminum driveshaft.

Pretty much my goals for next month is to get that torque box finished, at least tacked in, build a mount for the air ride controller and reinstall it. I will probably put the motor and trans back in after the driveshaft gets here so I can see if it will fit or will need modded plus I want to build the box on the trans hump for the shifter and see if I will have to mod the tunnel in the rear for driveshaft clearance.

Hopefully I can get a little accomplished this next month, I have to do some repair work on the kitchen floor and finish the upstairs bookcase so that will steal a little time :roll:

I will keep chipping away at it.

See Ya,
Mike
Mike's build thread
viewtopic.php?f=9&t=13058
Image

User avatar
loman
Posts: 1301
Joined: Sat Dec 28, 2013 9:03 am
Location: Missouri

Re: Lavron's '64 Build Thread

Post by loman »

I know you have other things you have to do during the 2019 Gathering, but at the rate your going I predict this car will drive itself to the 2020 Gathering. Keep up the work. Keep on chuggin along.
Image

lavron
Site Admin
Posts: 4710
Joined: Sat Nov 01, 2003 9:17 am
Location: Missouri, Ozarks
Contact:

Re: Lavron's '64 Build Thread

Post by lavron »

loman wrote:at the rate your going I predict this car will drive itself to the 2020 Gathering
Certainly a goal I should be able to make with an additional year, might have time to get some paint on it :P

See Ya,
Mike
Mike's build thread
viewtopic.php?f=9&t=13058
Image

lavron
Site Admin
Posts: 4710
Joined: Sat Nov 01, 2003 9:17 am
Location: Missouri, Ozarks
Contact:

Re: Lavron's '64 Build Thread

Post by lavron »

I got a package from CA today, I wonder what it could be?
Image

A couple of things I discovered positively; The yoke from the late model Crown vic does not fit the T5, it is too big around like 62Cometman said, and the splines are way in there. Secondly it is shorter than my original driveshaft, I am not saying this will help any because I am not sure how far back the trans is compared to the original.
Image

You notice it is also fatter and prettier than the original :roll: :P One other thing, the yoke from the 3 speed top loader fits in the T5 but would require an offset U-Joint to fit the CV driveshaft, don't really want to do that so I think I will find a replacement yoke. I am thinking of not even replacing the U-Joints they look ok and if the car actually had 34,000 miles on it I would think they should be ok? Not a big expense if you guys think I should go ahead and change them, just think sometimes you are better off with the factory original than rolling the dice with an aftermarket part.

See Ya,
Mike
Mike's build thread
viewtopic.php?f=9&t=13058
Image

redhotcomet
Posts: 349
Joined: Mon Jan 27, 2014 2:22 pm
Location: Saskatchewan, Canada

Re: Lavron's '64 Build Thread

Post by redhotcomet »

I used a conversion u-joint on the aluminum DS with a yoke that fit the T5. Like yours, my crown vic yoke did not fit. I think I have an extra set of bolts for the rear flange, if you need them, PM me.
1964 Caliente hardtop, 302/T5/8.8"

Image

Post Reply