Tomb's 65 Comet Build
-
caseville cyclone
- Posts: 503
- Joined: Sat Dec 28, 2013 12:10 pm
- Location: Caseville, Michigan

Re: Tomb's 65 Comet Build
Thanks Andy. I hope they last. I did put extra epoxy on the inside to strengthen them.
Tom
Tom
tomb's 65
Re: Tomb's 65 Comet Build
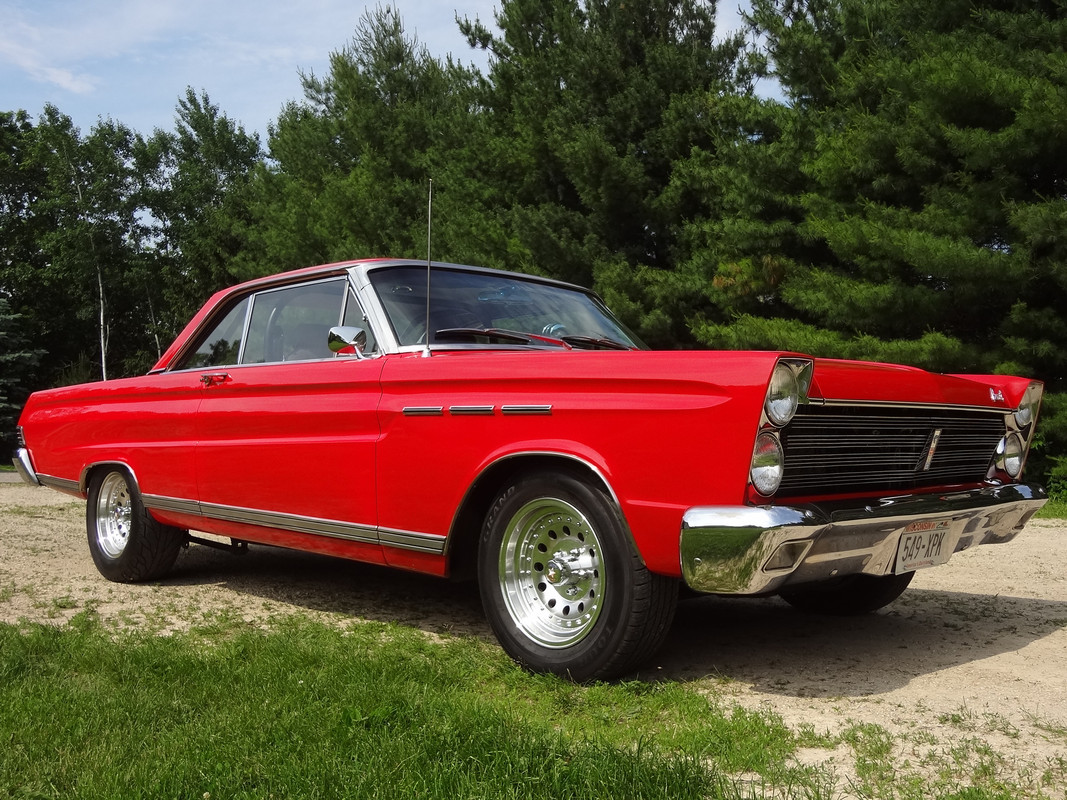
Here's the finished product. Tried to keep it original looking.
Thanks for looking
Tom
Thanks for looking
Tom
Last edited by tomb22 on Wed Apr 25, 2018 9:47 pm, edited 1 time in total.
tomb's 65

-
Jims65cyclone

- Posts: 2764
- Joined: Sun Nov 23, 2014 10:29 pm
- Location: Lexington, SC

Re: Tomb's 65 Comet Build
Thanks POP and Jim. I hope the rest of the dash looks as good.
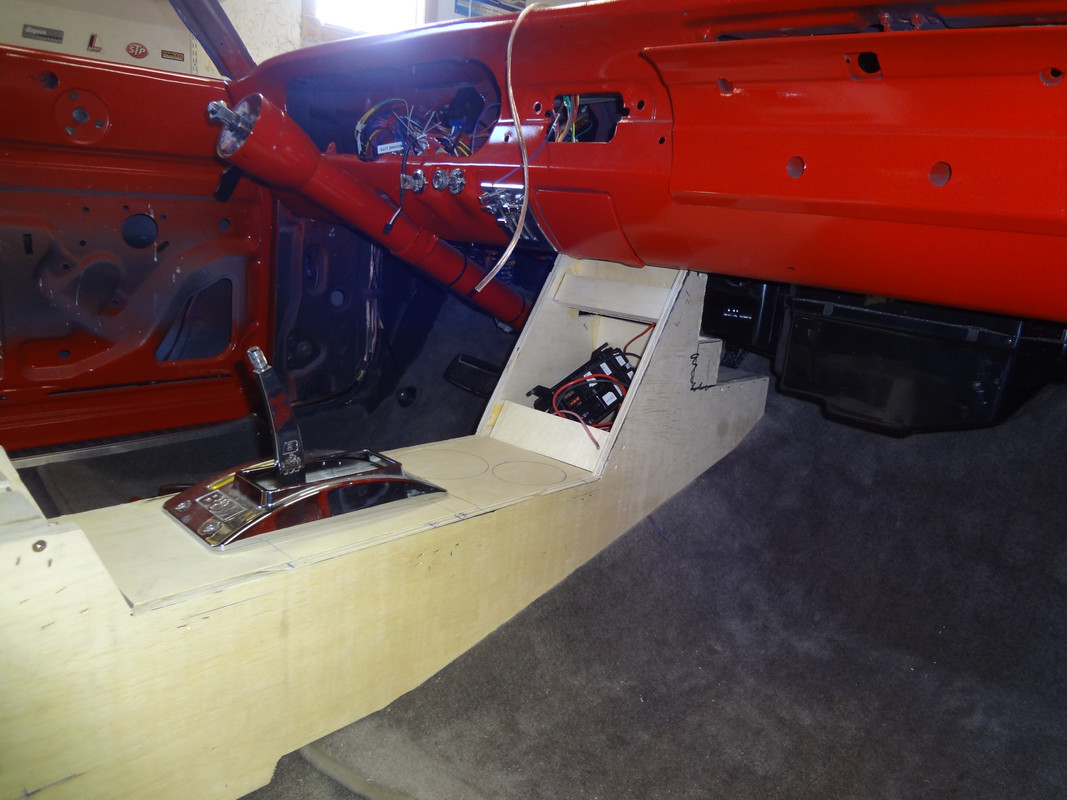
After seeing Stacey's counsel I got inspired to make my own also. I was looking all over the internet for counsels and came up with zilch. So I got cardboard like Stacey and put something together. Here is the final wood product that needs to be covered with vinyl.
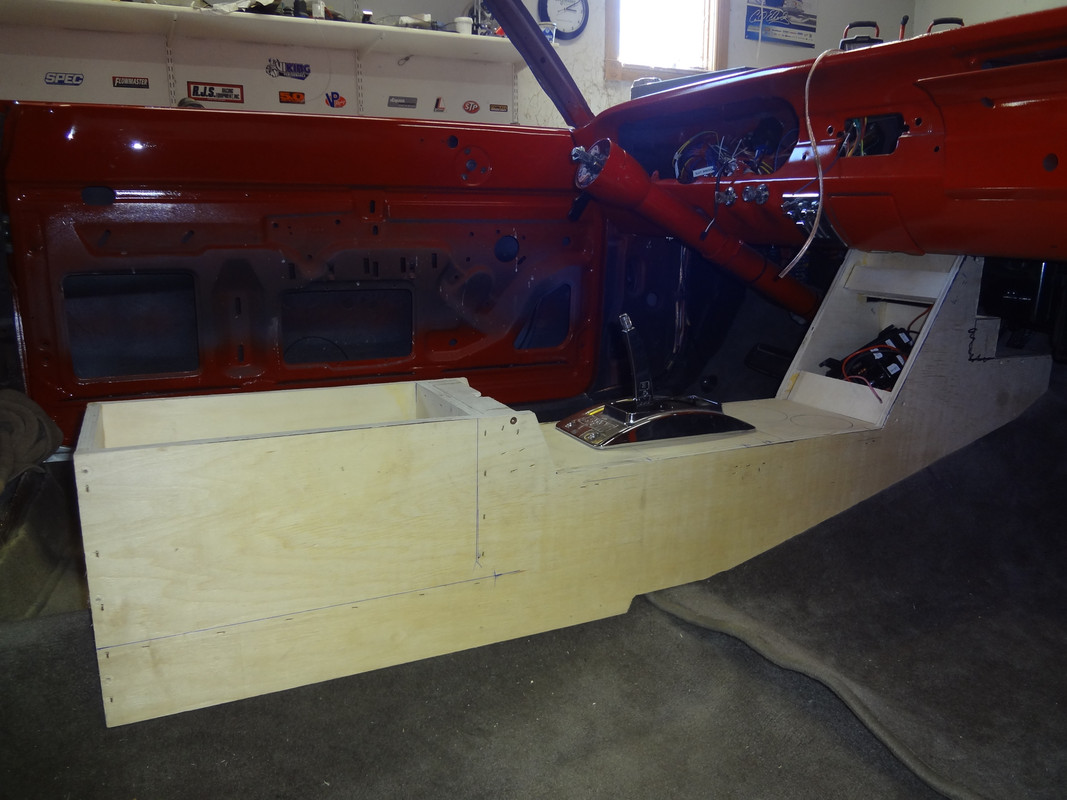
Here is another picture and you can see a relay box that will be hidden behind the counsel. The relay box controls the remote entery, overdrive delete, and the security system.
Thanks for looking
Tom
After seeing Stacey's counsel I got inspired to make my own also. I was looking all over the internet for counsels and came up with zilch. So I got cardboard like Stacey and put something together. Here is the final wood product that needs to be covered with vinyl.
Here is another picture and you can see a relay box that will be hidden behind the counsel. The relay box controls the remote entery, overdrive delete, and the security system.
Thanks for looking
Tom
Last edited by tomb22 on Wed Apr 25, 2018 9:50 pm, edited 2 times in total.
tomb's 65

Re: Tomb's 65 Comet Build
console looks great Tom! just like the rest of your build - top notch! I think the light at the end of that long tunnel is visible now ,,,right?  I know that feels good.

Johno
-
Jims65cyclone
- Posts: 2764
- Joined: Sun Nov 23, 2014 10:29 pm
- Location: Lexington, SC
Re: Tomb's 65 Comet Build
Thanks again guys. I would like to drive it by June but I'm not going to rush it.
Tom
Tom
tomb's 65
-
Kingspeedy2
- Posts: 272
- Joined: Tue Mar 31, 2015 2:36 pm
Re: Tomb's 65 Comet Build
bravo ! Nice Job on the gauges and the console .We must be telpathically connected.
As first we have the same thoughts on gauges and now the console .Your way ahead I just got my rear end together (literally) .and hope to have the car done for June but of 2023 in time for my 55 bday. Did you use speed hut gauges by chance? I am so looking forward to seeing your console done. My car is all resto mod so I was going to try something similar ,I was thinking of squeezing In a double din deck that has a 7 inch screen slide out for navigation and perhaps Back up camera. or just double din with Display. That will get the ire up of the Purists .. great thread keep up the fantastic work
As first we have the same thoughts on gauges and now the console .Your way ahead I just got my rear end together (literally) .and hope to have the car done for June but of 2023 in time for my 55 bday. Did you use speed hut gauges by chance? I am so looking forward to seeing your console done. My car is all resto mod so I was going to try something similar ,I was thinking of squeezing In a double din deck that has a 7 inch screen slide out for navigation and perhaps Back up camera. or just double din with Display. That will get the ire up of the Purists .. great thread keep up the fantastic work
Re: Tomb's 65 Comet Build
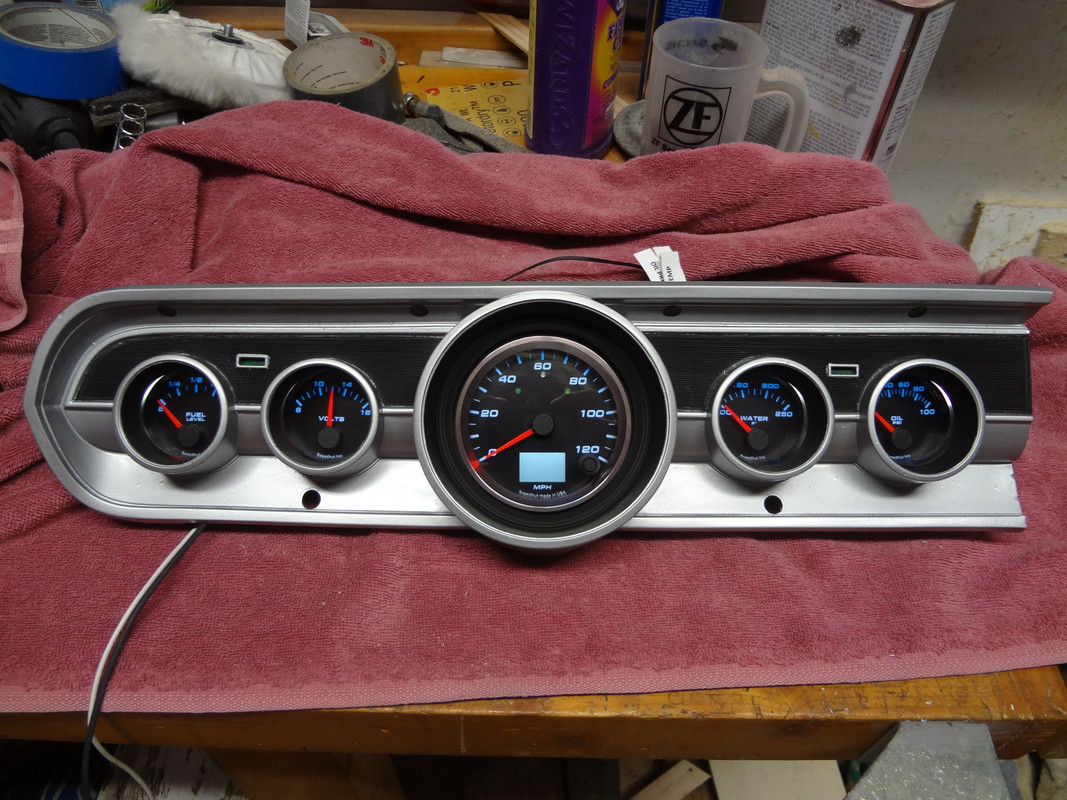
Thanks Kingspeedy. I wish I was some wares near 55.
The gauges are speedhut's. I liked the fact you can pretty much design the way you want them. The fuel gauge and speedometer are programmable to your car which makes it nice to calibrate. My cruise control picks up a signal from the speedometer for knowing how fast I'm going. Cain't wait to see if it all works. A navigation system would be nice along with rear camera. I pretty much used up all the space under the dash in the counsel for other things. I will be putting in a USB charger, a USB input and aux input for the radio on the front cover.
Tom
tomb's 65
Re: Tomb's 65 Comet Build
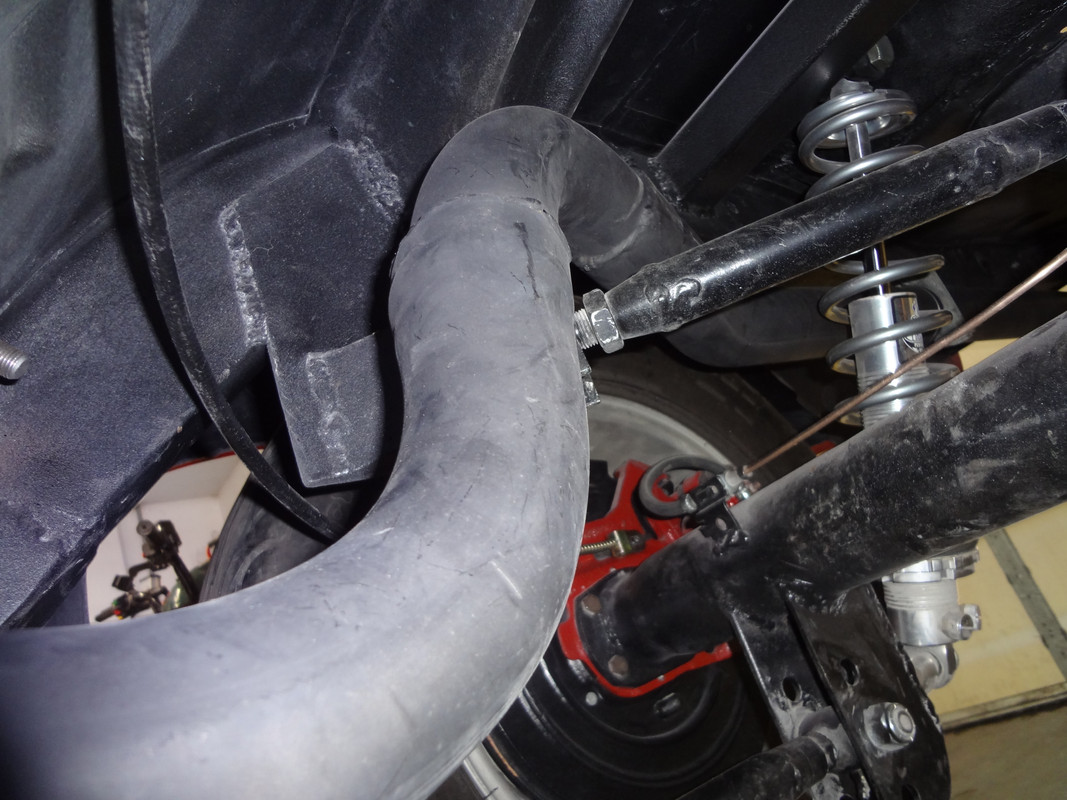
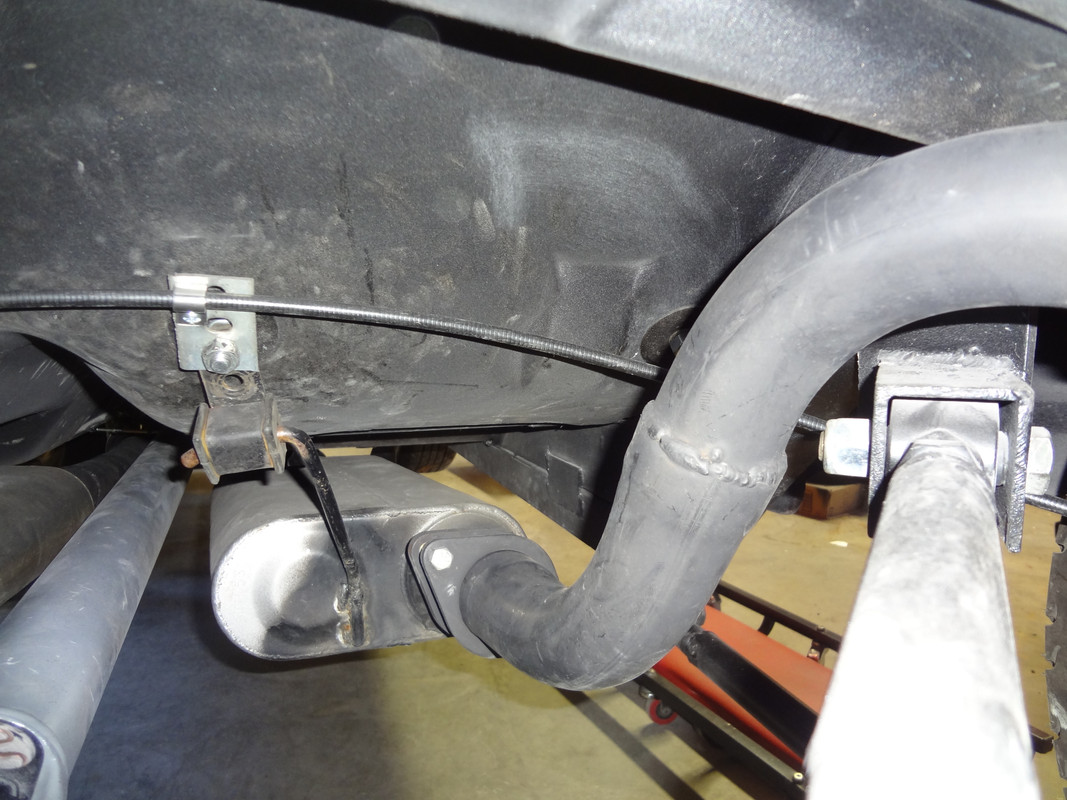
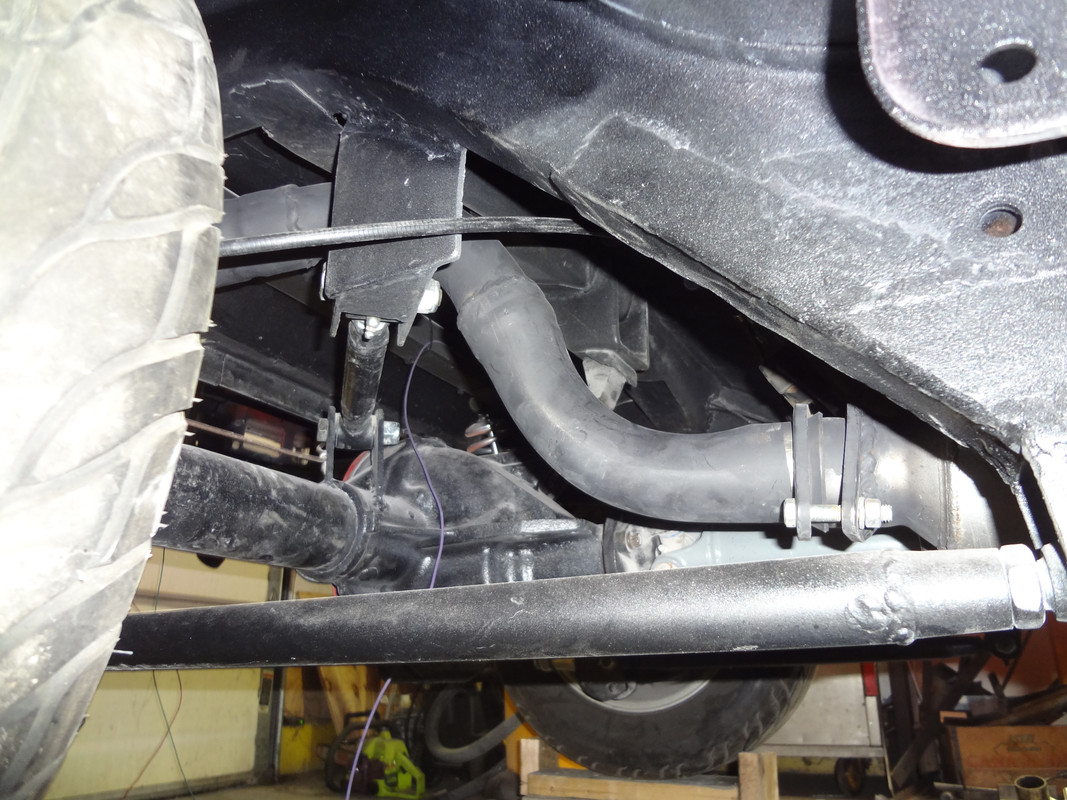
It's been a while sense I've posted anything, so here is an update. I welded up a new exhaust system using the old pipes which where only two years old. Used a lot of couplings; had to move the H pipe back and the mufflers forward. Rerouted the pipes around the quad link and got everything up out of site as best I could. Installed custom emergency cables and got them hooked up to the original mechanism on the transmission mount.
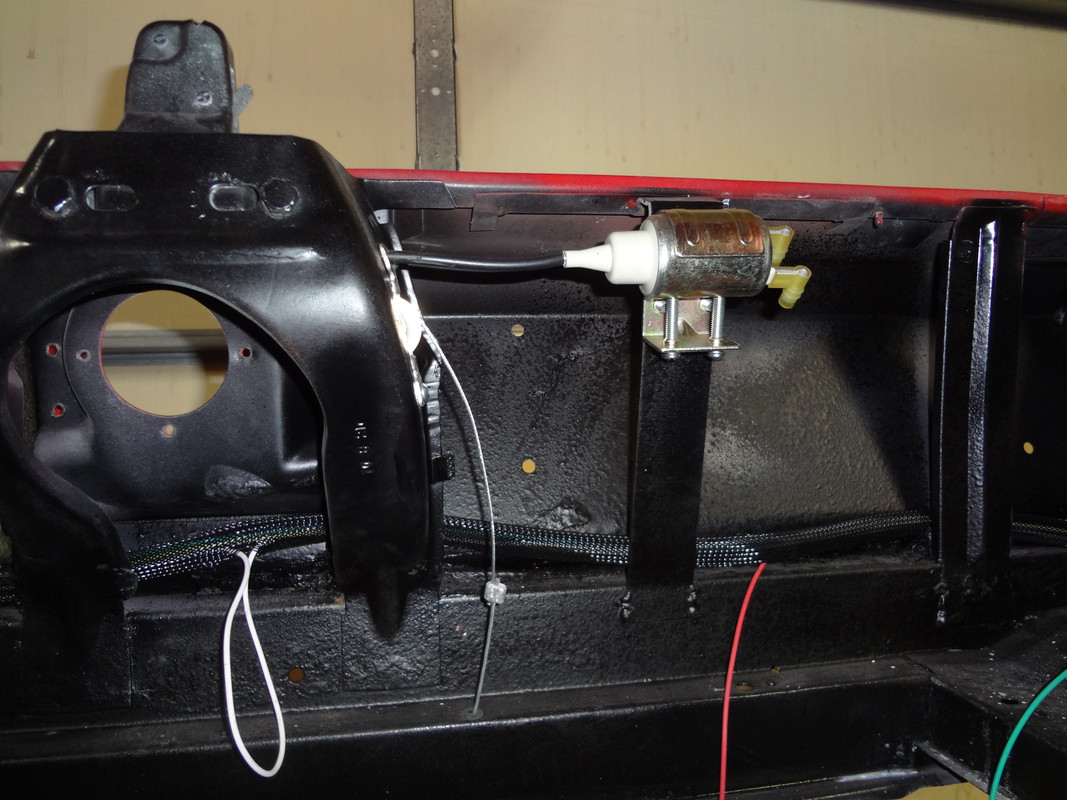
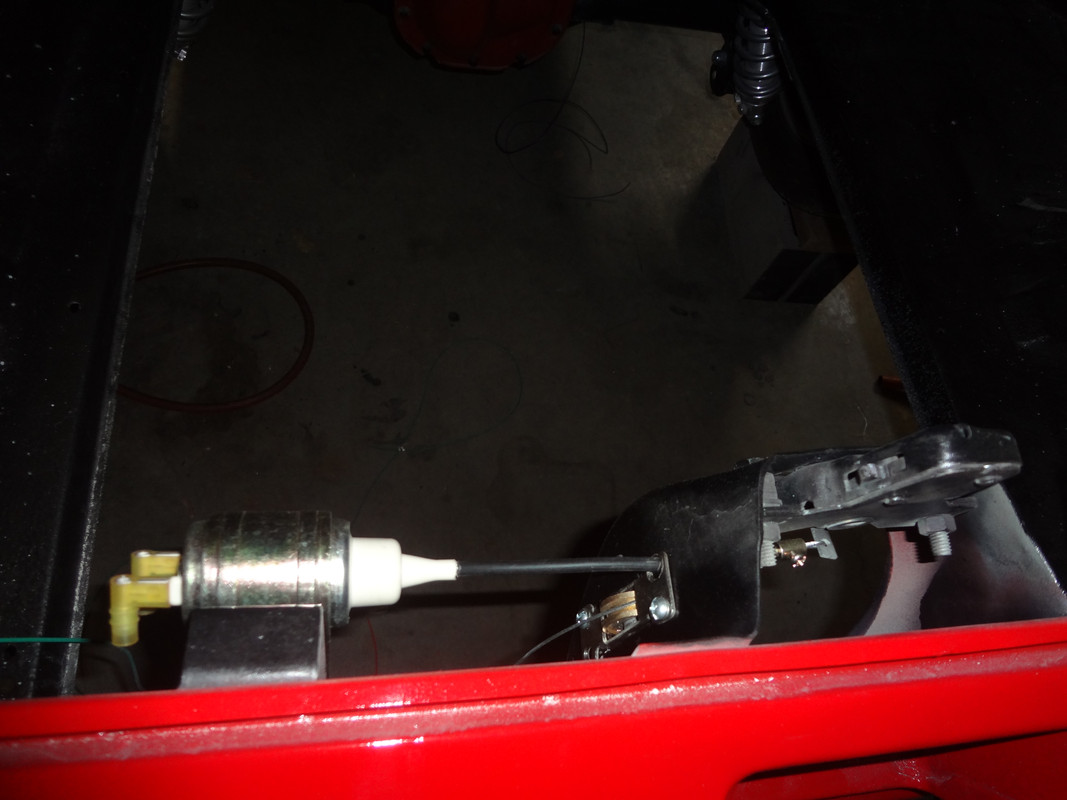
I installed new transmission cooling lines and did a little wiring for the trunk release. Exchanged places of the catch and locking mechanism so I could install a solenoid to open the trunk and a safety cable encase the battery goes dead in the trunk. Here are a couple pictures that shows this.
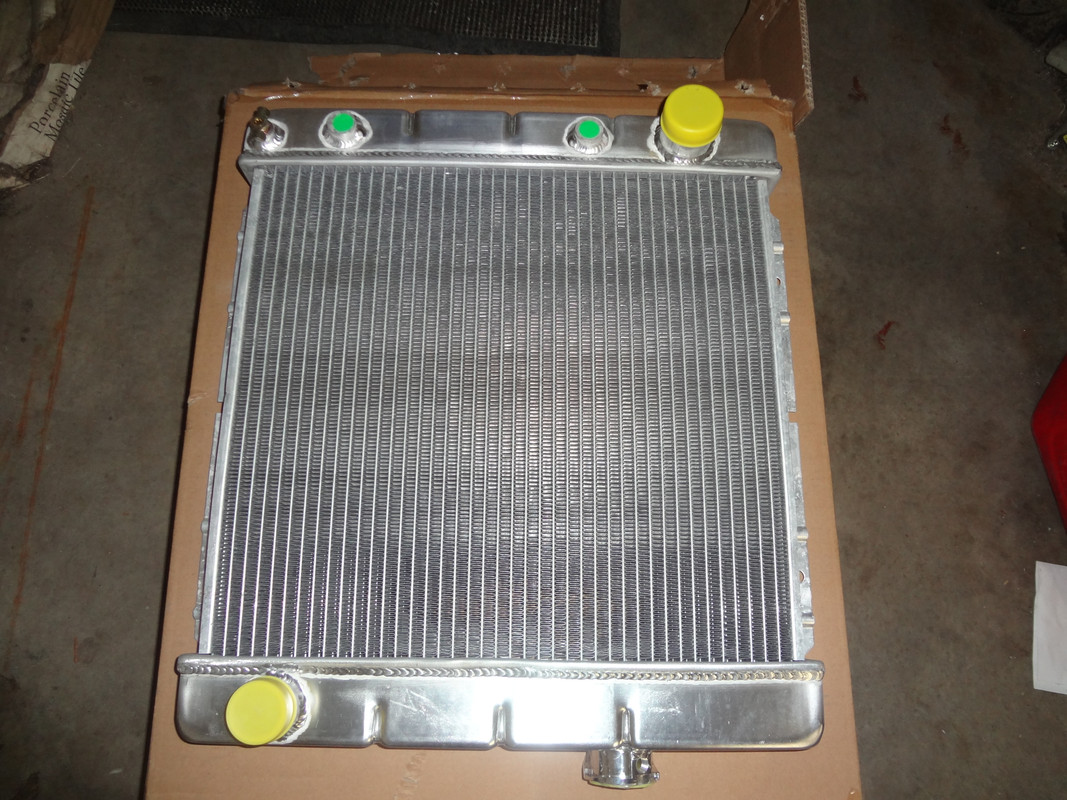
After a little debate with myself I decided to get a new radiator with the outlet on the drivers side. I had gotten a hose to work with the old radiator but it was lying on the anti roll bar and about 1/2" away from the harmonic balancer. Here's the new radiator.
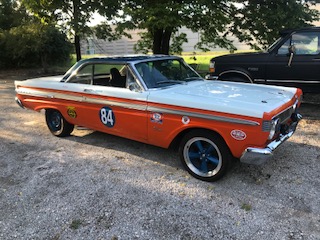
I'm getting closer.
Thanks for looking
Tom
I installed new transmission cooling lines and did a little wiring for the trunk release. Exchanged places of the catch and locking mechanism so I could install a solenoid to open the trunk and a safety cable encase the battery goes dead in the trunk. Here are a couple pictures that shows this.
After a little debate with myself I decided to get a new radiator with the outlet on the drivers side. I had gotten a hose to work with the old radiator but it was lying on the anti roll bar and about 1/2" away from the harmonic balancer. Here's the new radiator.
I'm getting closer.
Thanks for looking
Tom
tomb's 65
Re: Tomb's 65 Comet Build
Right-on Tom - keep whupping it!!! Got any pics of the exhaust??
'cause Johno says you gotta have a sig pic! 
-
Jims65cyclone
- Posts: 2764
- Joined: Sun Nov 23, 2014 10:29 pm
- Location: Lexington, SC
Re: Tomb's 65 Comet Build
Here are some pictures of the exhaust Rocket Man. I ended up being right under the frame rail above the axle then the frame offsets out so the pipes end up inside of the frame towards the back and then I turned them down in front of the bumperRocket989 wrote:Right-on Tom - keep whupping it!!! Got any pics of the exhaust??
If you need more, let me know
tomb's 65