caseville cyclone wrote:Looking good Tom, a very neat installation,everything looks like it belongs there. This summer when I roll my windows down,I'll think of your A/C installation. Andy
Thanks Andy I'll want the windows down more than A/C but I'm planing on using this car for an every day driver/cruiser and we get some very hot moggy days here in Wisconsin
Tom
IMO you definitely want to run a PCV valve. In a valve cover it won’t cause any kind of lean condition. Just breathers on a street driven motor won’t be fun at all. Before the PCV, the road draft tube setup was used. While only efficient at speed, it at least created some vacuum but was a dirty turd. Positively venting the crankcase is a good thing!
The hole is easy to drill but it needs to be baffled. On aluminum VC’s like the later EFI ones your running...you’ll need to add it via rivets or TIG/MIG+ spool gun.
Thanks Rocket for mentioning the crankcase ventilation issue. I did some research today and I'm thinking of buying old school valve covers with a baffled opening for the PCV valve and a baffled breather cap and hook it up like they used too. Run the PCV into the manifold then.
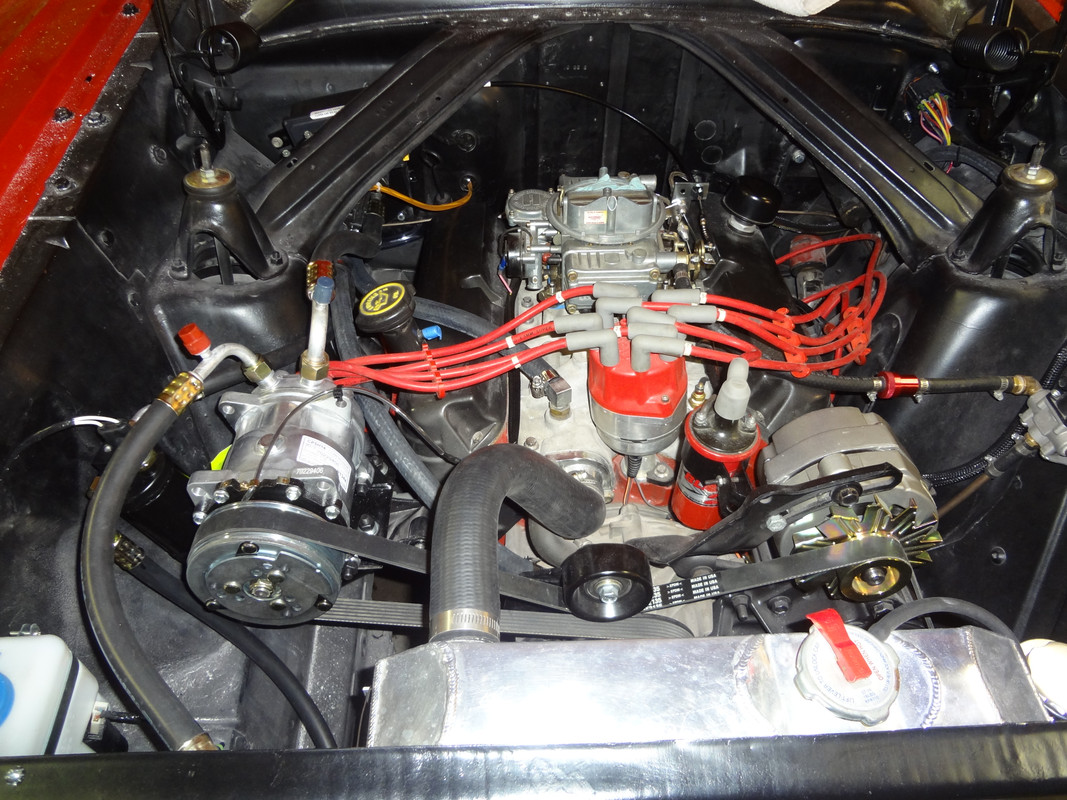
Good deal Tom! That Holley looks like an 1850 variant...it likely has a convenient PCV vacuum port on the pass side.
I have a pair of ‘93 Cobra stamped steel valve covers I almost used on the 289, but I would’ve needed to add the hole & baffle it. After trying the Comet covers on though, they’re staying in a box!
Tom the car is coming together nicely. I like the way your compressor sits on the pass side for the shortest & neatest route possible for the hoses for that ac unit. One thing I would do different is get a longer heater hose to intake port,kinda got the V.cover trapped like it is,I'd loop it up around the front of the v.cover. you already have the p.wires like I like them ,,,up around the front out of the way of the v.covers.
All looks neat & well thought out.
Did you get pre made ac hoses or cut to fit?
the push in polished aluminum oil caps I used from billet specialties have a hose port & pcv valve hidden inside. I take out one pcv valve out of one oil cap run that side to my carb breather. the other side leave the valve in & run it to the manifold.
Last edited by poboyjo65 on Mon Sep 10, 2018 2:09 pm, edited 1 time in total.
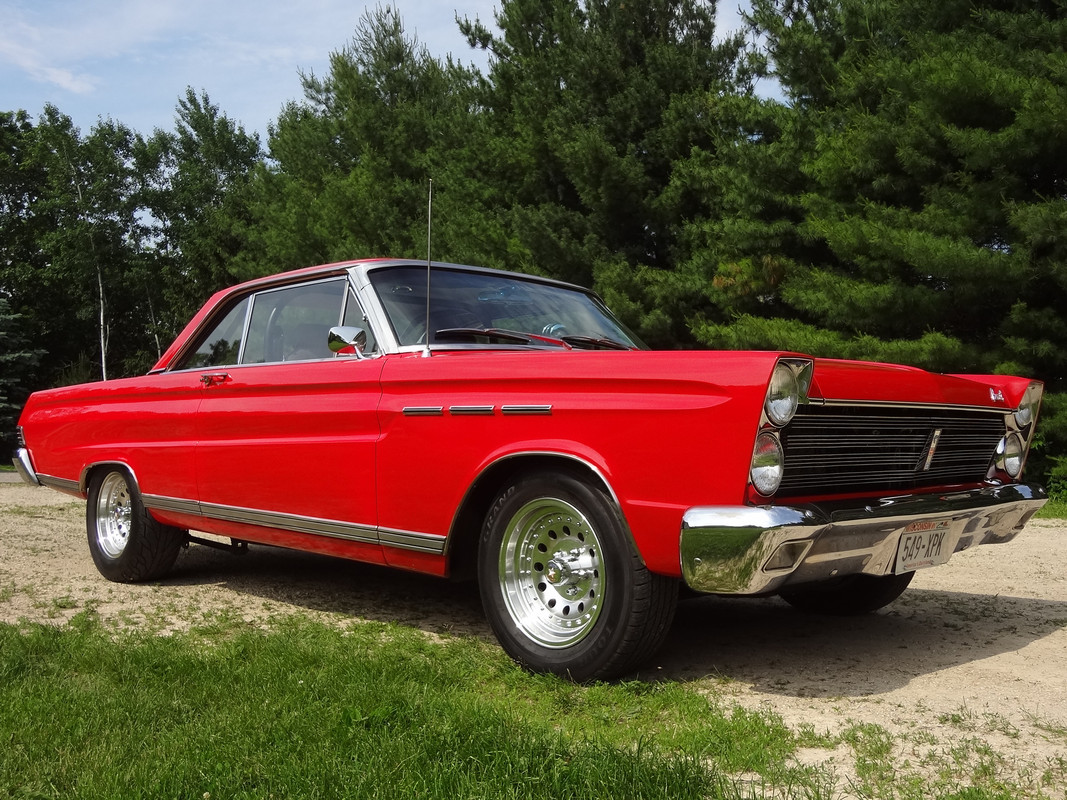
tomb22 wrote:Have all the wires in place and I bought the Classic-auto Air kit for a 65 Mustang with custom plumbing hoses and fittings.
Tom...Did you have in significant fit-up problems or modifications with the A/C kit being for a 65 Mustang, and were your custom plumbing hoses and fittings fabbed by a local shop based on your routing and dimensions you gave them, or did you buy pre-fabbed hoses that came closest to what you needed?
Jim
Thanks Guys. I told Classic-auto air what I was doing and they sent a custom hose kit. A lot of hose and a bunch of fittings. I made up the hoses the way I wanted them and then took them to my auto parts store to be crimped. Worked out real slick. This unit fits perfect under the dash, uses the stock openings in the firewall and the existing controls are changed to electronic controls but look the same, no cables. I had to drill one hole in the firewall for a condensate tube. Most older ford motors are set up for the compressor to be on the drivers side but I found a 1987 Grand Marque with the AC compressor on the passenger side and bought all the brackets off that motor. I had to build an adapter to mount this compressor to that bracket though. So far I'm impressed with the kit and they have been very friendly and helpful. They said that a lot of Australians are using their kits and they all want to put the compressor on the passenger side.
Thanks for the idea on the heater hose and the oil caps Johno
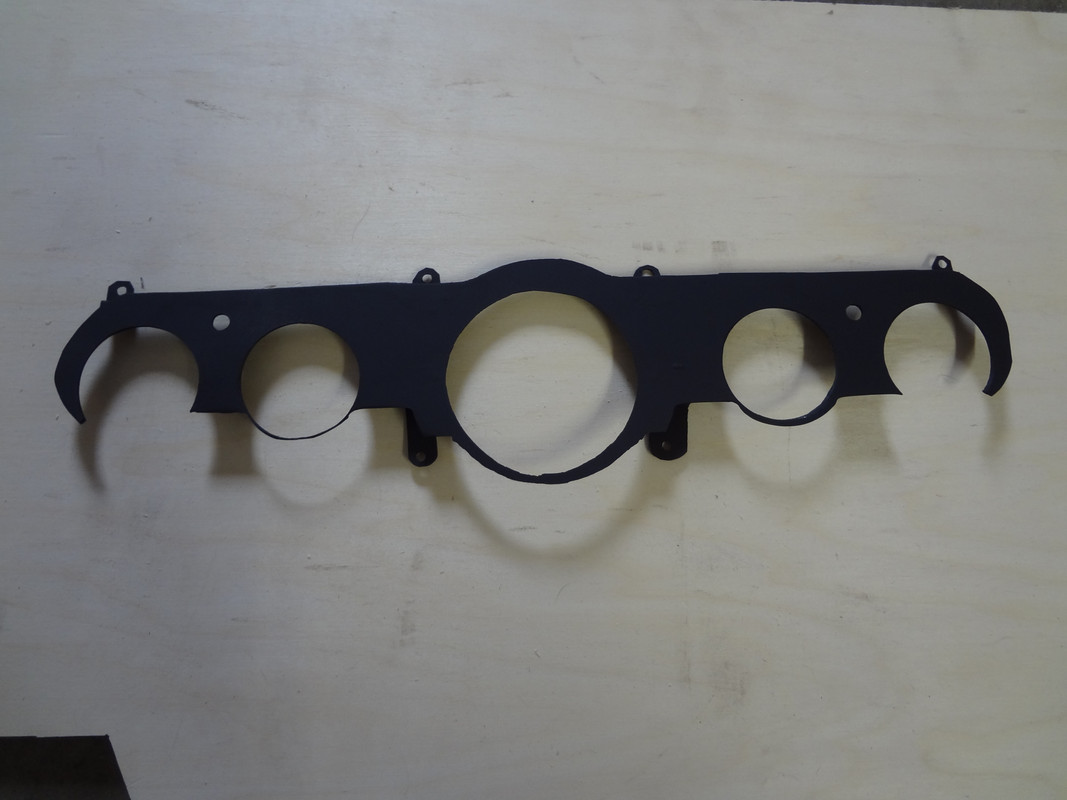
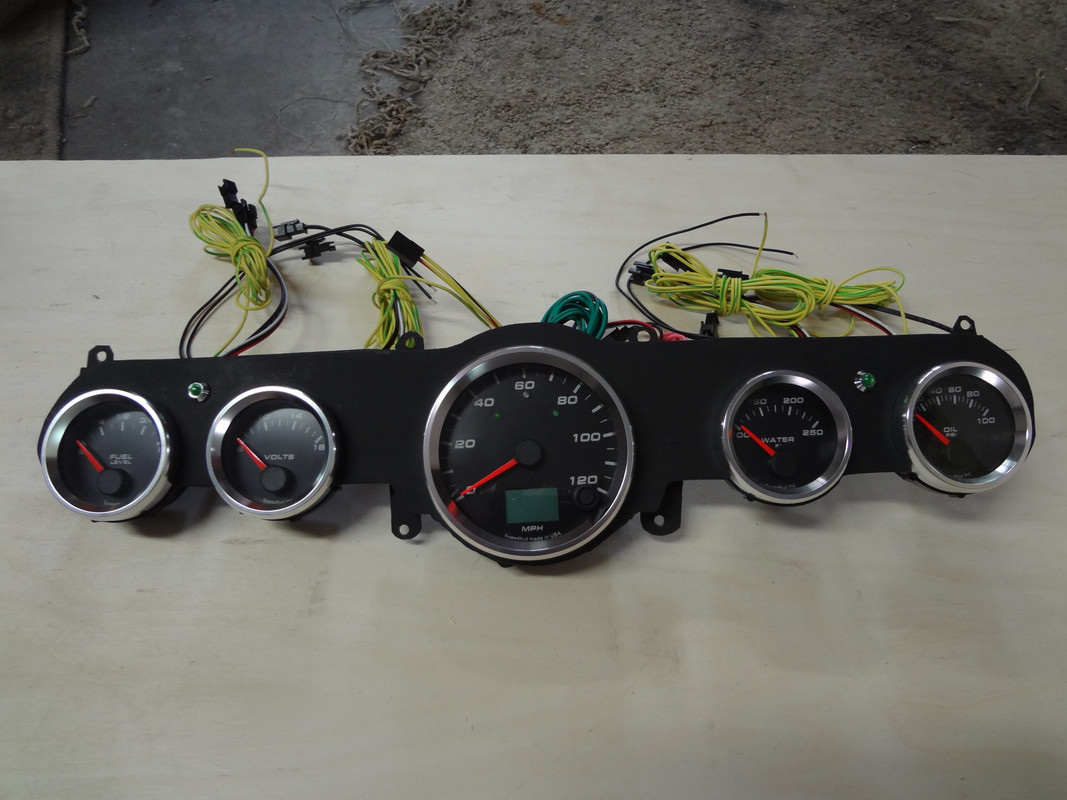
I've watched you guys doing a lot of different arrangements to install some new gauges. So I came up with this idea. I want to use the original face but you can't find a complete set of 1 1/2" gauges which some of you have pointed out so I built this backing plate to mount the 2 1/16" gauges in.
Here are the gauges mounted in the backing plate.
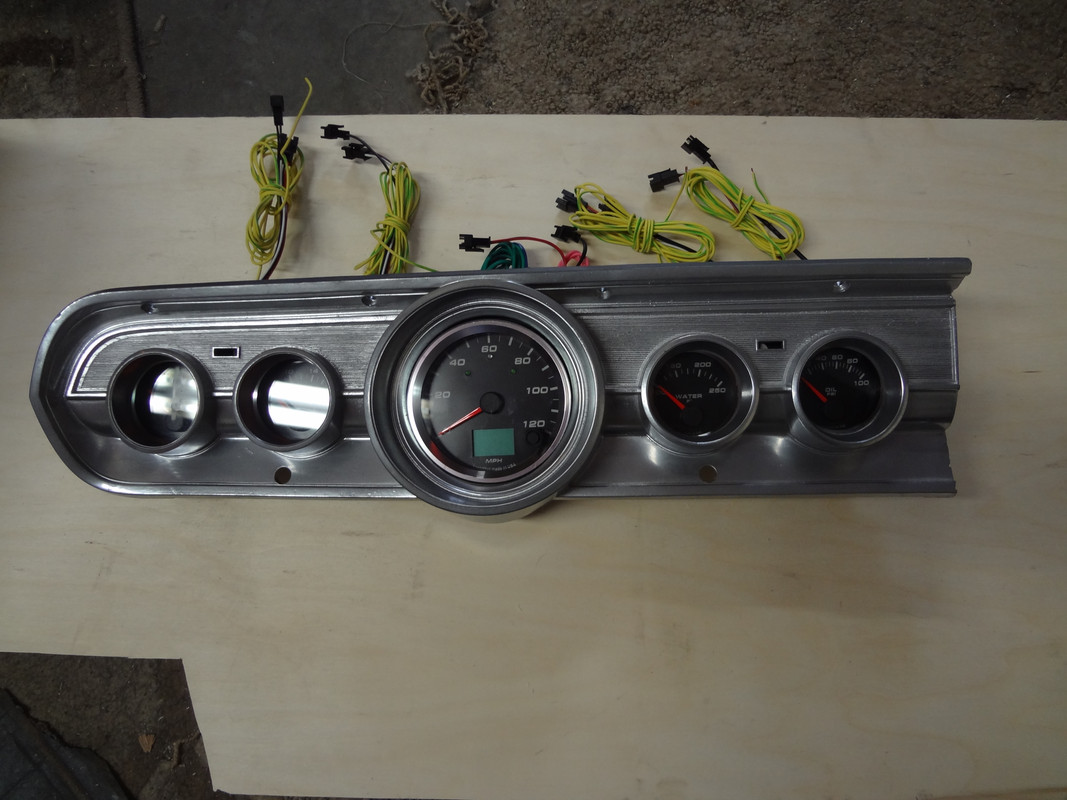
Then I used a 1 3/4" hole saw to make just a little bigger hole in the bezel and this is what it looks like.
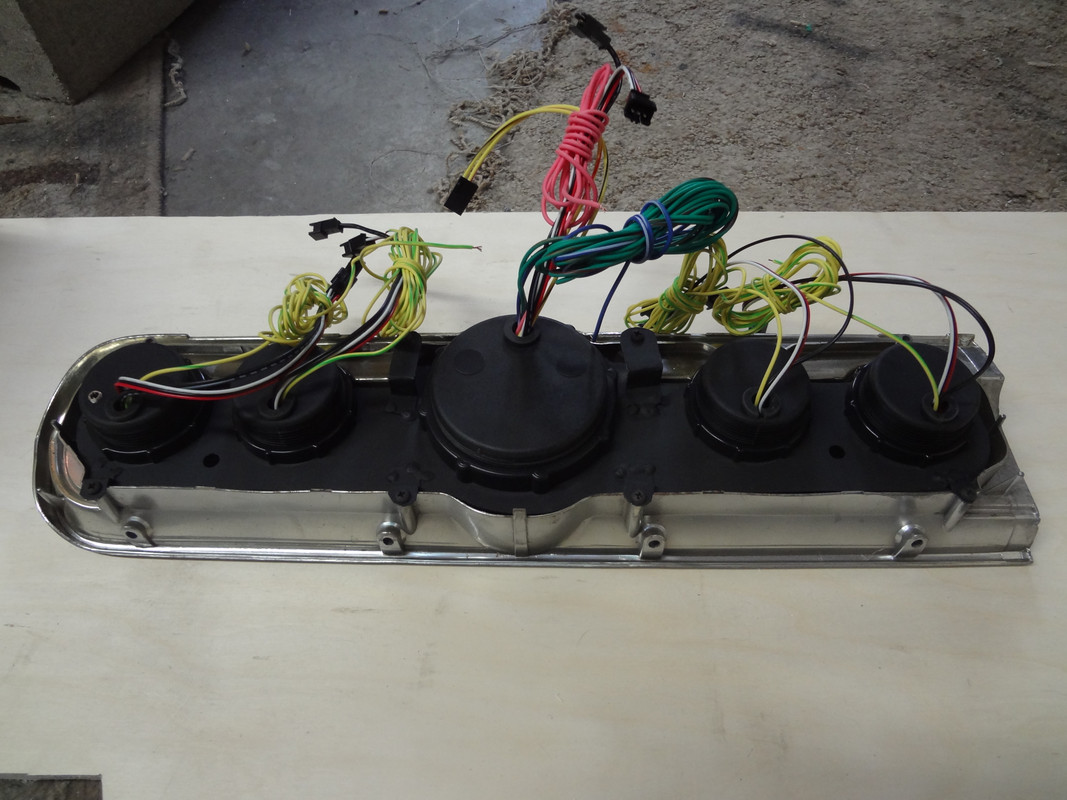
I'm not finished with the bezel yet. I've been experimenting with different paint. The next picture shows how I fastened the backing plate to the bezel.
So far I think it's going to work out.
Thanks for looking
Tom
Last edited by tomb22 on Wed Apr 25, 2018 9:44 pm, edited 4 times in total.
66 Cyclone GT; 245/60R15's on 15x8's and 215/70R15's on 15x7 Magnum's.
There's nothing like the sound of a pushrod V8 singing at the top of her lung's.
very nice work,I would like to think great minds think alike as that's exactly what I am going to do with my gauges,Looks like you used Speed Hut gauges as well?
I noticed when I used a broken bezel as a sacrificial test piece that the when enlarging the holes the sides of what left gets a little thin,I warmed up some epoxy so it flowed better and filled in the space to make it a little more solid. Just in the are right around the gauge.It did add a little weight but marginal..Som urethane gorilla glue may work well too .Just a thought
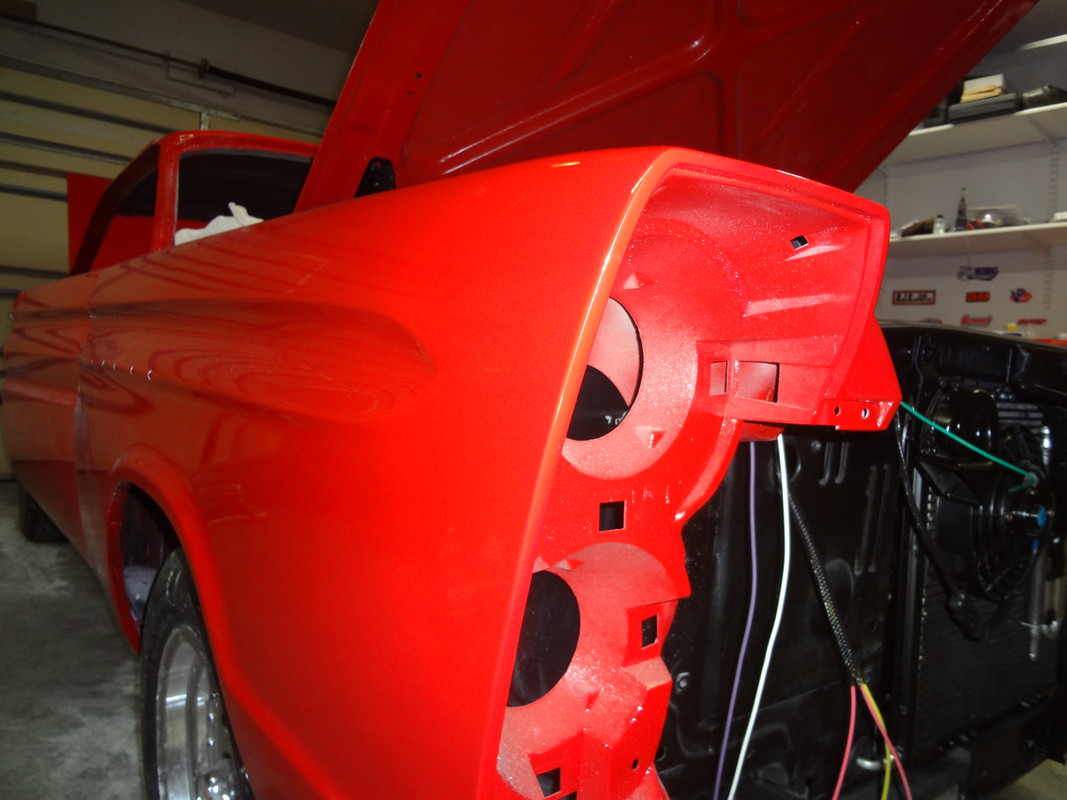
Now you have the car painted how do you feel about the epoxy and smoothing of the fender/headlight extensions? Did it cause any access difficulties for installing headlight adjustment doo dads or any other unforeseen Issues? Did you end up lightening it up some? could you possibly post a pic of how a smoothed fender looks ? Demanding I know LOL .I have enjoyed following this build..Keep up the great work
Thanks guys for all the support. I especially enjoy seeing all your posts. I've learned a ton from you guys and you sure know these cars inside and out. It amazes me how you guys can pick something out from the pictures.
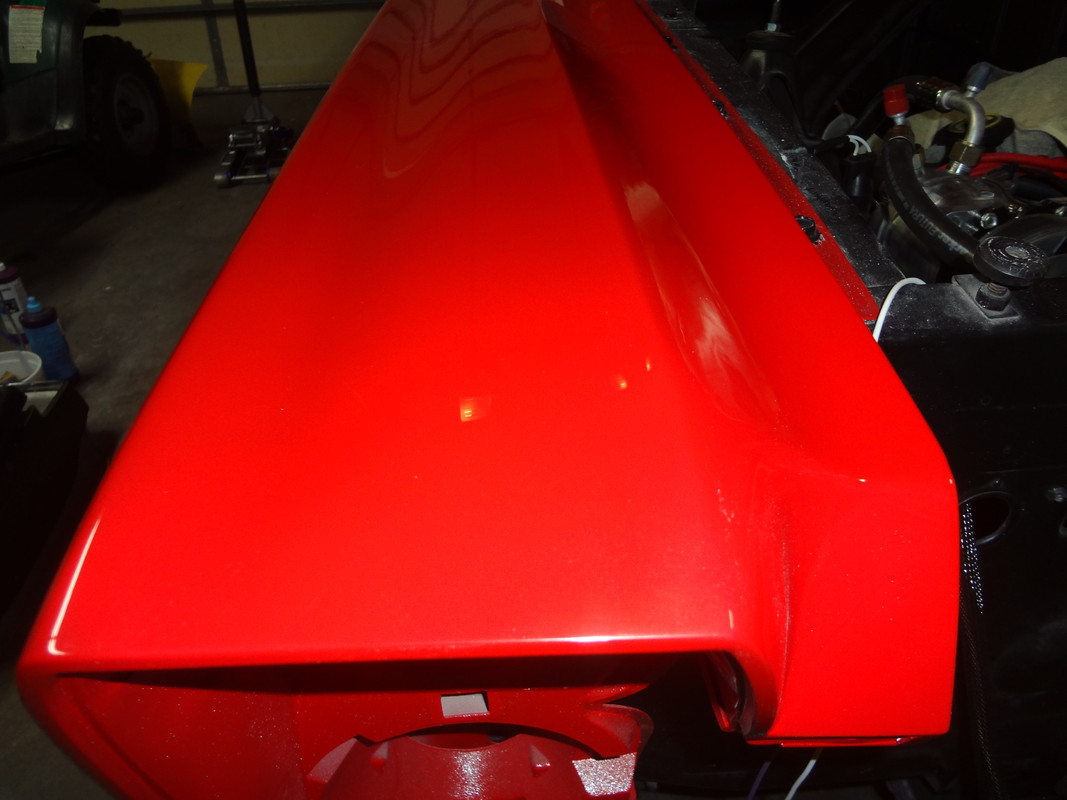
Here are some pictures of the fender Kingspeedy2. So far they both look great. Can't tell they are 2 piece. I'm hoping they don't crack when the car is driven.
Thanks for posting the pictures ,looks very Nice. I am not at that point yet anyway.I have several headlight bezels to choose from all with their individual issues. One NOS so we will see how that looks.
That panel adhesive is amazing stuff coming from those I know who have used it. Being crack inspector sometimes its best to design a spot in as Ford Did.
A friend just had his car painted and some #$@#$ came up and started grabbing his Extension (headlight that is) and started moving it up and down ,saying it saying it doesn't fit well here ..Who the hell does that. Good luck and I love your posts


 [/url
[/url