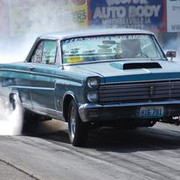
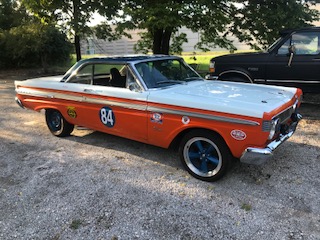
65 Comet with 390
Re: 65 Comet with 390
Got my draglink yesterday, super fast shipping from Opentracker. Two thumbs up. I also scored a msd pro billet 390 distributor off Craig's list.
Re: 65 Comet with 390
That should work fine!! What’re you thinking for brakes??
Re: 65 Comet with 390
For now, I'll keep the stock drums on it. It should be enough to stop a mid to high 12 second car. If we get to the point where we get the 390 really humming we'll look into it upgrading it then.Rocket989 wrote:That should work fine!! What’re you thinking for brakes??
I was looking at my new strut rod mounts from the Crites kit tonight. Removing the original ones looks like it will be a PITA. I don't see any easy way of removing the original ones other than a lot of grinding. Anyone else remove theirs? Any tips to make it easier without a plasma cutter or torch?
I also attached a picture of the new draglink. You can see how much shorter the Comet one is compared to the Mustang. The crew chief is cleaning up the tie rods, idler arm, and pitman arm this week, so maybe by the end of this weekend the steering will be back on the car.
- Attachments
-
- motor plate.jpg (51.86 KiB) Viewed 5043 times
Re: 65 Comet with 390
I got the strut mounts removed this evening. The first one was kind of rough removing, I used a 4" grinder with cut off wheel. The grinder was to big to get up in the channel to remove it cleanly. I ended cutting the sides with cut off wheel and then I bent the rest back and forth until it broke off. The second side went easier. I used an air saw and sliced up both sides then broke off the rest. The worst part of it all was I got something in my eye. Hopefully it is out and just a scratch and nothing In it. And yes, I had safety glasses on.
Re: 65 Comet with 390
I have been wearing glasses and a face shield because I still glowing sparks falling down inside the face shield, hope your eye is ok. And it is good you got something more done.loman wrote:The worst part of it all was I got something in my eye. Hopefully it is out and just a scratch and nothing In it. And yes, I had safety glasses on.
See Ya,
Mike
Re: 65 Comet with 390
Here are pics of the shock towers welded in. When we bolted the upper A arm on it rubbed in a few places so we had to grind out a little for clearance.
- Attachments
-
- thumbnail_IMG_2024.jpg (45.13 KiB) Viewed 4984 times
-
- thumbnail_IMG_2025.jpg (48.46 KiB) Viewed 4984 times
Re: 65 Comet with 390
As for the steering, I used my Comet spindles, A arms,& control arms and got rid of the 6 cylinder tie rods and centerlink stuff. Then I installed the 65 Mustang tie rods, idler arm & pitman arm with my Opentracker center link.
- Attachments
-
- thumbnail_IMG_2027.jpg (45.46 KiB) Viewed 4984 times
-
- thumbnail_IMG_2026.jpg (48.12 KiB) Viewed 4984 times
Re: 65 Comet with 390
The next step is to install the new Crites strut mounts. The mount they provide is quite a bit thinner than the original that I cut out. With it being thinner I don't see how the mount can get tight unless i add a spacer/washer or modify the rubber bushing.
On a side note, why does the cup side of the strut washer face away from the bushing. The washer says this side to rubber. To me the cup side should be "cupping" the bushing.
On a side note, why does the cup side of the strut washer face away from the bushing. The washer says this side to rubber. To me the cup side should be "cupping" the bushing.
- Attachments
-
- thumbnail_IMG_2022.jpg (46.32 KiB) Viewed 4984 times
-
- thumbnail_IMG_2021.jpg (29.79 KiB) Viewed 4984 times
-
- thumbnail_IMG_2020.jpg (52.01 KiB) Viewed 4984 times
Re: 65 Comet with 390
The cup side out is a time immemorial thing... been that way always...dunno why!!! 


Re: 65 Comet with 390
I pondered the same thing several years back and discussed it with an engineer bud. Best explanation i could decipher was that with the cupped side towards the bushing, when there was tension/a pull on the strut rod, the cup facing in would squeeze the bushing inward, effectively pinching the strut rod. Made sense to me then. Looking good!
Dan
Dan
Re: 65 Comet with 390
I made a couple of spacers from some unistrut square washers today. Crew chief stopped by and we got the Crites strut plate welded in along with our spacer. . I measured my white car from the frame rail down to the strut rod and then we put a jack under the lower control arm and jacked it up until the strut rod matched. Then we tacked welded in the Crites strut plate, removed the strut rod and burned it in. Next we added the spacer and welded that in. I put some rattle can paint on it and hopefully i'll install the strut rods tomorrow.
I took the picture after I already had the Crites piece tacked in. But you can see what I did by doubling up on the mount so things will get tight after everything is torqued down.
I took the picture after I already had the Crites piece tacked in. But you can see what I did by doubling up on the mount so things will get tight after everything is torqued down.
- Attachments
-
- thumbnail_IMG_2029.jpg (50.7 KiB) Viewed 4947 times
Re: 65 Comet with 390
Today I cleaned up a little bit, but I couldn't help digging out my 352 block and setting it in the engine bay. I knew it was going to be tight and now I got a little preview of what is to come. I took the motor mounts off of the 390 and went to bolt them on the 352 but they wouldn't bolt on. Someone mentioned that early FE blocks only had 2 motor mount holes and the later ones have 4 and that is what I have. I was planning on motor plates but I was hoping I could bolt the mounts on to rig something temporarily. I made an adapter out of 1/2" plywood and bolted that to the block and then bolted the mount to the plywood. I then added some boards to keep the motor from resting on the center link. So at least I can set the motor in the engine bay for now and take the pressure off of the engine puller.
I also bought a stock cast iron 390 4 bbl intake today. I found it on Craig's list less than 10 miles from home for $65.
I also bought a stock cast iron 390 4 bbl intake today. I found it on Craig's list less than 10 miles from home for $65.
- Attachments
-
- thumbnail_IMG_2030.jpg (58.14 KiB) Viewed 4933 times
Re: 65 Comet with 390
Today we made some temporary front motor plates from some scrap channel iron we had. We positioned the motor back so the steering box lands between the #7 and #8 cylinders. This will allow the rear motor plate to land rearward of the steering box on the inside of the frame. The motor is installed as low as possible. We turned the wheels all the way to the right and left and made sure we had clearance on the center link. There's not a lot of room, but it clears. The biggest issue that came up today is we can't get a valve cover on the drivers side because of the master cylinder. Also, contemplating on raising the motor just a bit to allow for more clearance on cross member and center link once oil pan gasket and engine diaper are installed in the future. I looked back at Tunnelbolt's build and the master cylinder was an issue for him as well. I'm also guessing but haven't looked at it yet is how much of the trans tunnel will need to be modified.
- Attachments
-
- thumbnail_IMG_2037.jpg (56.25 KiB) Viewed 4899 times
-
- thumbnail_IMG_2036.jpg (54.11 KiB) Viewed 4899 times
-
- thumbnail_IMG_2035.jpg (50.11 KiB) Viewed 4899 times
-
- thumbnail_IMG_2034.jpg (58.76 KiB) Viewed 4899 times
-
- thumbnail_IMG_2033.jpg (57.35 KiB) Viewed 4899 times
Re: 65 Comet with 390
Valve cover issued solved, at least I think. I tried one of the originals ones off of my truck 390 and was able to put it on. That may change once the rockers are installed but we will have to wait and see. So much for using my orange Mercury valve covers.
I went down to my dad's and looked at the 390 since he got it tore down the other day. The motor is a 390. The pistons are stock bore and have 390 cast into them. Also, my dad measured the stroke and says it all checks out as a 390. There is one possible issue. The main caps. The caps appear to have been replaced and or mismatched. I'm not familiar with 390's so I hope someone can clarify the numbers on top of them. Our assumption was 2 & 4 were mixed up but not sure about #1. I checked my 352 caps and each one of them only have an arrow ^C 2AE. Nothing telling which main they were from. I took a center punch and put marks on top of each cap to show which main cap 1 through 4 each was for future reference.
Main cap #1 - 2 1
main cap #2- 4^C 2AE
main cap #3- 3^C 2AE
main cap #4- 2^C 2AE
- Attachments
-
- #1 cap
- thumbnail_IMG_2043.jpg (22.56 KiB) Viewed 4869 times
-
- #4 cap
- thumbnail_IMG_2042.jpg (20.84 KiB) Viewed 4869 times
-
- #3 cap
- thumbnail_IMG_2041.jpg (84.11 KiB) Viewed 4869 times
-
- #2 cap
- thumbnail_IMG_2040.jpg (87.13 KiB) Viewed 4869 times
-
- #1 cap
- thumbnail_IMG_2039.jpg (98.75 KiB) Viewed 4869 times
Re: 65 Comet with 390
I moved my master cylinder over an inch to clear the valve covers


