Lou's 65 Comet Build

Re: Lou's 65 Comet Build
Lou when they release they have a stout SNAP! that spits out the ball. I push one ,pull the hood latch ,Then push the other . I'm having trouble with my center latch hanging,getting stuck closed, not enough adjustment. hood is a little off.still tinkering on it. But I did a test run up about 90mph with just the pins & center safety latch. I really wont trust them alone as they are now , especially after they get used some. but as back ups I don't think they will both fail at the same time.

Johno
-
Lou's Comet
- Posts: 1540
- Joined: Sat Nov 26, 2011 8:56 pm
- Location: Jeannette, Pa.
Re: Lou's 65 Comet Build
Thanks for the info John !
Lou
Lou
Re: Lou's 65 Comet Build
Lou that black on black will be awesome. Can't wait to see it finished. It's goin to be sick, Pugs.
302 roller
4 speed
Real cars are built to be driven and driven hard!!!
4 speed
Real cars are built to be driven and driven hard!!!
-
Lou's Comet
- Posts: 1540
- Joined: Sat Nov 26, 2011 8:56 pm
- Location: Jeannette, Pa.
Re: Lou's 65 Comet Build
Thanks Pugs, I too can't wait to see it donepugs65 wrote:Lou that black on black will be awesome. Can't wait to see it finished. It's goin to be sick, Pugs.
Lou
Re: Lou's 65 Comet Build
Lou's Comet wrote:Thanks Pugs, I too can't wait to see it donepugs65 wrote:Lou that black on black will be awesome. Can't wait to see it finished. It's goin to be sick, Pugs.
Lou

pop/glenda
-
Jims65cyclone

- Posts: 2764
- Joined: Sun Nov 23, 2014 10:29 pm
- Location: Lexington, SC
Re: Lou's 65 Comet Build
thank you JIM,,,the dogs ain't sick........they are pretty,nice to look at just like your comet with that perfect set of whls on it 

pop/glenda
-
Jims65cyclone
- Posts: 2764
- Joined: Sun Nov 23, 2014 10:29 pm
- Location: Lexington, SC
Re: Lou's 65 Comet Build
Yeah, the dog comment was with a wink and nudge. Thanks for the wheel comment. Heaven knows I fretted enough over them and tires before I finally got them. Turned out fine. 
Jim
Jim

-
Lou's Comet
- Posts: 1540
- Joined: Sat Nov 26, 2011 8:56 pm
- Location: Jeannette, Pa.
Re: Lou's 65 Comet Build
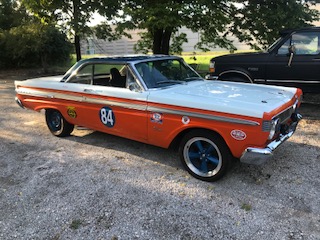
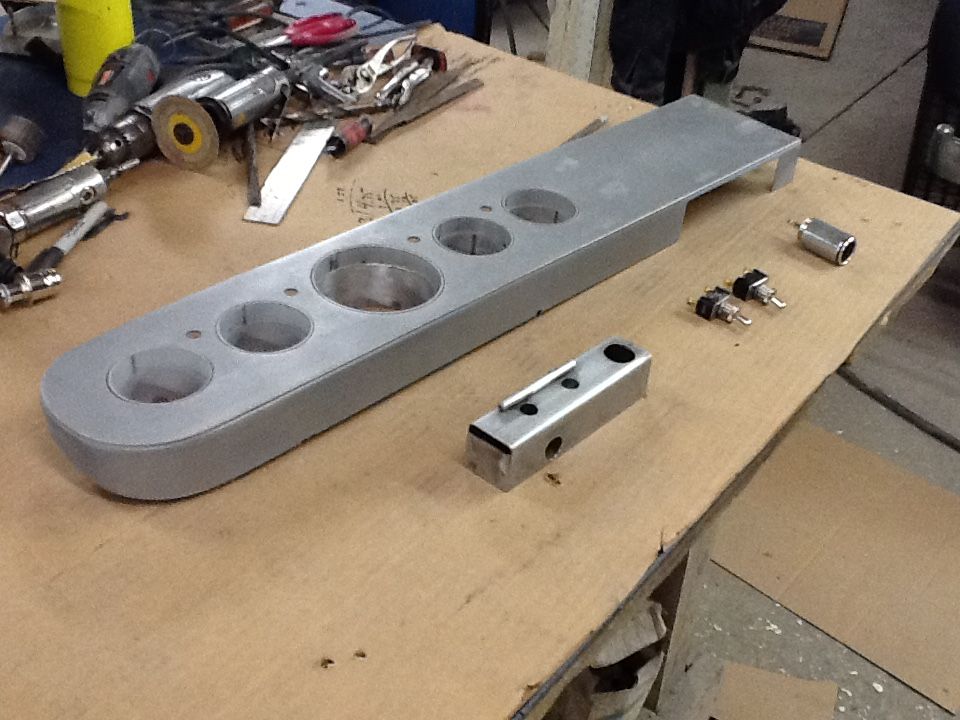
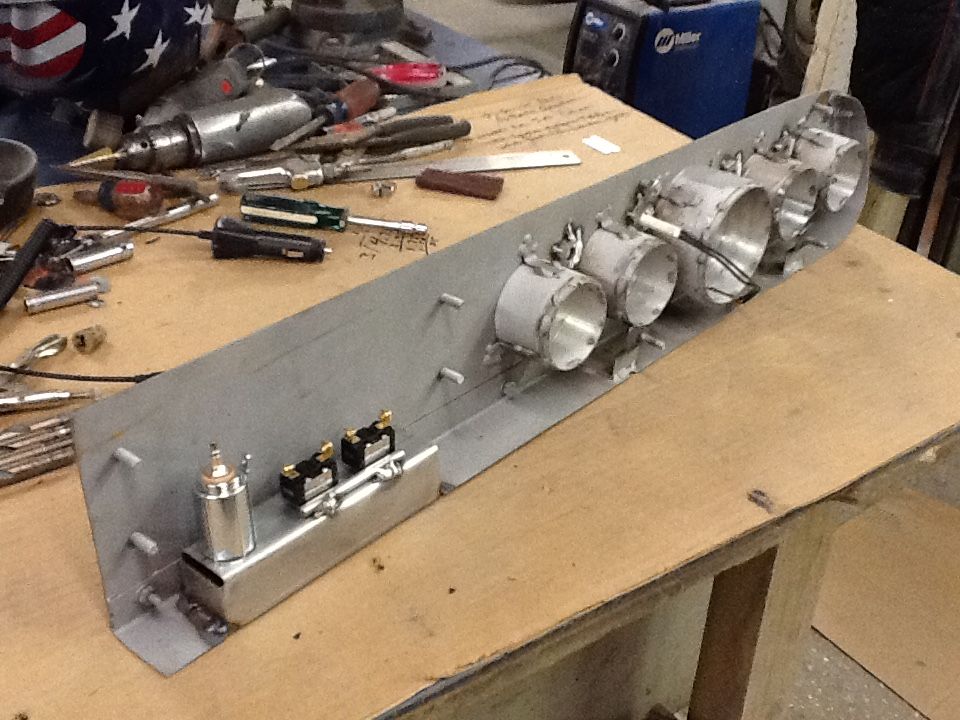
Haven't updated in awhile...I have been working on the Comet. I blocked the car out again, and it took care of the rest of the small issues with the coves. Reprimered the car and very pleased with it. The car is now ready to wet sand and paint. Thought I had a couple pictures but can't find them. But while car is sitting in primer I decided to finish drivers side of dash. Finished welding the pieces of exhaust pipe together and to the dash face for the gauges to recess in. Also weld some washers to the back of dash face for the indicator lights to set back into. Here is back of dash face, not pretty but after some 8115 and some paint it will look ok.
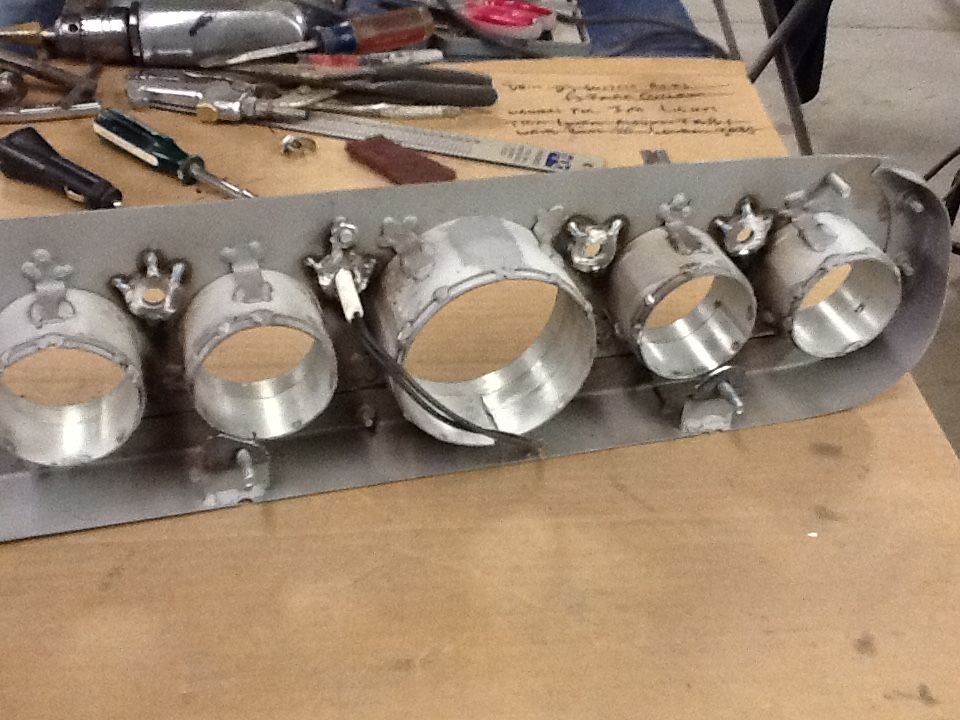
Dash face from front
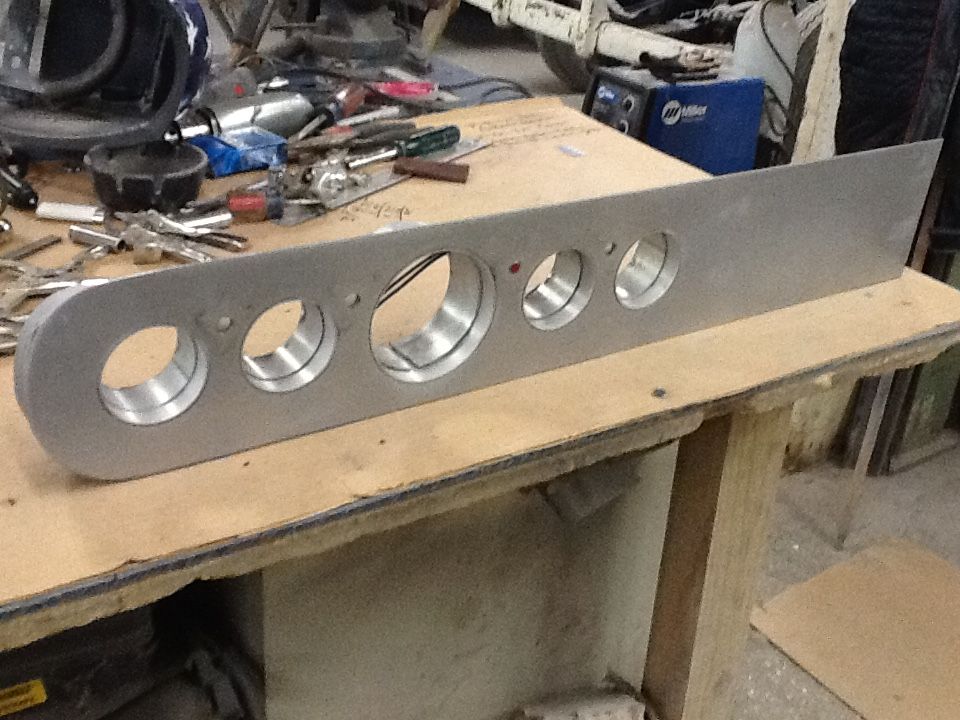
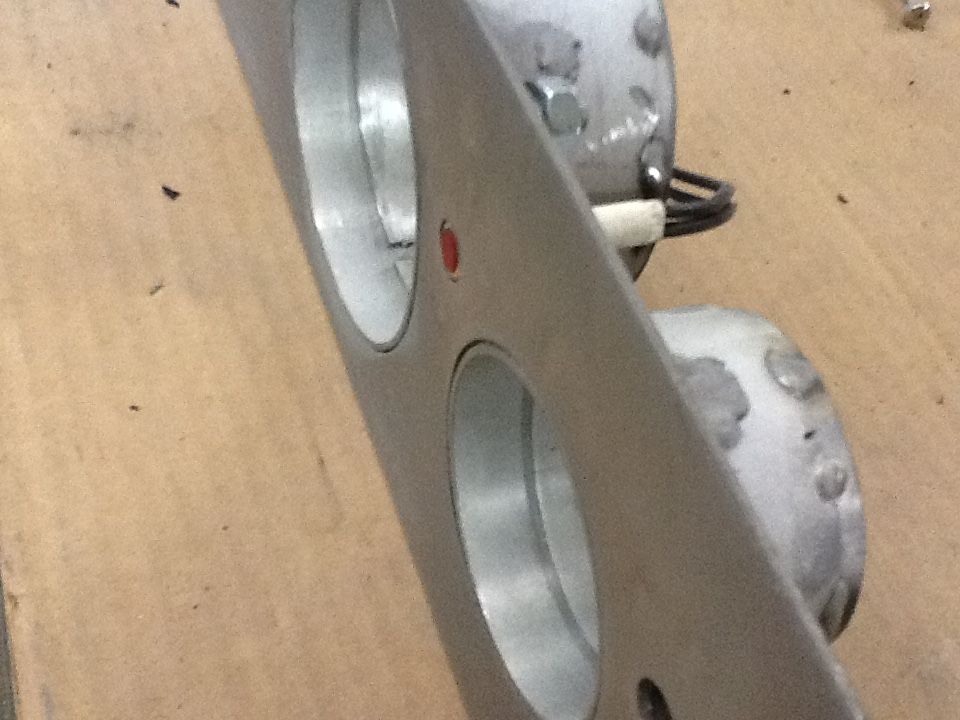
For the indicator lights I wanted them recessed so they were flush with face. I did this with 2washers welded to back of face. First washer had hole big enough for bezel to fit into. Second washer has smaller hole and a is stop for the indicator bezel which determines the depth. Which I set for flush.
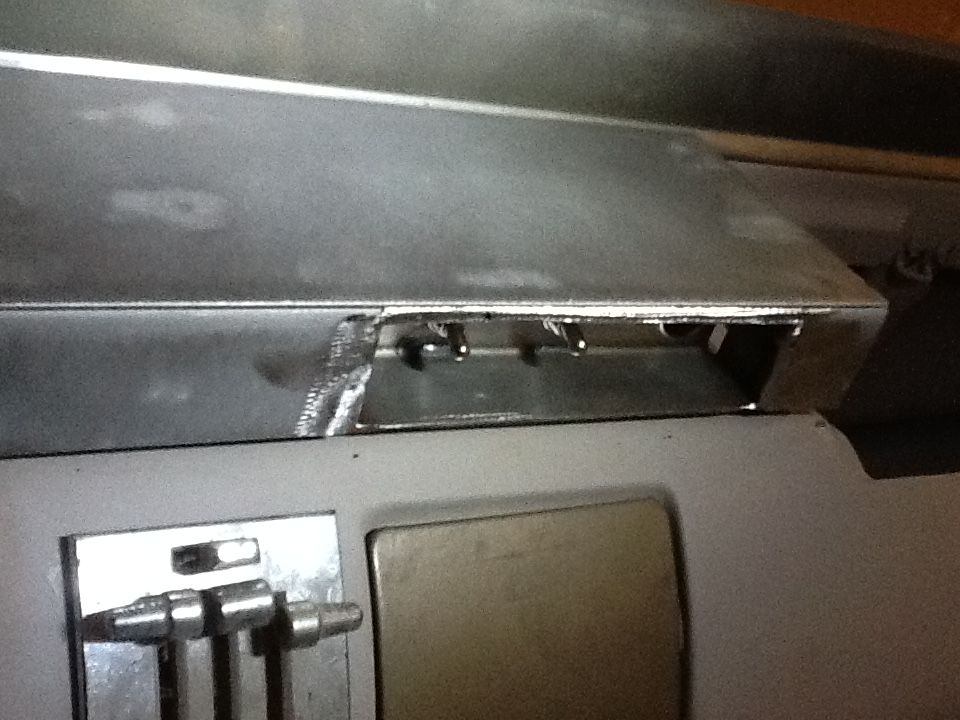
Also wanted to add a couple switches and another power outlet. Decided to hide these behind the dash face to keep a smooth clean look. I made a small sheetmetal box and drilled it for the 2 switches and outlet. Then cut out the bottom edge of dash for the box to fit into.
Here is what it looks like from the back after welding it into place.
Picture mounted in car. I have a cell phone charger plugged into outlet to make sure ash tray still opens, (although ash tray doesn't open past new dash lol, will need lengthened )
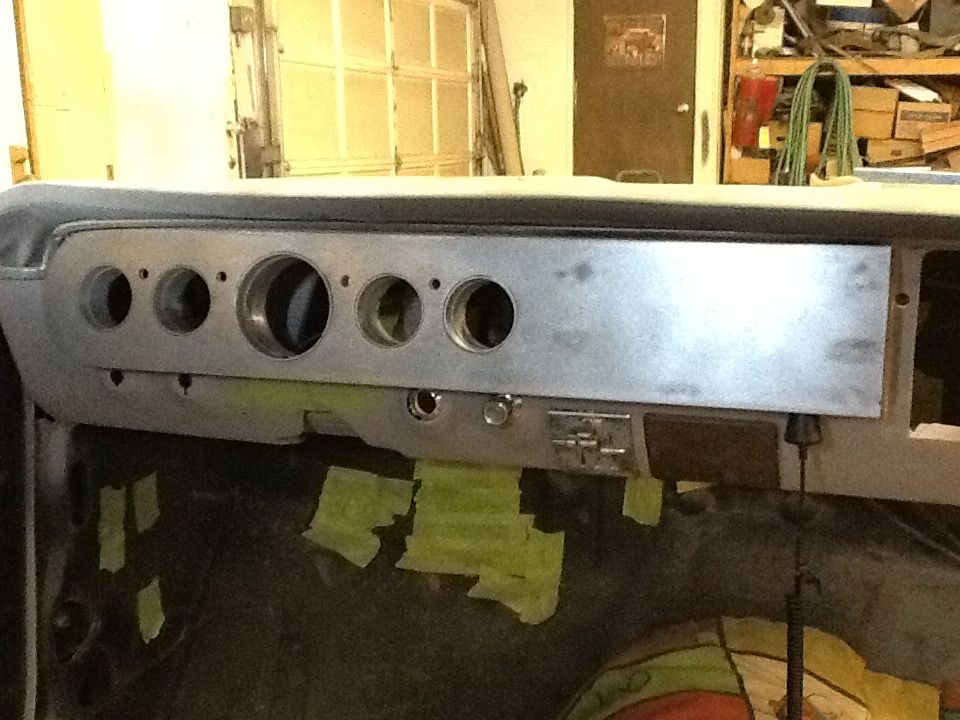
Happy with how the switches and outlet are hidden.
Looks like in bottom of dash.
Also been playing with the hood pins. Decided to just go with the traditional hood pins, drilled the top of the hood.

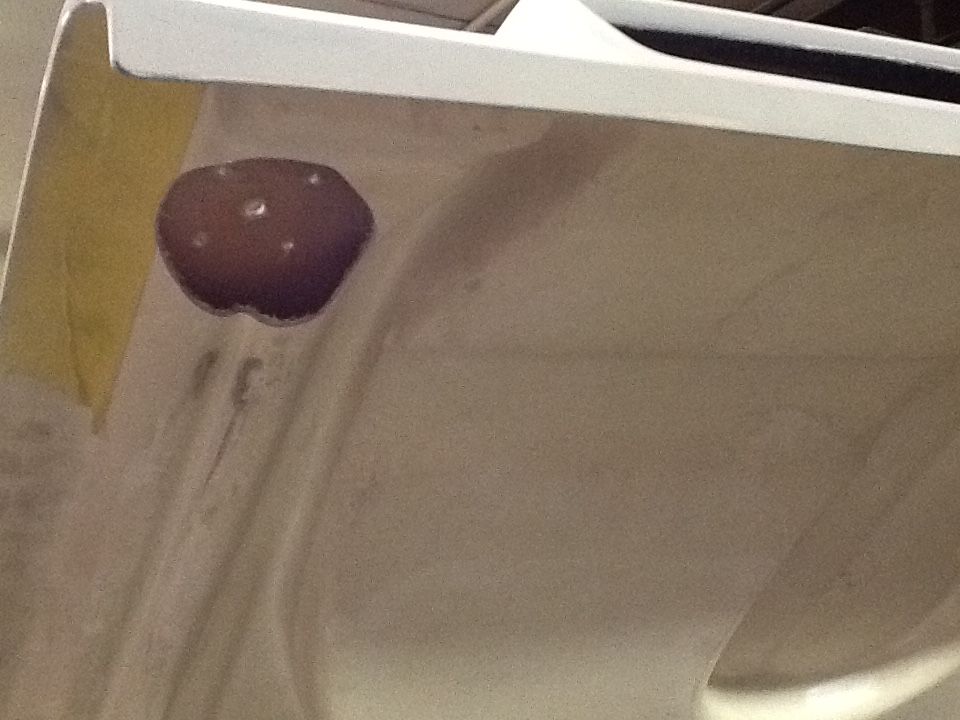
Drilled the center(pin) hole thru bottom panel of hood also. Really didn't like where the hole came thru the bottom panel. Was in a odd spot. Plus not a fan of the screws just going thru top panel of hood, don't want anything to crack or stripout. Decided to do something like John did with his hood and form a bond between the two panels where the pin goes thru. I took a 3" hole saw and cut a hole in the bottom panel.
Took some fiberglass cloth, resin, and lid from tuff stuff cleaner .............
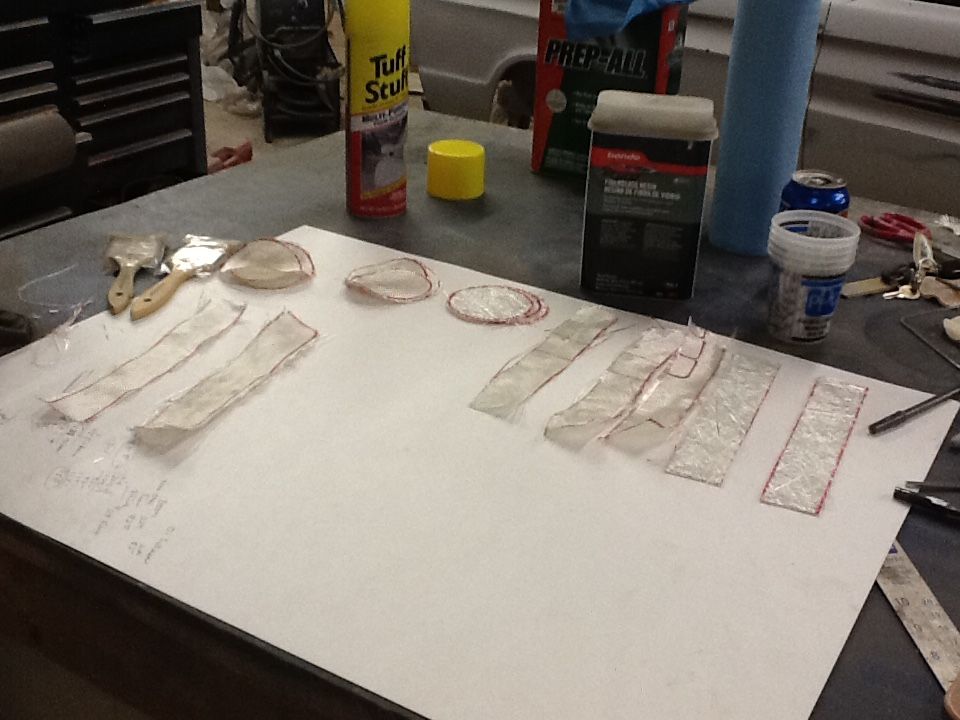
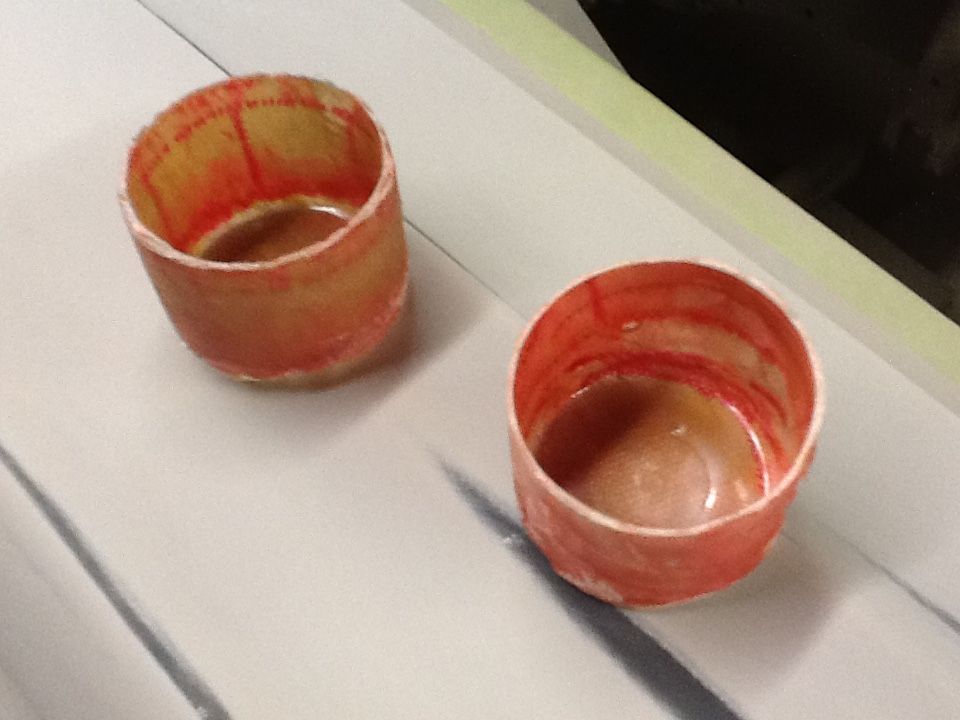
And made some fiberglass cups, the lid from the tuff stuff happened to be right size
The cups fit up into the holes in bottom panel I cut.
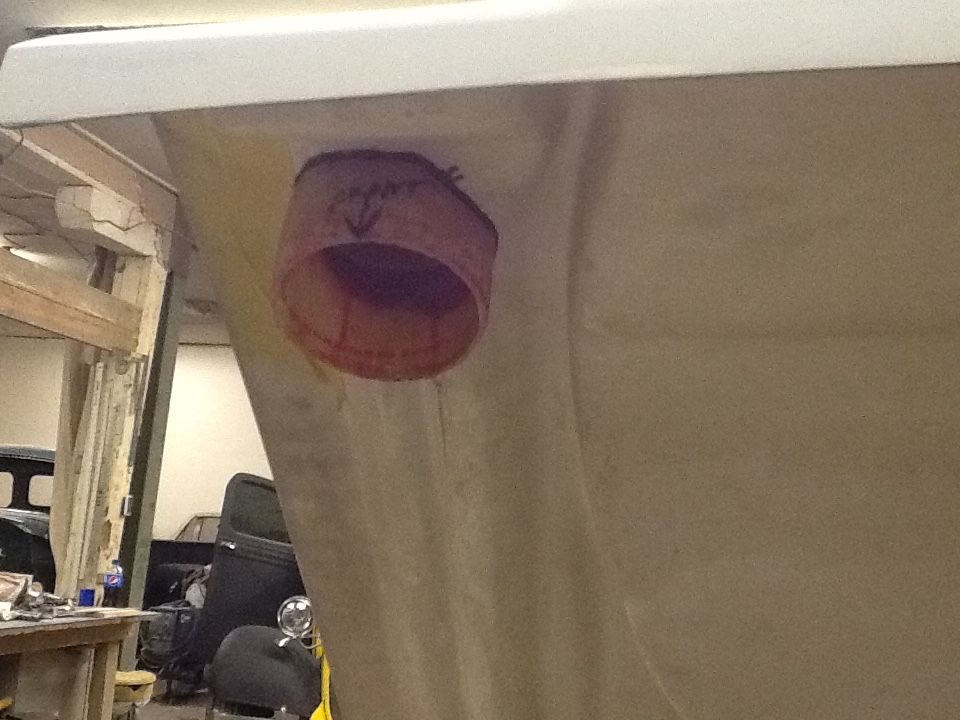
I will trim these to fit the contour of the bottom panel and glue in with 8115 adhesive. This will give me the strength I want between the two panels and I will be able to use machine screws with acorn nuts instead of the screws to mount scuff plates. Also think the installation will look cleaner when done.
Hopefully as weather gets warmer and days longer will get some more done with Comet.
Lou

Dash face from front

For the indicator lights I wanted them recessed so they were flush with face. I did this with 2washers welded to back of face. First washer had hole big enough for bezel to fit into. Second washer has smaller hole and a is stop for the indicator bezel which determines the depth. Which I set for flush.

Also wanted to add a couple switches and another power outlet. Decided to hide these behind the dash face to keep a smooth clean look. I made a small sheetmetal box and drilled it for the 2 switches and outlet. Then cut out the bottom edge of dash for the box to fit into.

Here is what it looks like from the back after welding it into place.

Picture mounted in car. I have a cell phone charger plugged into outlet to make sure ash tray still opens, (although ash tray doesn't open past new dash lol, will need lengthened )

Happy with how the switches and outlet are hidden.
Looks like in bottom of dash.

Also been playing with the hood pins. Decided to just go with the traditional hood pins, drilled the top of the hood.

Drilled the center(pin) hole thru bottom panel of hood also. Really didn't like where the hole came thru the bottom panel. Was in a odd spot. Plus not a fan of the screws just going thru top panel of hood, don't want anything to crack or stripout. Decided to do something like John did with his hood and form a bond between the two panels where the pin goes thru. I took a 3" hole saw and cut a hole in the bottom panel.

Took some fiberglass cloth, resin, and lid from tuff stuff cleaner .............

And made some fiberglass cups, the lid from the tuff stuff happened to be right size

The cups fit up into the holes in bottom panel I cut.

I will trim these to fit the contour of the bottom panel and glue in with 8115 adhesive. This will give me the strength I want between the two panels and I will be able to use machine screws with acorn nuts instead of the screws to mount scuff plates. Also think the installation will look cleaner when done.
Hopefully as weather gets warmer and days longer will get some more done with Comet.
Lou
Re: Lou's 65 Comet Build
Gauges are gonna look smooth Lou! That hole in the bottom of your hood looks very familiar. I ended up beefing up the whole bottom edges of my hood & it turned out to look pretty good, better than expected. I dont think I ever posted any pics of it though. So hopefully yours will be painted this summer? 
Johno
Re: Lou's 65 Comet Build
Nice job Lou! I like you mounted the switches.
I'm afraid to even touch my instrument cluster from the fear that it is going to brake.
Matt
I'm afraid to even touch my instrument cluster from the fear that it is going to brake.
Matt

Re: Lou's 65 Comet Build
Beautiful work Lou!
1965 Caliente HT- 289/4 speed
1964 Falcon HT- track car- 302/4 speed
1964 Falcon HT- track car- 302/4 speed
-
Santa's Comet
- Posts: 250
- Joined: Wed Jul 31, 2013 2:48 pm
Re: Lou's 65 Comet Build
Lou, great looking set up! I like how you added the plugin tucked under!
NP Dave
NP Dave
Re: Lou's 65 Comet Build
Gonna be one smokin' Comet!! Lot of REALLY fine work! 


'cause Johno says you gotta have a sig pic!