Lou's 65 Comet Build
Re: Lou's 65 Comet Build
http://www.ritewaybrakedies.com/catalog/catalog20.pdf Here are some pics of the dies I was talking about. We called it an offset die, they call it a box die. You can see if the dies have different size "throats" then they can brake (bend) different distances between the brakes (bends).
-
Lou's Comet
- Posts: 1544
- Joined: Sat Nov 26, 2011 8:56 pm
- Location: Jeannette, Pa.
Re: Lou's 65 Comet Build
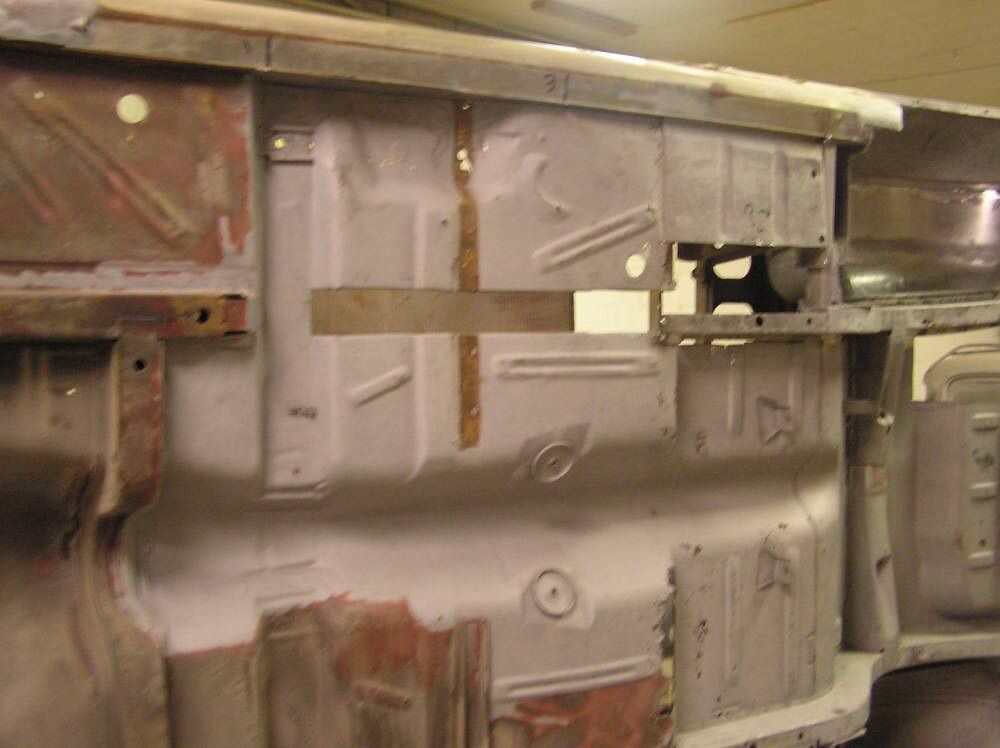
Finished welding my rail on. Started on wheel well. Cut out the inner well and the floor up to the frame rail.
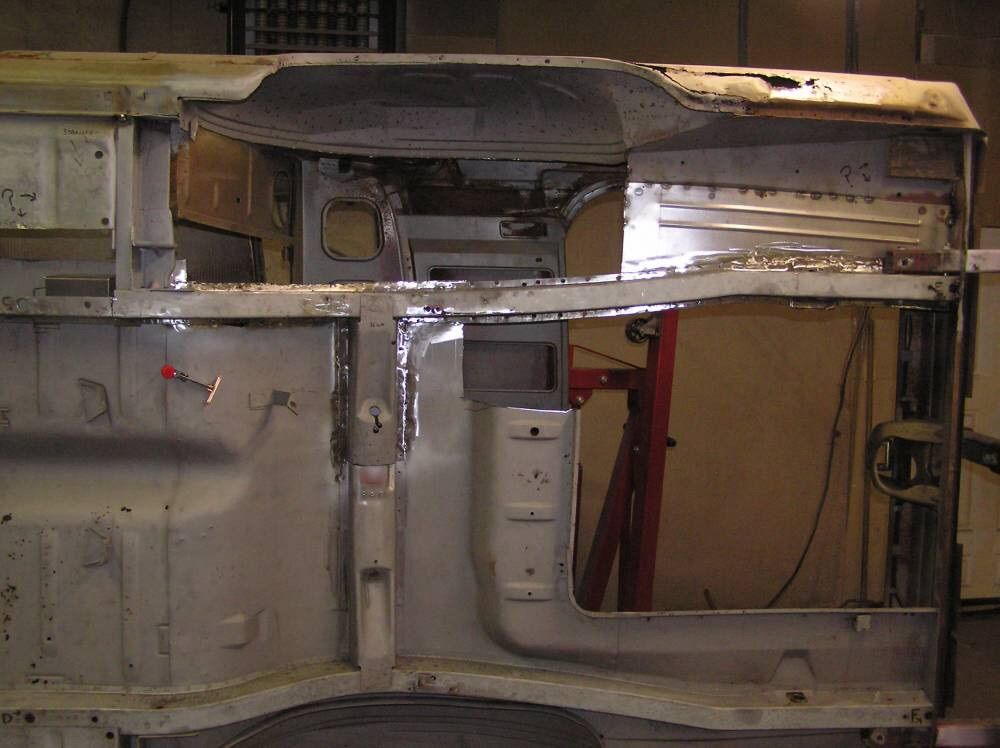
Here is the inner wheel well trimmed down. I decided to keep about a inch flange around the bottom of well and to keep the flange on the frame rail. This will place the inner well about a inch away from frame rail. I was originally going to cut flange off and weld inner well flat against frame rail but think this will look better and won't make a difference since leaf spring will be the inner limit for wheel/tire combination.
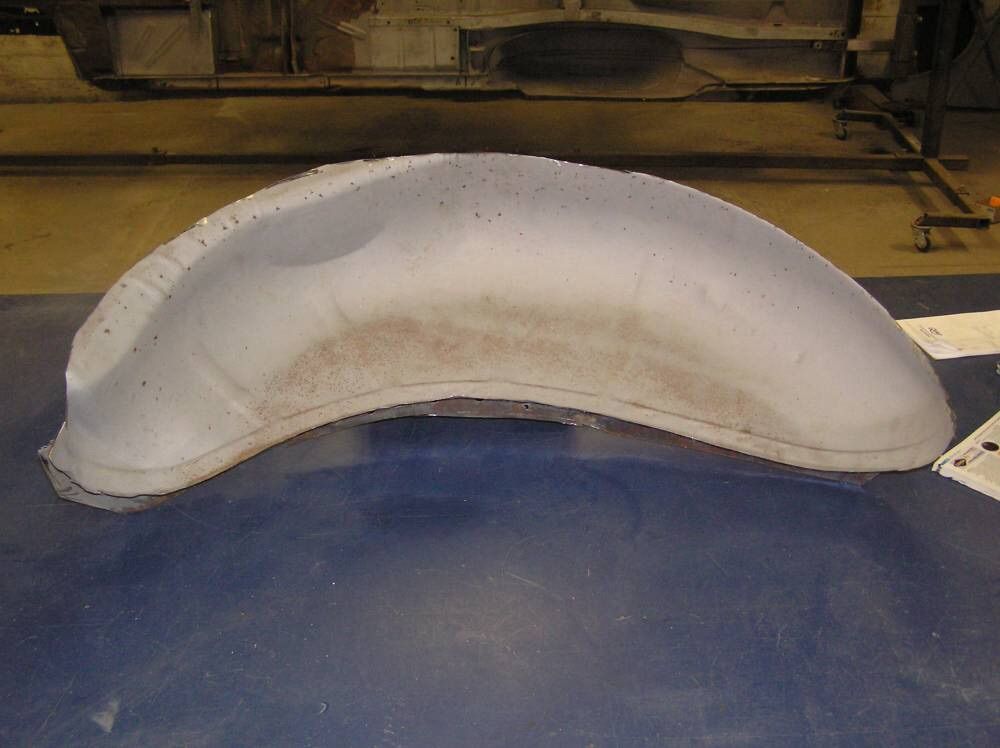
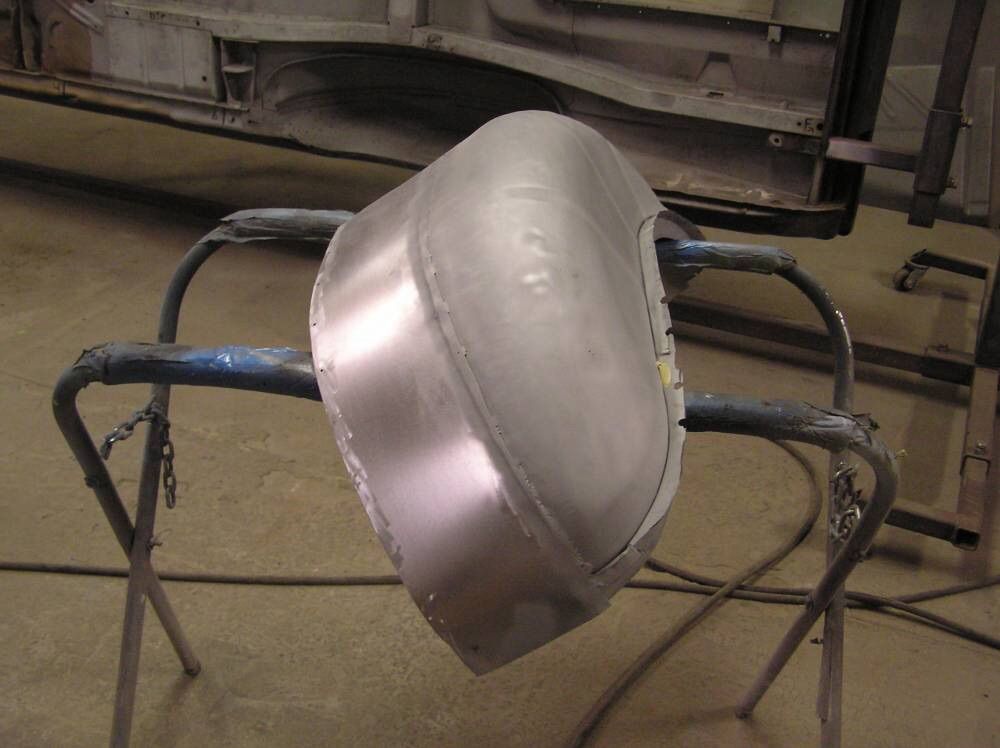
Didn't like the humps on left side and was going to hammer and dolly them out but since I have to make filler pieces anyways I decided to just cut the humps out. I also drilled out the spot welds that held the lower part of trunk hinge mount, and welded up the holes. Here is piece ready to be clamped back on car.
Clamped inner well back on car and made the templates for filler pieces.
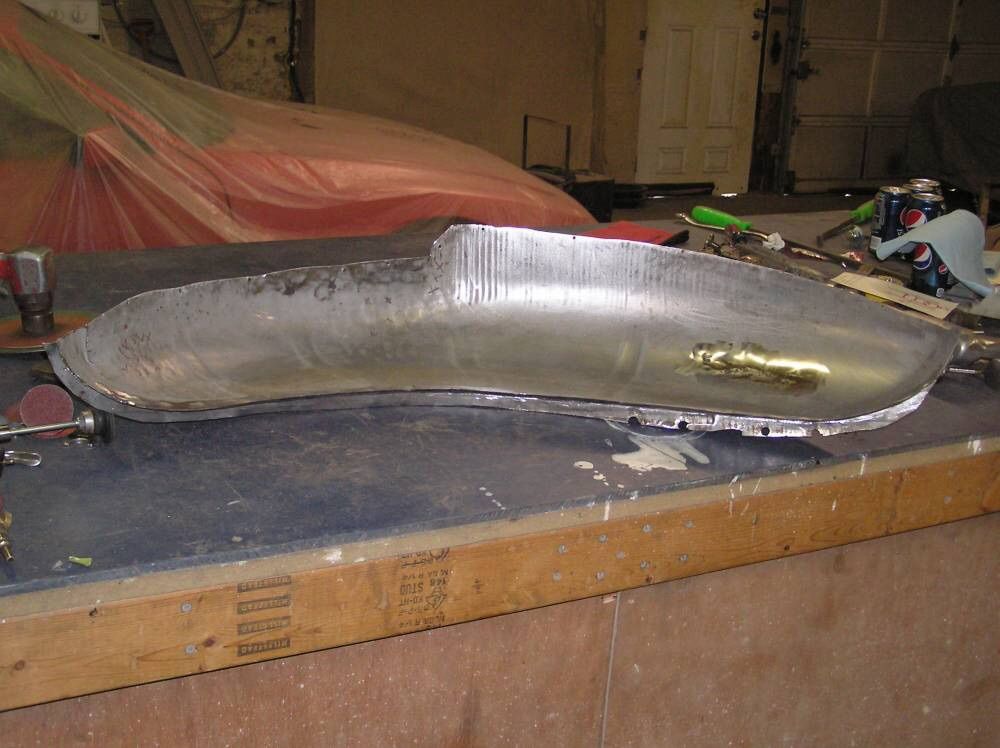
Took the templates and cut the pieces out of 18ga. Stepped the edge where the pieces will be welded to the trimmed inner well.
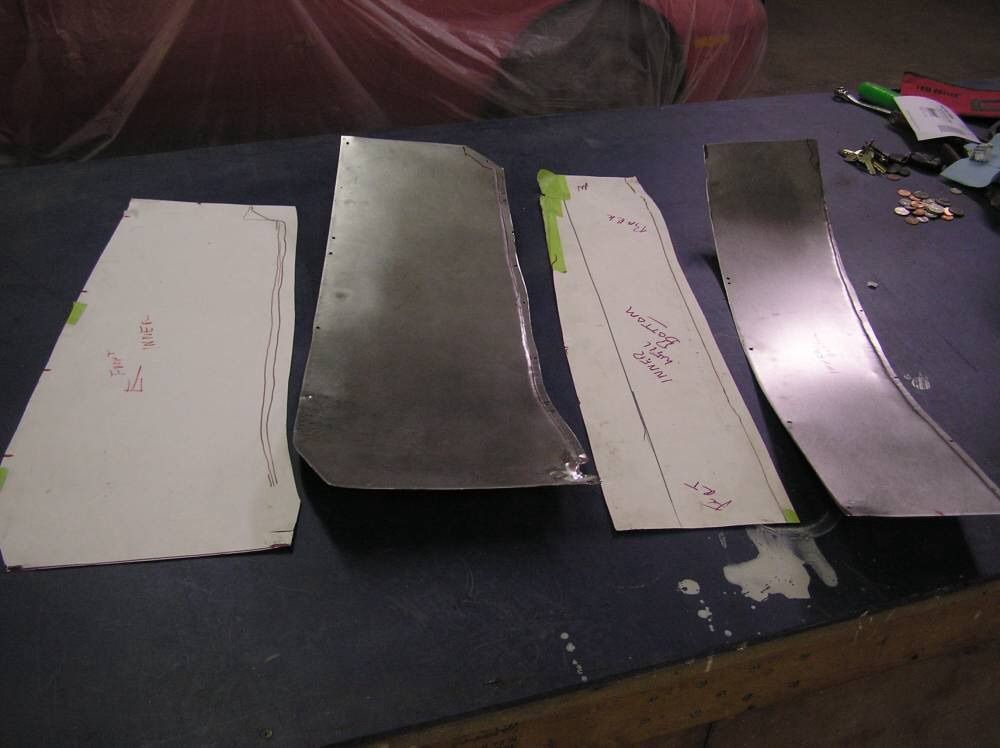
Clamped the new filler pieces and inner well to car for fitment, had to grind a couple edges but pretty happy with how it fit.
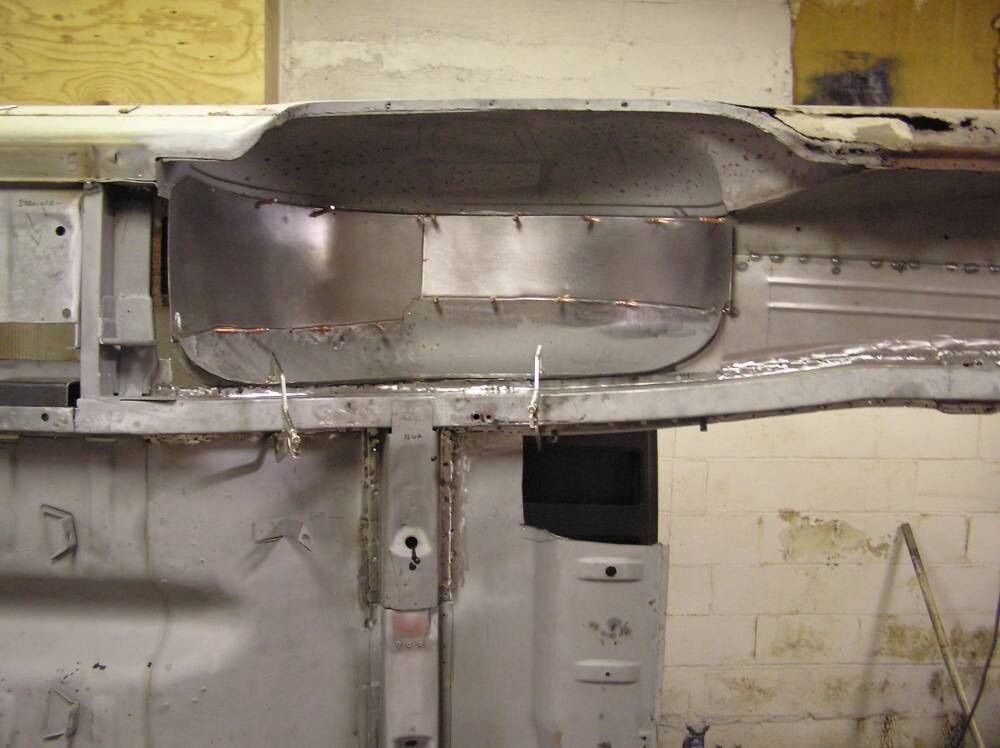
Once it fit how I wanted it to, I welded the pieces and inner well together.
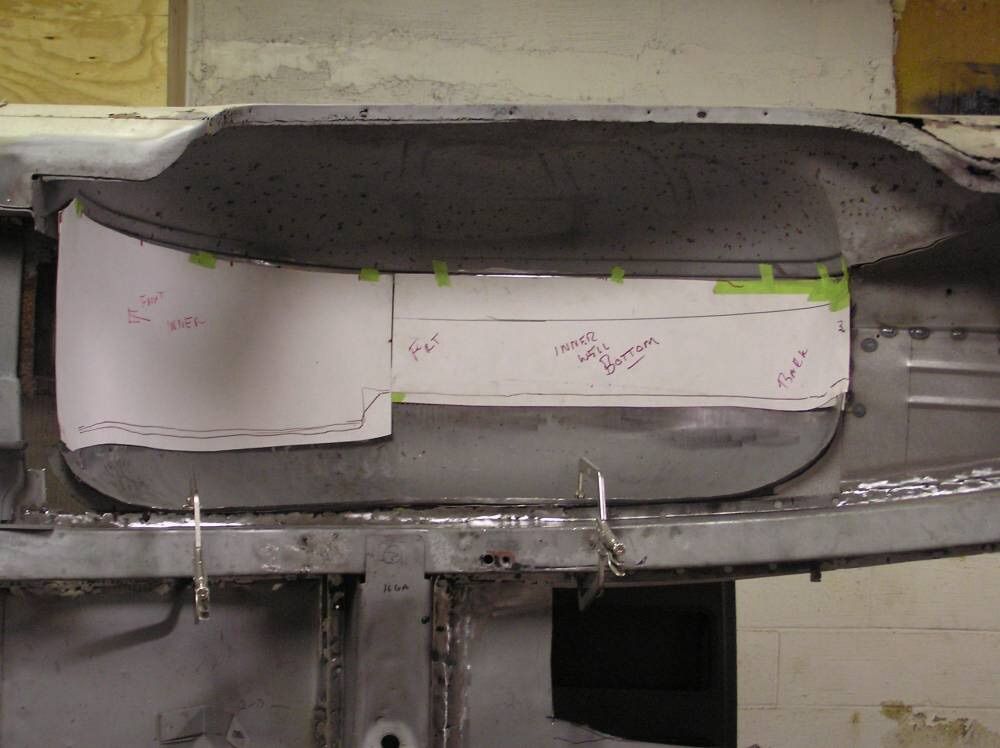
Here is picture that shows the difference in size between the new wheel well and the old one.
I will spot weld the new inner well to the outer one on the outside and weld the seam inside to preserve the factory seam. also have to remount the lower part of trunk hinge bracket to new inner well.

Here is the inner wheel well trimmed down. I decided to keep about a inch flange around the bottom of well and to keep the flange on the frame rail. This will place the inner well about a inch away from frame rail. I was originally going to cut flange off and weld inner well flat against frame rail but think this will look better and won't make a difference since leaf spring will be the inner limit for wheel/tire combination.

Didn't like the humps on left side and was going to hammer and dolly them out but since I have to make filler pieces anyways I decided to just cut the humps out. I also drilled out the spot welds that held the lower part of trunk hinge mount, and welded up the holes. Here is piece ready to be clamped back on car.

Clamped inner well back on car and made the templates for filler pieces.

Took the templates and cut the pieces out of 18ga. Stepped the edge where the pieces will be welded to the trimmed inner well.

Clamped the new filler pieces and inner well to car for fitment, had to grind a couple edges but pretty happy with how it fit.

Once it fit how I wanted it to, I welded the pieces and inner well together.

Here is picture that shows the difference in size between the new wheel well and the old one.

I will spot weld the new inner well to the outer one on the outside and weld the seam inside to preserve the factory seam. also have to remount the lower part of trunk hinge bracket to new inner well.
Last edited by Lou's Comet on Wed Nov 18, 2015 8:32 pm, edited 1 time in total.
-
Lou's Comet
- Posts: 1544
- Joined: Sat Nov 26, 2011 8:56 pm
- Location: Jeannette, Pa.
Re: Lou's 65 Comet Build
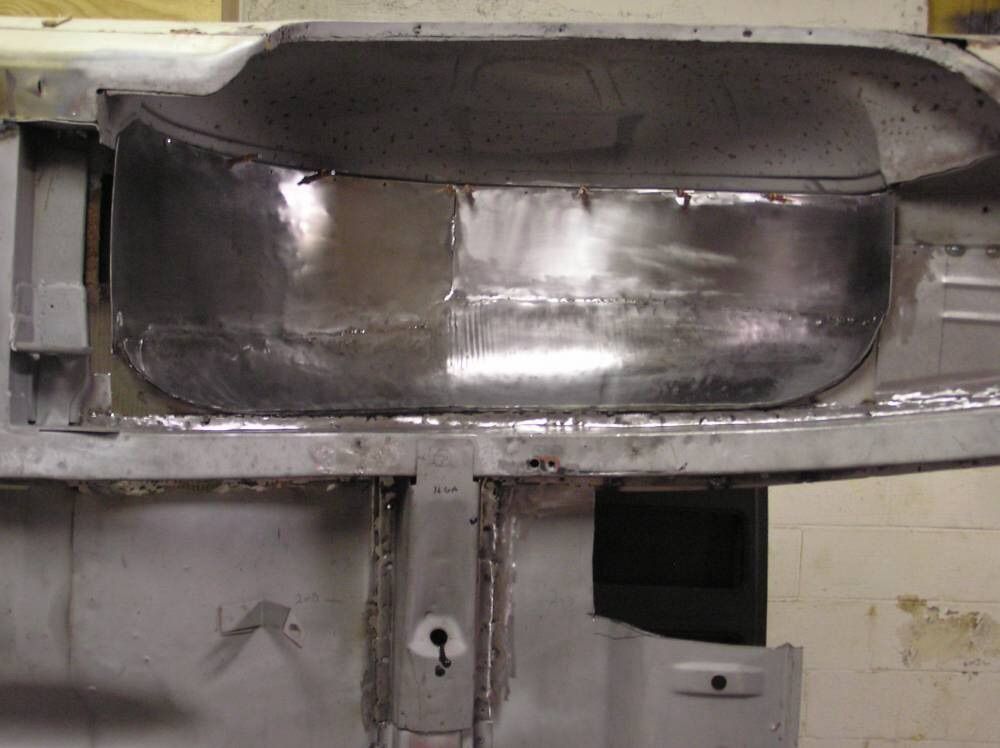
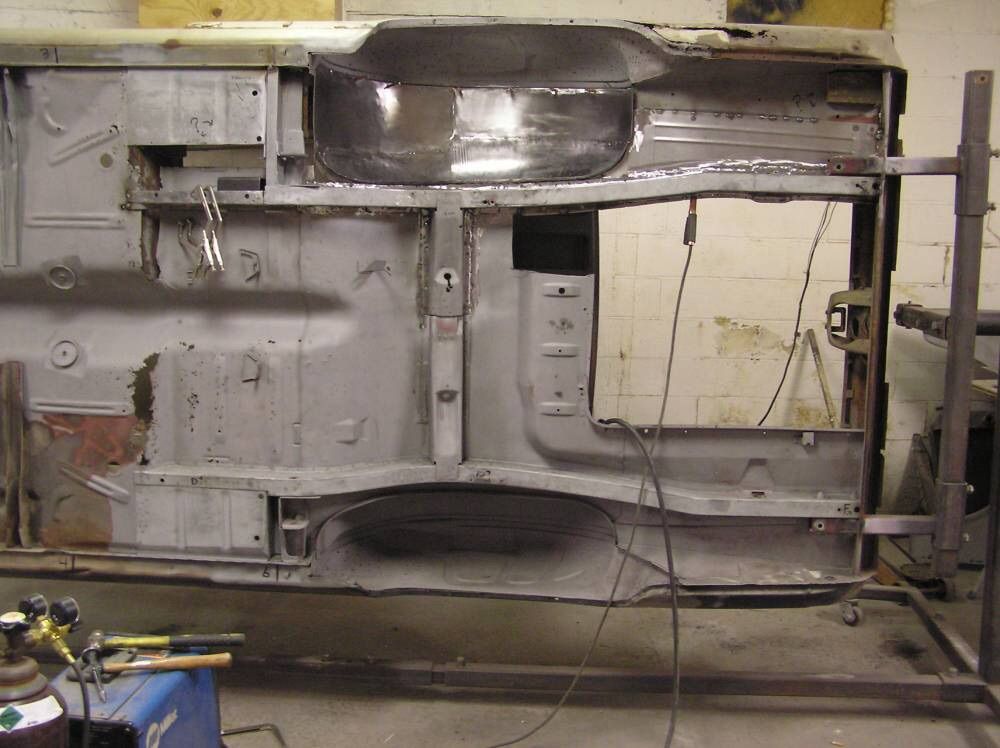
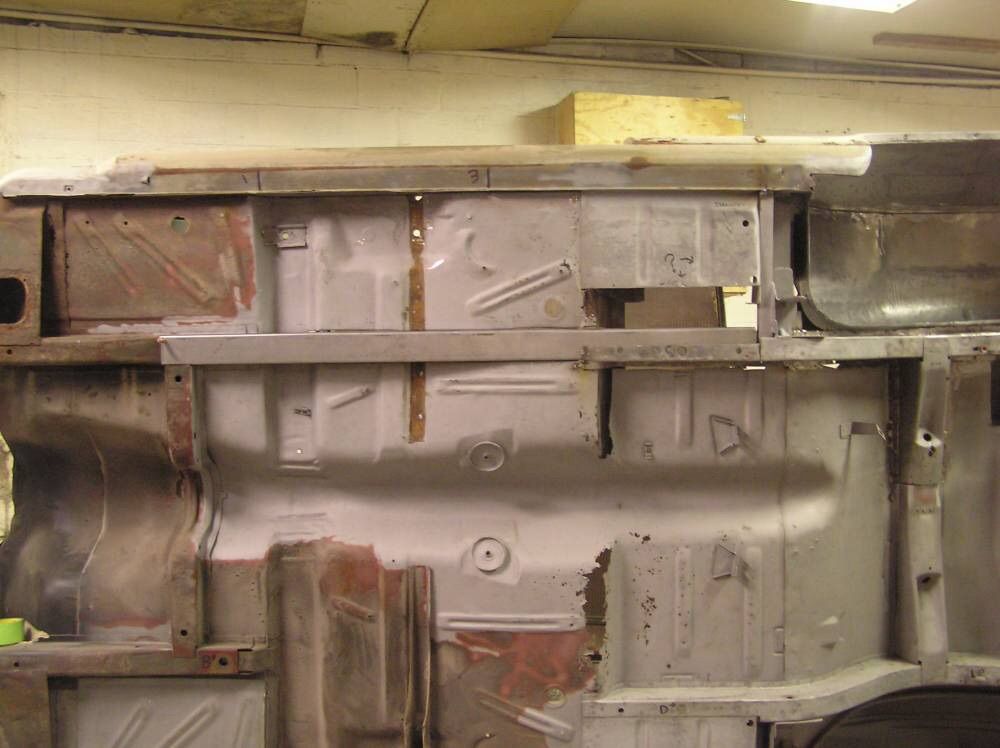
Got some time this weekend. Sandblasted and ground the welds on inner wheel well.
Welded the well in and finished welding the outer trunk floor
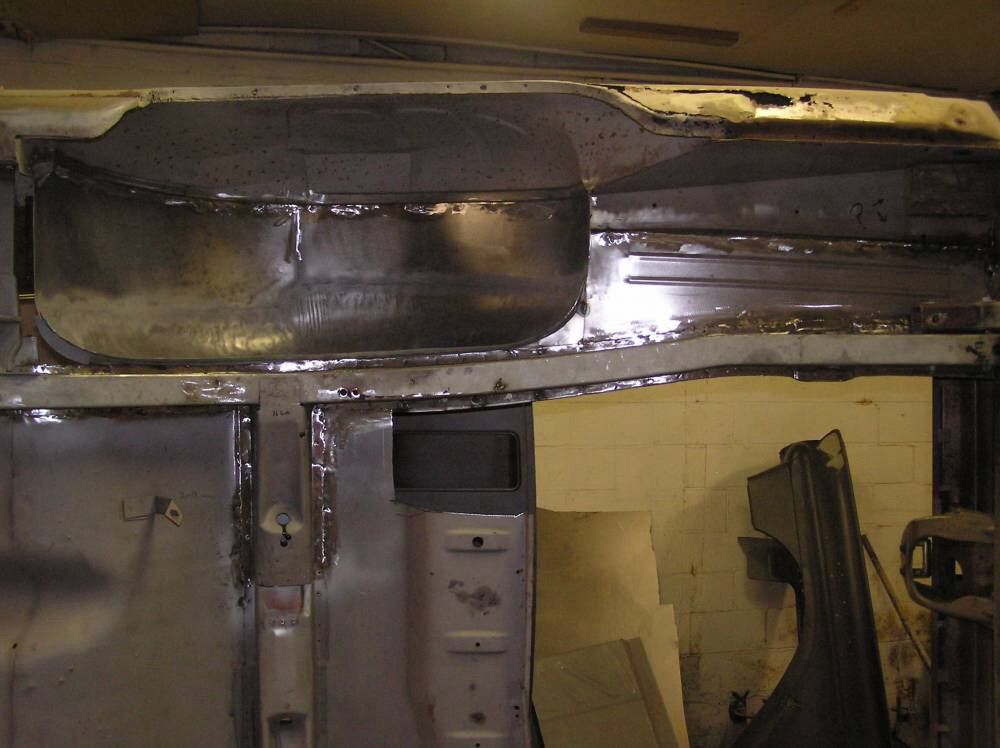
Here is picture from inside trunk. Should be able to fit decent tires when done lol
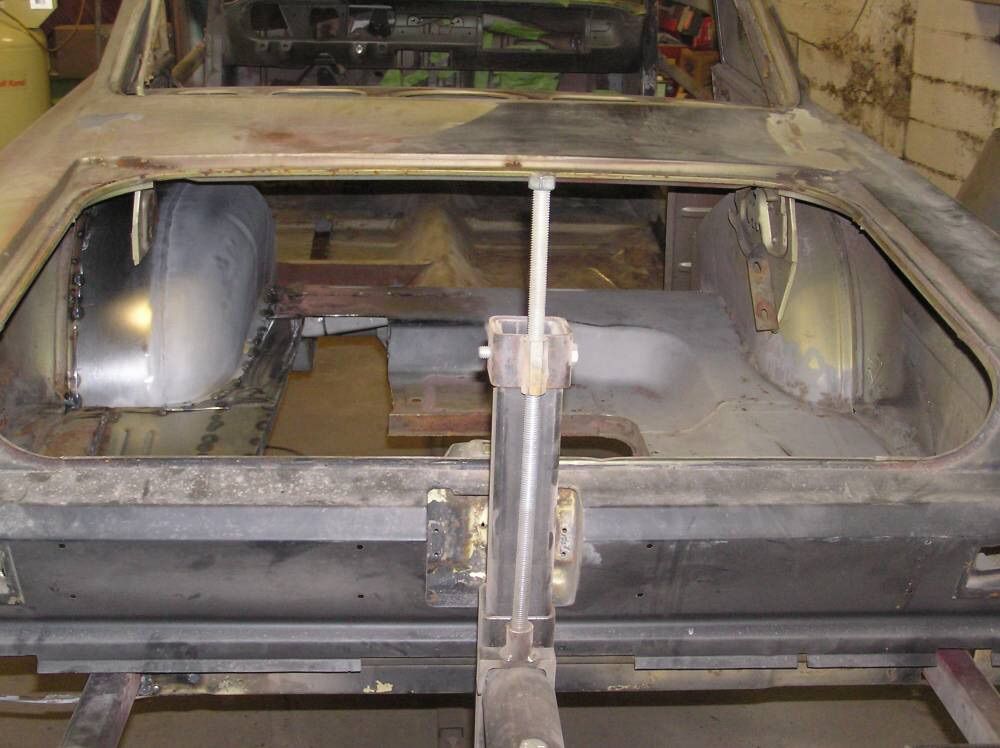
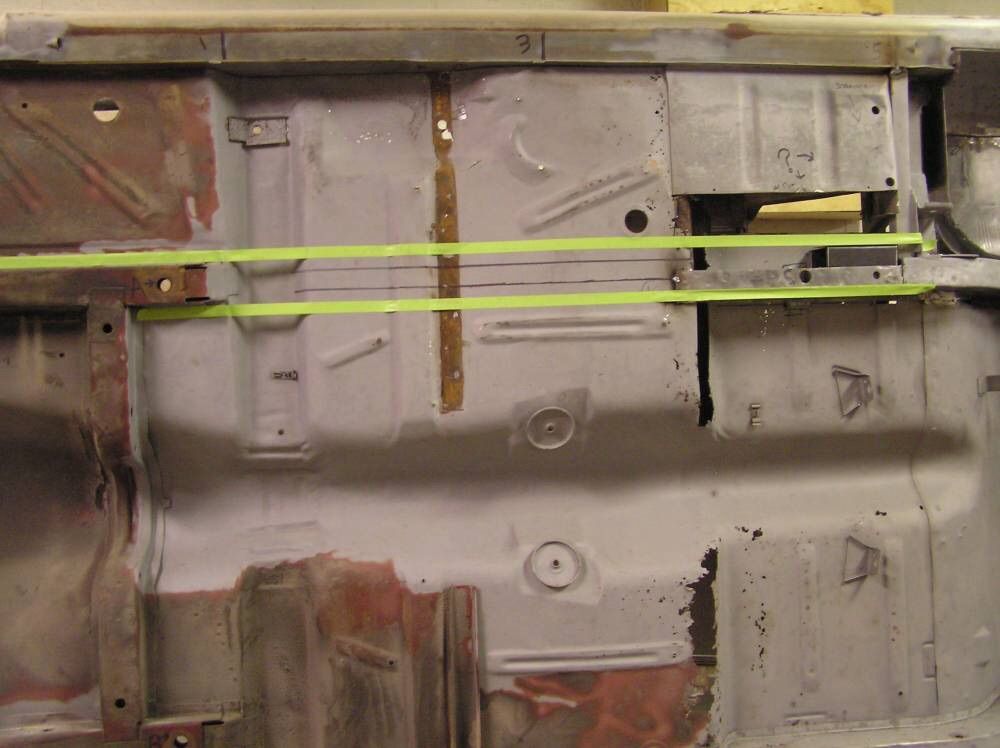
Started on frame connector. Laid sample piece in rear frame rail, With tape marked where I wanted opening. Then laid tape on the inside to figure the flange.
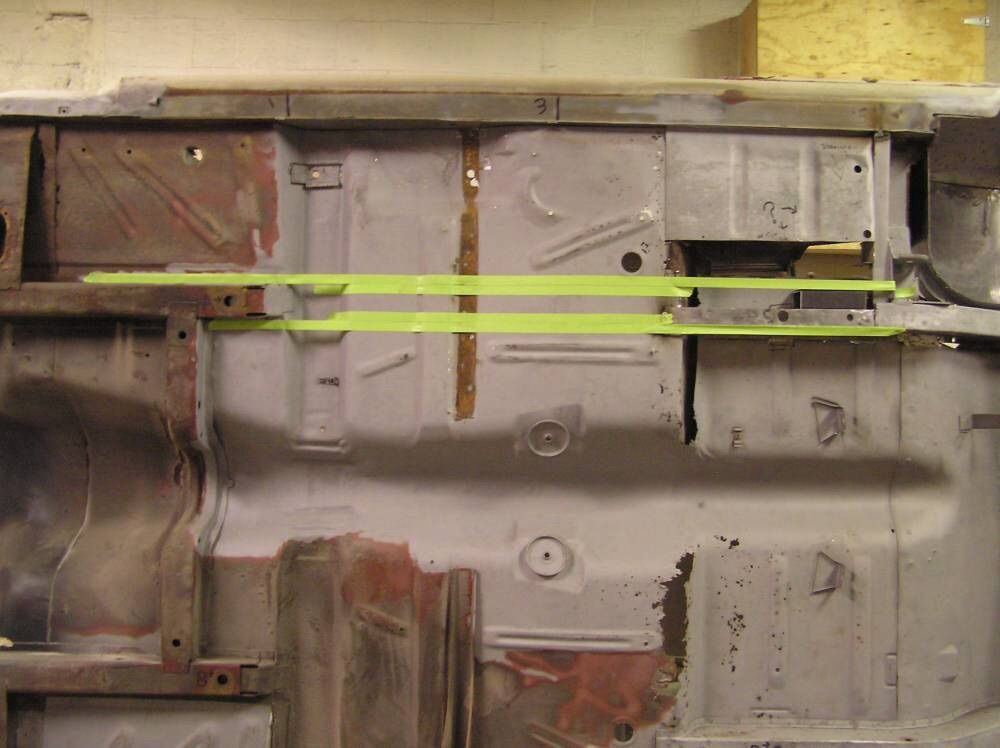
Marked where I wanted to cut. I will cut between the black marker lines. The part between the marker lines and tape will be the flange.
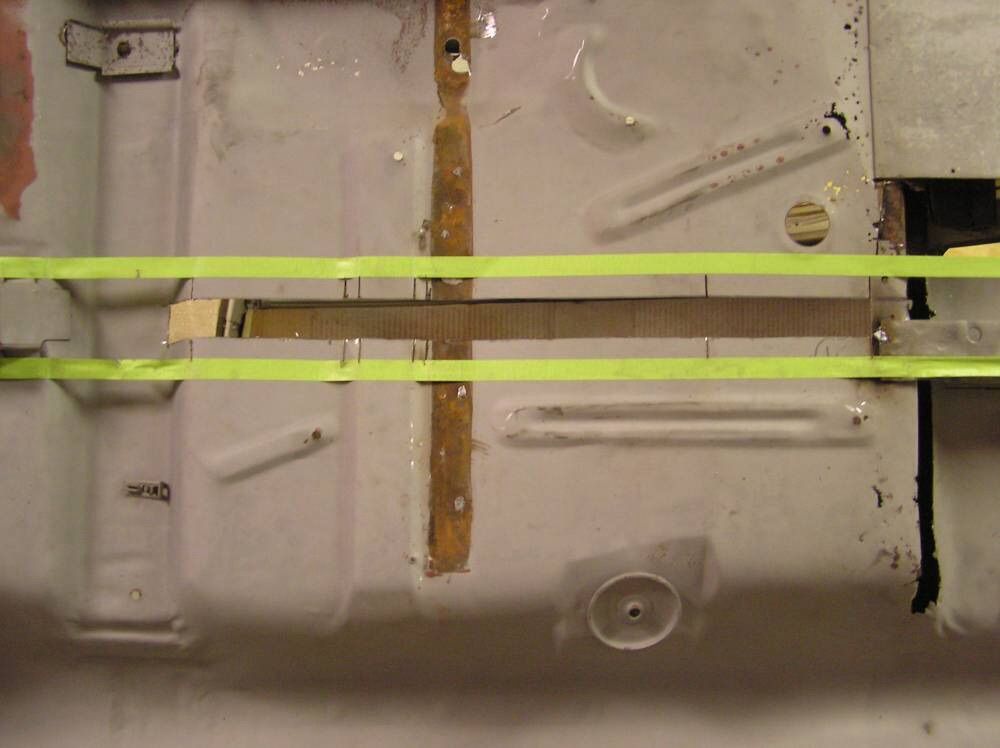
Here is what it looks like after I cut it out. I also cut relief’s where the floor bends so I can bend the flanges
I used various sizes of angle iron clamped from the inside to hammer/bend the flange inward.
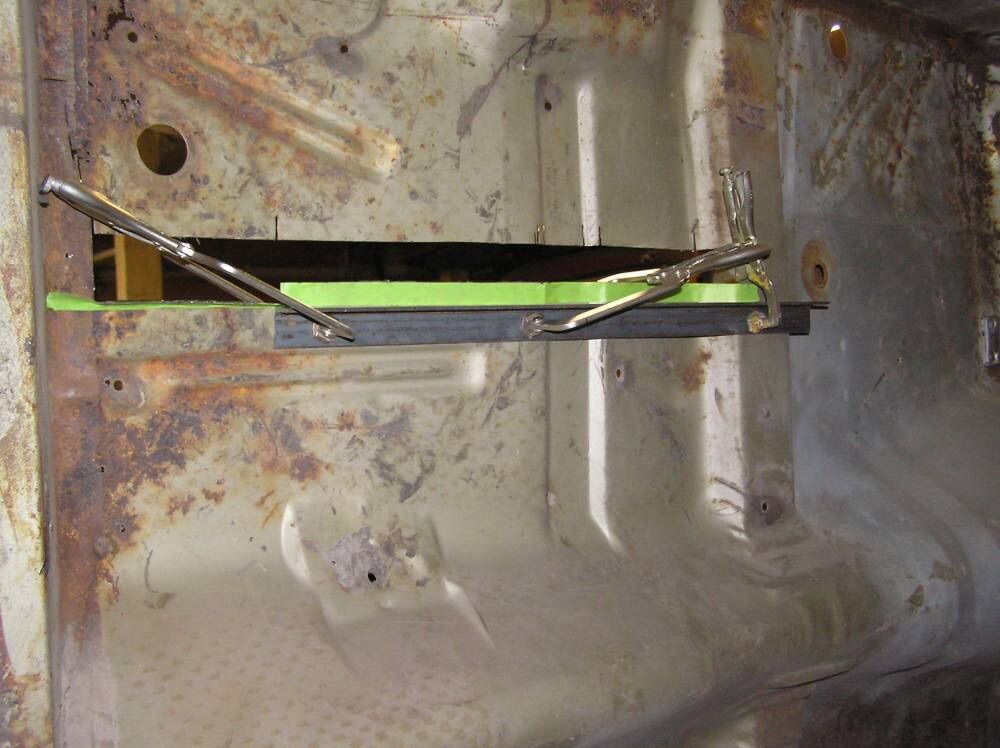
Here is what it looks like after making the flanges. This will make it easier to weld the connector in and give a more finished look from the bottom.
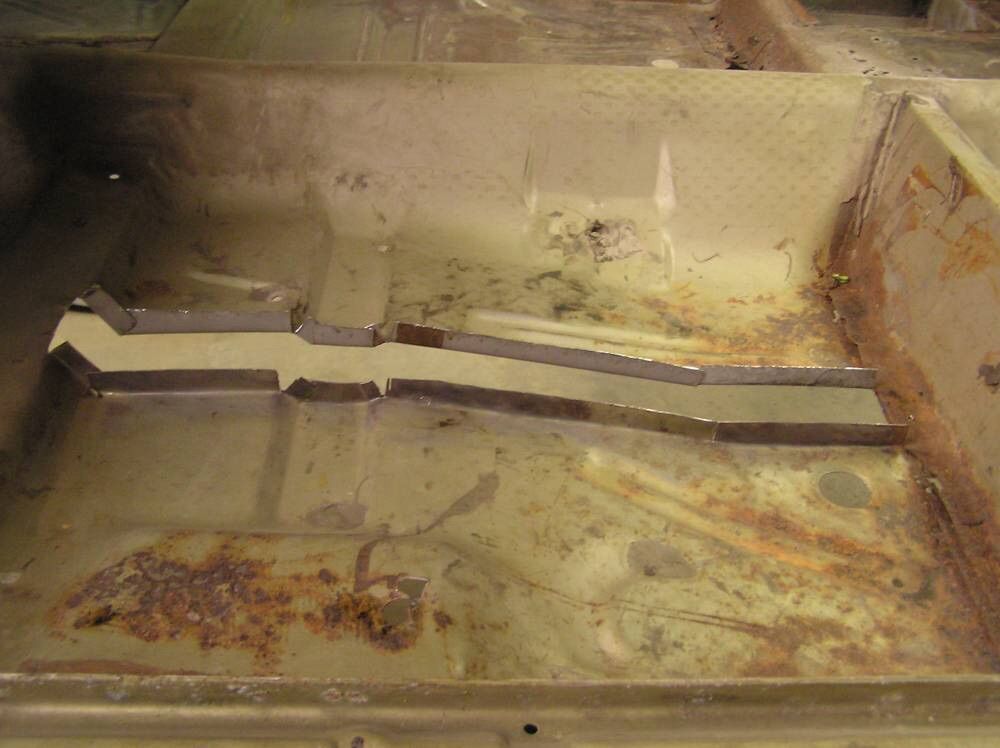
And what the opening looks like from the bottom.
The goal was to get the connector to fit snug/tight but not have to be hammered in. It does fit snug, will actually stay in place by itself and can pull it out by hand. I am going to have to tweak it a little to get it fitting better, But pretty happy with it and it basically worked out how I wanted it. Here it is slid in place.

Welded the well in and finished welding the outer trunk floor

Here is picture from inside trunk. Should be able to fit decent tires when done lol

Started on frame connector. Laid sample piece in rear frame rail, With tape marked where I wanted opening. Then laid tape on the inside to figure the flange.

Marked where I wanted to cut. I will cut between the black marker lines. The part between the marker lines and tape will be the flange.

Here is what it looks like after I cut it out. I also cut relief’s where the floor bends so I can bend the flanges

I used various sizes of angle iron clamped from the inside to hammer/bend the flange inward.

Here is what it looks like after making the flanges. This will make it easier to weld the connector in and give a more finished look from the bottom.

And what the opening looks like from the bottom.

The goal was to get the connector to fit snug/tight but not have to be hammered in. It does fit snug, will actually stay in place by itself and can pull it out by hand. I am going to have to tweak it a little to get it fitting better, But pretty happy with it and it basically worked out how I wanted it. Here it is slid in place.

Last edited by Lou's Comet on Wed Nov 18, 2015 8:55 pm, edited 1 time in total.
-
CALIFORNIA CALIENTE
- Posts: 5933
- Joined: Mon Feb 20, 2006 12:57 am
- Location: Camarillo,California
Re: Lou's 65 Comet Build
Lou;the wheel tub looks AWESOME!!! The way you are doing the frame connectors is going to make the body/chassis very rigid!It makes me feel like I took the EASY way out on mine by using the Alston kit!!! Very NICE work and design!!! ROY.
Real Racecars have 3 pedals


Re: Lou's 65 Comet Build
Lou,
This is inspiring work, although in my reality, I imagine this being time lapsed photos from about 5 years of work instead of near real time as you cruise through this project.
This is inspiring work, although in my reality, I imagine this being time lapsed photos from about 5 years of work instead of near real time as you cruise through this project.

1964 Comet Caliente Convertible
30,000 miles on our rebuild
All Comets start out as dreams...
Re: Lou's 65 Comet Build
very nice work, lou. your attention to detail is going to make you comet a sweet ride. it's amazing how much more you can see and how your building perspective changes when you look at your frame rails and underside from your view as opposed to laying on your back looking at it from a foot or two away. keep the pictures coming
Re: Lou's 65 Comet Build
Amen to that. Do they make Bi-Focal Welding Shields?riverbum wrote:it's amazing how much more you can see and how your building perspective changes when you look at your frame rails and underside from your view as opposed to laying on your back looking at it from a foot or two away.
1964 Comet Caliente Convertible
30,000 miles on our rebuild
All Comets start out as dreams...
Re: Lou's 65 Comet Build
YEPGroover wrote: Do they make Bi-Focal Welding Shields?
At your local welding supply store, maybe even Harbour Frieght
I'd rather do it myself if it's done right or not,,,isn't that what hotrodding is all about

-
CALIFORNIA CALIENTE
- Posts: 5933
- Joined: Mon Feb 20, 2006 12:57 am
- Location: Camarillo,California
Re: Lou's 65 Comet Build
Fred beat me to it!! I use 'cheater' [magnifiers] lenses in my hood so I can see up close!! ROY.
Real Racecars have 3 pedals
Re: Lou's 65 Comet Build
What super looking work,,this is so much more impressive than anything you see on those TV shows,imo,Stacey eat your heart out.......pop

pop/glenda
-
Lou's Comet
- Posts: 1544
- Joined: Sat Nov 26, 2011 8:56 pm
- Location: Jeannette, Pa.
Re: Lou's 65 Comet Build
Thanks Roy, Car been sitting in back of shop for 5+ years had plenty time to plan and figure design, Alston kit doesn't sound EASY, lolCALIFORNIA CALIENTE wrote:Lou;the wheel tub looks AWESOME!!! The way you are doing the frame connectors is going to make the body/chassis very rigid!It makes me feel like I took the EASY way out on mine by using the Alston kit!!! Very NICE work and design!!! ROY.
Thanks Groover, progress prob going to slow for awhile, holidays and customer work.Groover wrote: This is inspiring work, although in my reality, I imagine this being time lapsed photos from about 5 years of work instead of near real time as you cruise through this project.
The rotisserie has spoiled me more than I thought, I have a customer's car, 71 mustang ragtop, replacing inner rockers and floors. Was laying under it today and thought this really sucks.riverbum wrote:very nice work, lou. your attention to detail is going to make you comet a sweet ride. it's amazing how much more you can see and how your building perspective changes when you look at your frame rails and underside from your view as opposed to laying on your back looking at it from a foot or two away. keep the pictures coming
Thank's Pop, Who's Stacey?popscomet wrote:What super looking work,,this is so much more impressive than anything you see on those TV shows,imo,Stacey eat your heart out.......pop
Re: Lou's 65 Comet Build
HE's got one of those TV shows,that builds hot rods and such, but he's got all the tools and equipment and motors ,or what ever else he needs furnished ,just for advertisment,,,,you and your way of doing is so so so much more impressing,you flat A--, do nice work...really enjoy your PIC's.......thank-you,,,,,pop
pop/glenda
Re: Lou's 65 Comet Build
'63 Comet Hardtop
Re: Lou's 65 Comet Build
THATS HIM ! another thing about him that galded my butt,was----everything was funny ,he laughed after saying any thing,,,,it reminded me of my brother's 1st wife,get hurt she'd laugh,,I go in thier house,ask--when you gonna wash the dishes,,she laugh, when you gonna pick up the place,,she laugh ,she had a twin sister,,same way, didn't care for neither one. Maybe thats why I don't care for the show....Oh well..I feel better now........getting on here is better then lyeing on a sofa,while talking to a goofy acting guy ,wearing a white jacket,holding a clip board while wearing RED tennis shoes....I'm on a ROLL,,happy holidays to all......POP.................lol
pop/glenda

Re: Lou's 65 Comet Build
Lou keep up the pics, great job and your wheel tubs look great.
Roger
Every old welder needs cheater lens in their tool box.
Roger
Every old welder needs cheater lens in their tool box.
65 comet 7.61@96mph 1/8
Made in Canada, Built for speed.
Tweaked65 on instagram
https://youtu.be/JCVwEitXSi4

Made in Canada, Built for speed.
Tweaked65 on instagram
https://youtu.be/JCVwEitXSi4