Lavron's '64 Build Thread

The Era of The Square Body Racing Comets
lavron
Site Admin
Posts: 4710
Joined: Sat Nov 01, 2003 9:17 am
Location: Missouri, Ozarks
Contact:

Re: Lavron's '64 Build Thread

Post by lavron »

Picture for above post, grill-less, with the "new" core support.
Image
I know this is odd but I feel a little nervous cutting the front of my car off, don't know why I have cut out bigger chunks already and replaced them :roll:

And a question, anyone know what these little nylon inserts are called that headlight door attaches too, and who has them?
Image

As you can see one has double holes, several are cracked and one is missing (it was there earlier, I may need to look around on the floor). I need to get all this stuff refurbished while I have it off.

See Ya,
Mike
Mike's build thread
viewtopic.php?f=9&t=13058
Image

Lou's Comet
Posts: 1540
Joined: Sat Nov 26, 2011 8:56 pm
Location: Jeannette, Pa.

Re: Lavron's '64 Build Thread

Post by Lou's Comet »

Nylon nuts. My local auto supply sells them in different sizes, if yours doesn't here is a link.

https://www.amazon.com/Ford-Nylon-Nuts- ... B004HBPULM

The one with double holes isn't factory, someone drilled the extra hole. Maybe it was stripped or they didn't have correct screw? But not factory.

Your making nice progress!!! Going to have a cool car before ya know it.

Lou

lavron
Site Admin
Posts: 4710
Joined: Sat Nov 01, 2003 9:17 am
Location: Missouri, Ozarks
Contact:

Re: Lavron's '64 Build Thread

Post by lavron »

Lou's Comet wrote:The one with double holes isn't factory, someone drilled the extra hole. Maybe it was stripped or they didn't have correct screw?
Probably I did that, I just missed the screw hole or, like you say it was stripped out. Thought while I am doing this I may as well replace all those sort of things I can that have had 50+ years of use.

I saw the U-bolts(?) that retain the grill to the headlight mount in related items on that page with the nylon nuts, only ones I can find are the extruded ones, mine has a square nut attached to a clip (well I have one not attached anymore) will the extruded ones work? I will have to go out and measure the original not sure what size they are but they take a 1/2" socket to remove them and a 1/2" wrench will fit the square nut (thankfully there is enough room to reach back there with a wrench)
Lou's Comet wrote:Your making nice progress!!! Going to have a cool car before ya know it.
Thanks.

See Ya,
Mike
Mike's build thread
viewtopic.php?f=9&t=13058
Image

Lou's Comet
Posts: 1540
Joined: Sat Nov 26, 2011 8:56 pm
Location: Jeannette, Pa.

Re: Lavron's '64 Build Thread

Post by Lou's Comet »

lavron wrote:
I saw the U-bolts(?) that retain the grill to the headlight mount in related items on that page with the nylon nuts, only ones I can find are the extruded ones, mine has a square nut attached to a clip (well I have one not attached anymore) will the extruded ones work? I will have to go out and measure the original not sure what size they are but they take a 1/2" socket to remove them and a 1/2" wrench will fit the square nut (thankfully there is enough room to reach back there with a wrench)

See Ya,
Mike
Think you are referring to J nuts? On the right in the photo on this link with "CIP9" stamped on it?

https://www.amazon.com/dp/B07JX6SNXR/re ... il_2?psc=1

Yes the extruded ones will work as long as right thread. If you want the ones with the nut attached they are still out there but the others are more common

Lou

lavron
Site Admin
Posts: 4710
Joined: Sat Nov 01, 2003 9:17 am
Location: Missouri, Ozarks
Contact:

Re: Lavron's '64 Build Thread

Post by lavron »

Lou's Comet wrote:Think you are referring to J nuts? On the right in the photo on this link with "CIP9" stamped on it?
Yes similar, once you click that link there are more and then I searched as well and found these.

https://www.amazon.com/25-Extruded-Nuts ... ive&sr=1-8

Again I am not sure they are the correct size and will measure mine, I may change all my bolts at the same time if they are very corroded but would like to stay close to factory original, as long as the extruded ones don't strip out it looks like they may be a better solution that the square nut ones that like to twist off the nut.

See Ya,
Mike
Mike's build thread
viewtopic.php?f=9&t=13058
Image

lavron
Site Admin
Posts: 4710
Joined: Sat Nov 01, 2003 9:17 am
Location: Missouri, Ozarks
Contact:

Re: Lavron's '64 Build Thread

Post by lavron »

This is very early and I hesitated even showing it because I am afraid that it will confuse more than instruct. I worked some more on the intake modification today, what this is a picture of is an impression, basically, of the intake using Bondoglass.
Image
I still have a lot to do as I said but I need to start with getting the side profiles thicker and getting a better impression around the original carb mount, I am not going to try and explain that but will show you as I go.

This is a pattern to be cast in aluminum, BTW.

See Ya,
Mike
Mike's build thread
viewtopic.php?f=9&t=13058
Image

lavron
Site Admin
Posts: 4710
Joined: Sat Nov 01, 2003 9:17 am
Location: Missouri, Ozarks
Contact:

Re: Lavron's '64 Build Thread

Post by lavron »

Hopefully this montage of picture will help it start to make my intake project make more sense in what I am trying to do.

Image

Just about done with the lower half (below the part line) and as you can see I have started on the upper part.

There is a guy at church that has foundry furnace but said I would need a 20# aluminum crucible and my own sand, he usually does lost wax castings like sculptures in bronze. Now to dig out all the scrap aluminum I can find, I think I will melt the old pistons from the 250 for this project because it seems like it would be the right thing to do to keep them with the car. :roll:

See Ya,
Mike
Mike's build thread
viewtopic.php?f=9&t=13058
Image

User avatar
poboyjo65
Moderator
Posts: 7058
Joined: Thu Oct 20, 2011 9:40 pm
Location: Camden, Tenn.

Re: Lavron's '64 Build Thread

Post by poboyjo65 »

Does the fuel mixture from all 3 carbs have to travel thru just the center original hole? if so I'd think for all the trouble your going thru you could make a couple more passage ways so the front 2 & back 2 cyl get equally tuned intake ports,more closely to the center 2 lengths. but that would be a whole lot more work & headache to get right .

But those 3 deuces look great !! :D
Image
Johno

lavron
Site Admin
Posts: 4710
Joined: Sat Nov 01, 2003 9:17 am
Location: Missouri, Ozarks
Contact:

Re: Lavron's '64 Build Thread

Post by lavron »

poboyjo65 wrote:Does the fuel mixture from all 3 carbs have to travel thru just the center original hole?
No, the intake will be epoxied and bolted to the original intake and holes bored under each carb.

See Ya,
Mike
Mike's build thread
viewtopic.php?f=9&t=13058
Image

User avatar
poboyjo65
Moderator
Posts: 7058
Joined: Thu Oct 20, 2011 9:40 pm
Location: Camden, Tenn.

Re: Lavron's '64 Build Thread

Post by poboyjo65 »

OK. guess I jumped the gun or didnt scroll back far enough.
Image
Johno

lavron
Site Admin
Posts: 4710
Joined: Sat Nov 01, 2003 9:17 am
Location: Missouri, Ozarks
Contact:

Re: Lavron's '64 Build Thread

Post by lavron »

Was doing a bunch of non car related things today but I was out in the shed welding on my mower so I made a new throttle arm. The hardest part of this was making the oblong/oval hole where the throttle plate comes through.

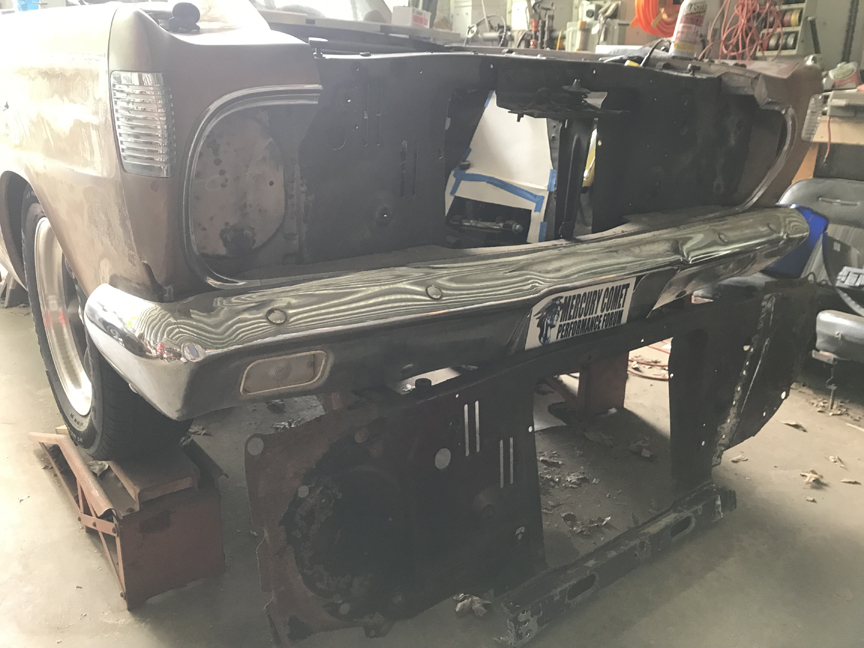
Just to recap, I will be removing the auto chokes from the front and rear carbs as well and making some sort of manual choke setup. Doing non-progressive linkage. And the aluminum intake will be direct mounted to the cast on intake with JB Weld (probably) and screws going down into the original intake and holes bored down below each carb.

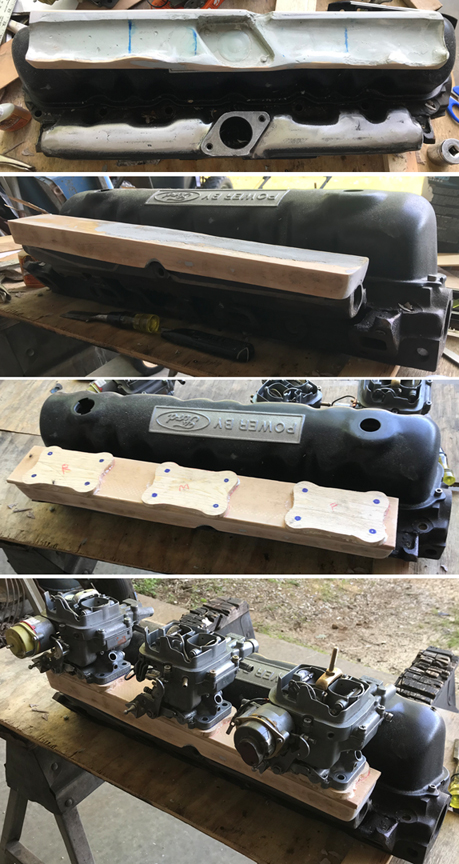
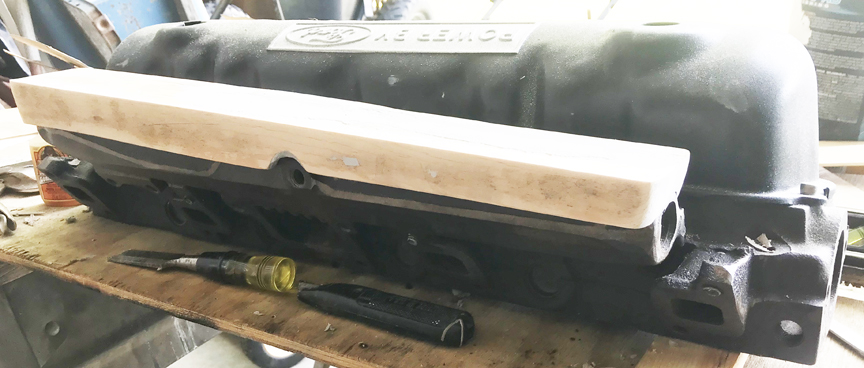
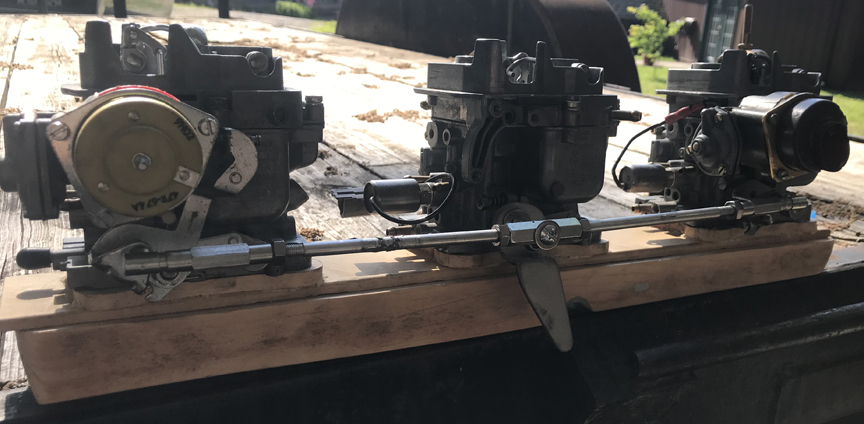
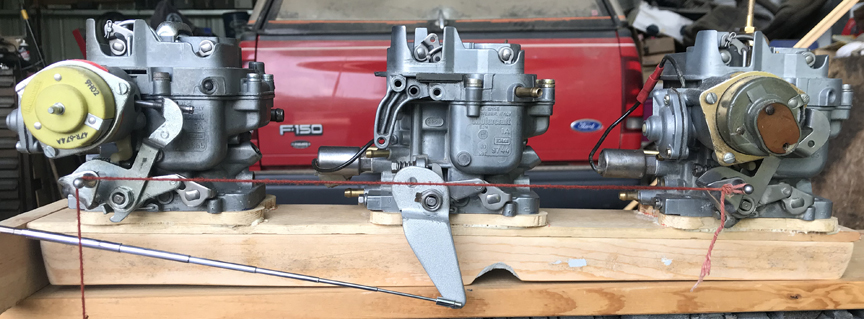
In the picture the red string indicates the rod that will go between the carbs, you can see the hole in the center arm where I will mount some kind of stud and all the linkage will be adjustable (hard to explain you will just have to follow along) the magnetic grabber represents the throttle cable and some where in the back I will make a cable mount.

Image

I have around 3 1/2" of travel in the pedal so the arm length should be about the correct length, I will drill a hole once I start the install, if I messed up the length I can weld or bolt an extension on, everything should clear the header ok but I have not mocked with the header on there yet.

See Ya,
Mike
Mike's build thread
viewtopic.php?f=9&t=13058
Image

Cobraguy
Posts: 39
Joined: Wed Sep 12, 2018 10:35 am
Location: El Cajon CA

Re: Lavron's '64 Build Thread

Post by Cobraguy »

Mike I think the JB Weld will fail near the exhaust ports. I once tried an intake manifold repair with it on a 223 in a f100. The intake manifold had cracked where the intake mates to the exhaust right under the carb. The JB Weld did not handle the heat and boy did it stink.

lavron
Site Admin
Posts: 4710
Joined: Sat Nov 01, 2003 9:17 am
Location: Missouri, Ozarks
Contact:

Re: Lavron's '64 Build Thread

Post by lavron »

Cobraguy wrote:Mike I think the JB Weld will fail near the exhaust ports. I once tried an intake manifold repair with it on a 223 in a f100. The intake manifold had cracked where the intake mates to the exhaust right under the carb. The JB Weld did not handle the heat and boy did it stink.
It sits quite a ways above the exhaust but I may do high temp RTV if my tolerances are tight enough. It will be firmly attached with bolts/screws so I really don't need the epoxy to hold it on there just something to seal everything.

I brightened this picture up quite a bit so everyone can see how far up any epoxy would be, remember the bottom of the intake is an impression of the top of the cast on intake.
Image

I picked up the stuff today to build my carb linkage so maybe I will have that built sometime soon. This would just be the part that ties the 3 carbs together.

I have never messed with a cable throttle before so this is new territory for me, I am not really sure how sharp of turns I can make so this may be more fun than I imagine. :roll:

See Ya,
Mike
Mike's build thread
viewtopic.php?f=9&t=13058
Image

lavron
Site Admin
Posts: 4710
Joined: Sat Nov 01, 2003 9:17 am
Location: Missouri, Ozarks
Contact:

Re: Lavron's '64 Build Thread

Post by lavron »

Little time today was helping some friends move but I got out early this morning and put this linkage together.

Image

I bought the 2 quick disconnects(?) at O'Reillys and the 1/4" aluminum rod, all thread connector and screws/nuts at the lumber yard. I cut the rod and threaded it (kinda boogered up the one clamping it with Visegrips) drilled a hole in the connector so a screw would would pass through.

It is ok but I am not really happy with the center link I think it will have a tendency to bind If everything is not perfectly aligned, I found these and thought about getting one but seem a bit pricey and I don't have a 1/4-28 lefthand die.https://midwestcontrol.com/shop/MCR-4

I will keep working on it may be I can come up with a better center link.

See Ya
Mike
Mike's build thread
viewtopic.php?f=9&t=13058
Image

lavron
Site Admin
Posts: 4710
Joined: Sat Nov 01, 2003 9:17 am
Location: Missouri, Ozarks
Contact:

Re: Lavron's '64 Build Thread

Post by lavron »

Little more work on the intake pattern, getting there I think.
Image

Should be down to mostly sanding and some light filler then getting some flasks built and mounting it on a board.

See Ya,
Mike
Mike's build thread
viewtopic.php?f=9&t=13058
Image

Post Reply