https://postimg.cc/gallery/3Tn0JJ9
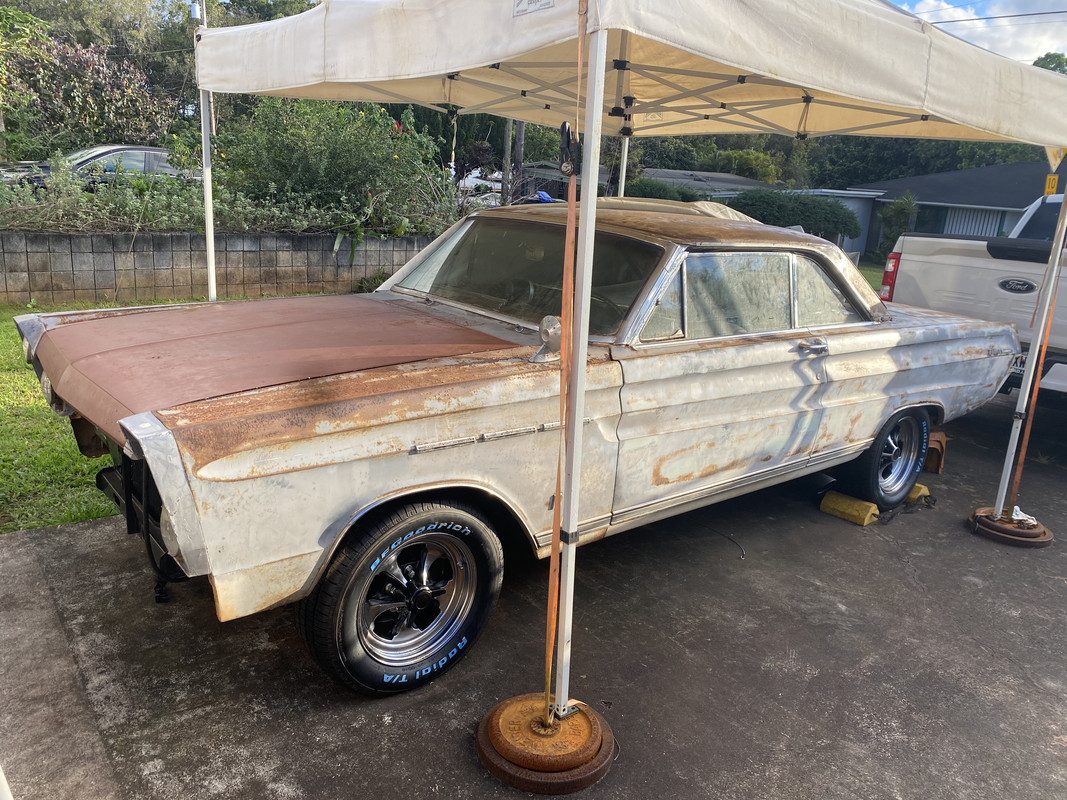
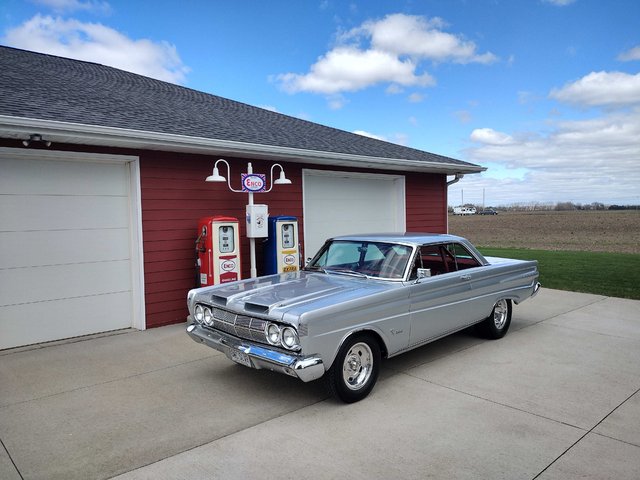
Here is the car’s stance after changing the front coil springs back to the original hard top springs.
Thanks, Ed
Introduce myself
-
Eddiecomet
- Posts: 75
- Joined: Mon Jun 01, 2020 6:31 pm
- Location: Oahu, Hi
Re: Introduce myself
Should send one picture at a time,
Ed

-
Ripper0863
- Posts: 9
- Joined: Wed Mar 08, 2023 1:50 pm
-
Boss/Cyclone

- Site Admin
- Posts: 2744
- Joined: Thu Oct 19, 2006 9:55 pm
- Location: South Central Michigan (Near Michigan International Speedway)
Re: Introduce myself
I like it, looks solid and ready for action.
1965 Mercury Cyclone former drag car, 1971 Boss 351 engine, 4 speed, ladder bars, etc. Now returned to a street car.

Larry
Larry
-
Eddiecomet
- Posts: 75
- Joined: Mon Jun 01, 2020 6:31 pm
- Location: Oahu, Hi
Re: Introduce myself
Aloha guys,
I’m also working on my head liner, my liner was the cardboard type that comes in three sections. A large center section and the two side pieces with the two strips running from the front to the back. Any ideas or information on head liners? Also was looking from rubbers seals for the trunk, doors and later for the windows. Let me know. I can’t wait to drive her already!
Mahalo, Eddie
Re: Introduce myself
I have the same setup, so I went to Menards and bought a 4 x 8 sheet of flexible thin plastic and cut out a piece that fit the middle area perfect. I also bought some aluminum flat pieces of metal that where in the paneling department. I bought some headliner material and glued the material to the plastic and to the original side pieces, then screwed the flat metal to the rib that runs along the top of the car. It looks very good but it was a pain in the a##.Eddiecomet wrote: ↑Wed Mar 22, 2023 11:44 pmAloha guys,
I’m also working on my head liner, my liner was the cardboard type that comes in three sections. A large center section and the two side pieces with the two strips running from the front to the back. Any ideas or information on head liners? Also was looking from rubbers seals for the trunk, doors and later for the windows. Let me know. I can’t wait to drive her already!
Mahalo, Eddie
The dome light actually holds up the center. I made some boards to hold the center piece up like you would when putting sheet rock on the ceiling.
Here is a picture of it before it was finished.
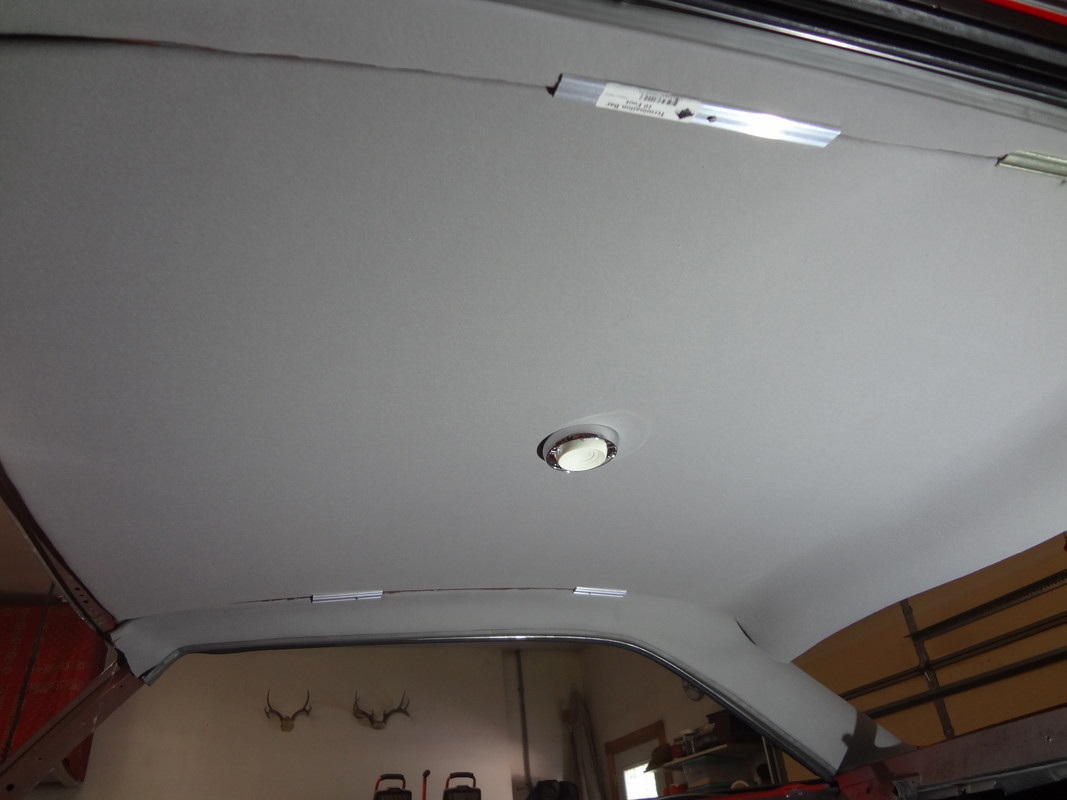
Tom
tomb's 65
-
Eddiecomet
- Posts: 75
- Joined: Mon Jun 01, 2020 6:31 pm
- Location: Oahu, Hi
Re: Introduce myself
Aloha Tomb22,
It looks great! I read somewhere else about using the plastic for the center. My side pieces are damaged and not sure if I can reuse them, has water damage and ripped. Do you think you could use the plastic for the sides also? Send me a picture of your finished head liner, I need inspiration! When I see everybody’s rides and all the DIY stuff that they do, it pumps me up! I want to thank all the guys for charming in and inspiring me to push it so I can hit the road. I had the very first test run around my block when I had to move my car into the garage for the final front end adjustments and Grandma Helen drove and shifted beautifully! No lights, no front fenders, running off a gallon of fuel. My front end was really close. I had to adjust the passenger side 3/32” which put my p/s camber at -.25, d/s at -.5, my caster ended up at +3.5. I need only to do the final toe in as on my test run, my steering was off a little. She’s coming along! Love you guys and God bless all of you!
Mahalo Nui Loa! Eddie
Re: Introduce myself
You could just convert to a conventional style headliner using a kit like this:
https://www.macsautoparts.com/conversio ... 888-1.html
With the time and aggravation trying to save or remake the cardboard style you might be money ahead using the kit.
Jim
https://www.macsautoparts.com/conversio ... 888-1.html
With the time and aggravation trying to save or remake the cardboard style you might be money ahead using the kit.
Jim
‘64 Cyclone/ Boss 302,quads,4spd, Winters 9”
Re: Introduce myself
Eddiecomet wrote: ↑Sun Apr 16, 2023 12:40 pmAloha Tomb22,
It looks great! I read somewhere else about using the plastic for the center. My side pieces are damaged and not sure if I can reuse them, has water damage and ripped. Do you think you could use the plastic for the sides also? Send me a picture of your finished head liner, I need inspiration! When I see everybody’s rides and all the DIY stuff that they do, it pumps me up!
When I bought the plastic originally I figured I would also use it for the sides but it seemed like a lot of work to get the bend in it like the original cardboard. I'm sure you could heat up the plastic and get the bend in it and it would stay. Maybe you could rebuild your side pieces with plaster paris and paper. Just a thought. Anyway You can buy headliner material of different colors and different textures pretty cheap.
Here are some pictures of the finished product.
Hope this helps you get motivated
Tom


tomb's 65
-
Eddiecomet
- Posts: 75
- Joined: Mon Jun 01, 2020 6:31 pm
- Location: Oahu, Hi
Re: Introduce myself
Aloha Tom,
The head liner came out great! I love the role bars and seat belts. I want to install shoulder strap seat belts but didn’t want to install a role bar. Not sure how I am going to accomplish that yet, or I may just keep it stock with the two front lap belts and add some in the rear. I finished up the alignment and I’m ready to start working on the body again and interior.
Thanks again Tom! Let do this, Eddie
-
Jims65cyclone

- Posts: 2772
- Joined: Sun Nov 23, 2014 10:29 pm
- Location: Lexington, SC
Re: Introduce myself
Hey, Eddie! I bookmarked a couple of approaches that some other guys used to install 3-point seat belts in their cars.
The first is Doug's 65 Cyclone where he added an attachment point to the roof. It's about 3/4 of the way down the page.
https://www.cometcentral.com/forum/view ... &start=345
The second is Joe's (Comethead) 65 that he added the attachment point for the shoulder strap to the B-pillar. It's about 1/4 of the way down the page.
https://www.cometcentral.com/forum/view ... &start=330
I'll probably end up using one method or the other in mine.
Jim

-
Eddiecomet
- Posts: 75
- Joined: Mon Jun 01, 2020 6:31 pm
- Location: Oahu, Hi
Re: Introduce myself
Aloha Jim,
That was some great information. I like the retractable system as it doesn’t get in the way of passengers getting in the back seat, but the belt is right in the middle of the window. I’m thinking about maybe going that route.
Mahalo again, Eddie
That was some great information. I like the retractable system as it doesn’t get in the way of passengers getting in the back seat, but the belt is right in the middle of the window. I’m thinking about maybe going that route.
Mahalo again, Eddie
-
Eddiecomet
- Posts: 75
- Joined: Mon Jun 01, 2020 6:31 pm
- Location: Oahu, Hi
 [/url]

-
Eddiecomet
- Posts: 75
- Joined: Mon Jun 01, 2020 6:31 pm
- Location: Oahu, Hi
Re: Introduce myself
Aloha guys,
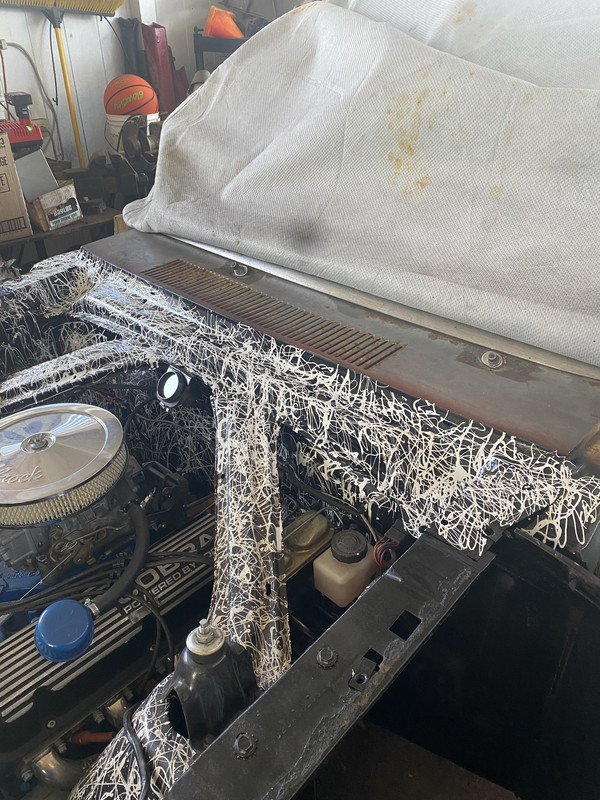
Just did some rust repair and finished up the vent area. Got it all splatter painted and installed the hood back on. I can start putting the front back together. Next I will attack the rear tail section and deal with the head liner. I will take a picture of the rotten tail section. The donor had a good tail section which I will replace it with.
Aloha, Eddie