Doug's 65 Cyclone build
Re: Doug's 65 Cyclone build
I 2nd all that has been said,,,,great info for future projects...thank you......POP

pop/glenda
-
Jims65cyclone

- Posts: 2764
- Joined: Sun Nov 23, 2014 10:29 pm
- Location: Lexington, SC
Re: Doug's 65 Cyclone build
Thanks for details and pics, Doug. Bookmarking your thread for future reference. 
Jim
Jim

Re: Doug's 65 Cyclone build
Thank you all for the kind words and encouragement. I have to go deeper into this car than I planned but after looking at your finished cars and reading your build threads I am motivated to make this car as good as my abilities and resources will allow. I have most of the skillset to build this car and it will just take a little longer and take a little more money than I had planned. A few comments on the build as it goes forward-I got into the 289 motor last weekend and three of the main cap bolts were backed out and completely loose. Must have been riding on the oil pan. That with the water in the oil when I bought the car has removed that motor from consideration for further use. Since I am shaving the shock towers anyway it looks like a good time to consider a 351 Windsor motor. I do all my own body and paint and since this car was born red on white I am thinking about painting it the same color of PPG Concept custom mixed red that I painted my 67 Barracuda. I managed to save the stock bucket and back seats and will have them upholstered in white with grey accent interior colors and carpet. I have all the suspension on the way and will be doing the typical suspension from John at Opentracker. He has been a great help. Anyway as I have previously stated I document all my builds prodigiously and will be posting every step of the build here, while reading all the great posts that you folks post as well:-) The build thread on the Viper blue 65 404 post car is on TFFN. (I'm not sure they are still operational) The complete build thread for my 67 Barracuda coupe is on FABO under DesertRat's 67 notch build. Thank you all for accepting me into your community and I look forward to building this car (which I Love) and sharing it all with you.
---------------DR-----------has left the building:-)---------------
---------------DR-----------has left the building:-)---------------
Oz never gave nothing to the tin man that he didn't-didn't already have-
Re: Doug's 65 Cyclone build
I guess the internet did not like my last post because I got an error and lost it, so I will just say it good to have you and others here willing to share to make this an awesome site, it is a community effort.
See Ya,
Mike
See Ya,
Mike

Re: Doug's 65 Cyclone build
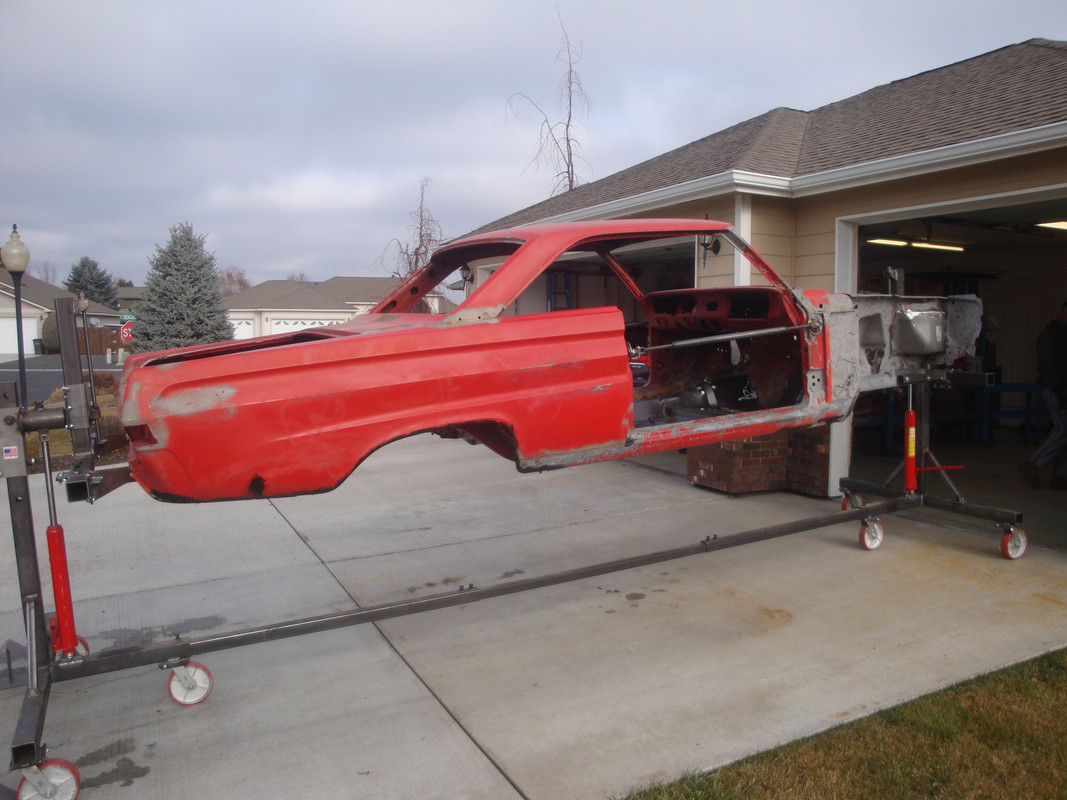
The floorpan is in and secure so it is time to install the subframe connectors. I selected Tin Man Fabrications but I think any suitable connectors for our cars would be fine, even fabrication of our own. The main thing is to understand how they go in and what they do. The attachment points at the rear are a given on our cars but the front is different for the Comets as compared to our sister cars. The front subframe is smaller depth wise than the connectors so using a skinny wheel one must cut the bottom our of the subframe up to the crossmember. I did all this while the car was on the stands but the best photos are after I had the car on the rotisserie.
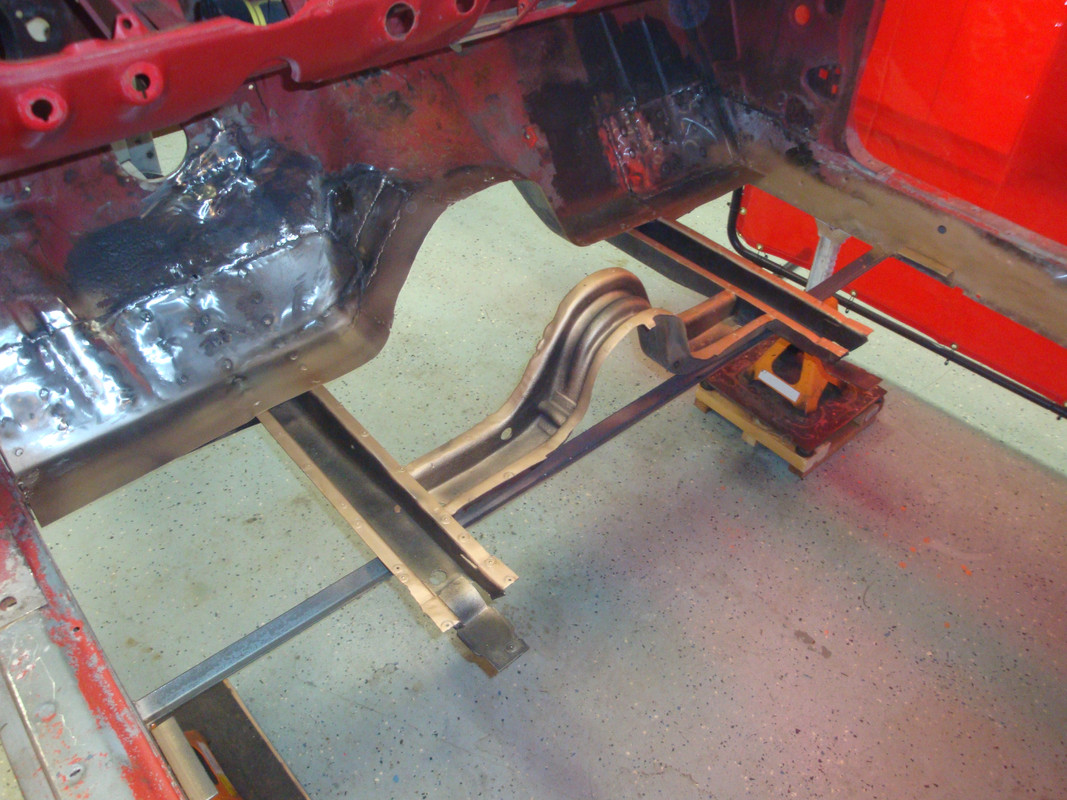
The ends of the front subframe are opened up while it is easy for me. I cut the bottom out after the floor was in.
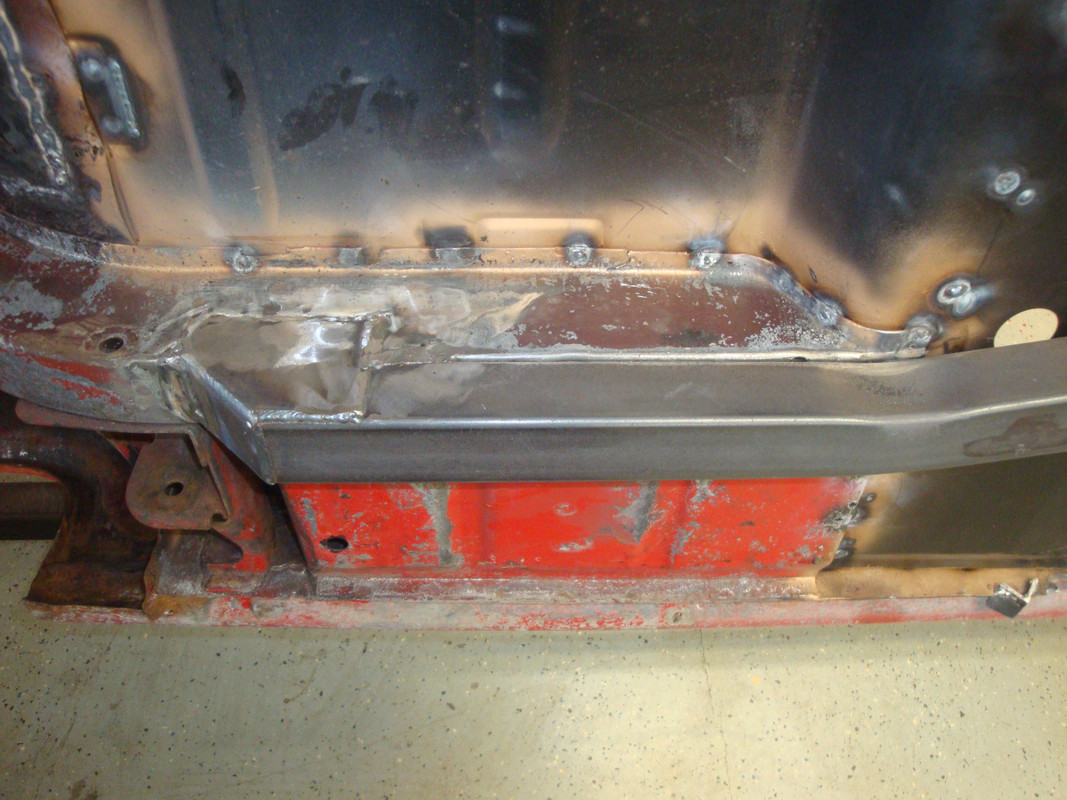
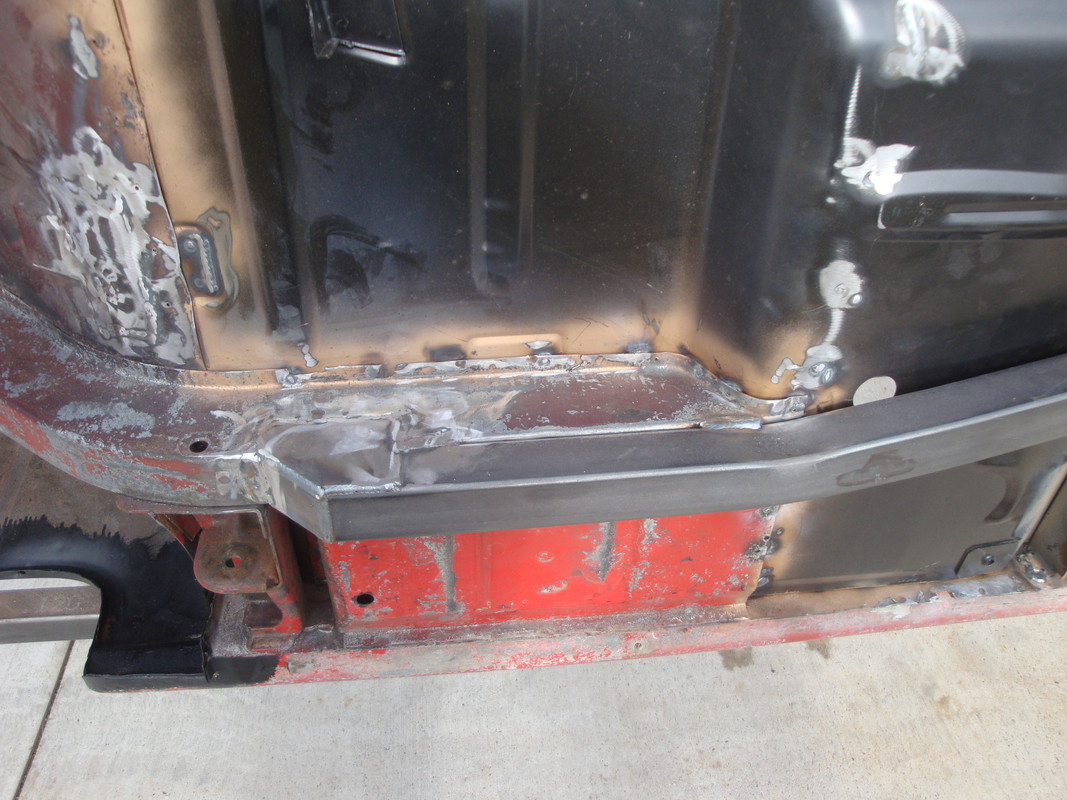
The above are the finished attachment at the rear torque boxes.

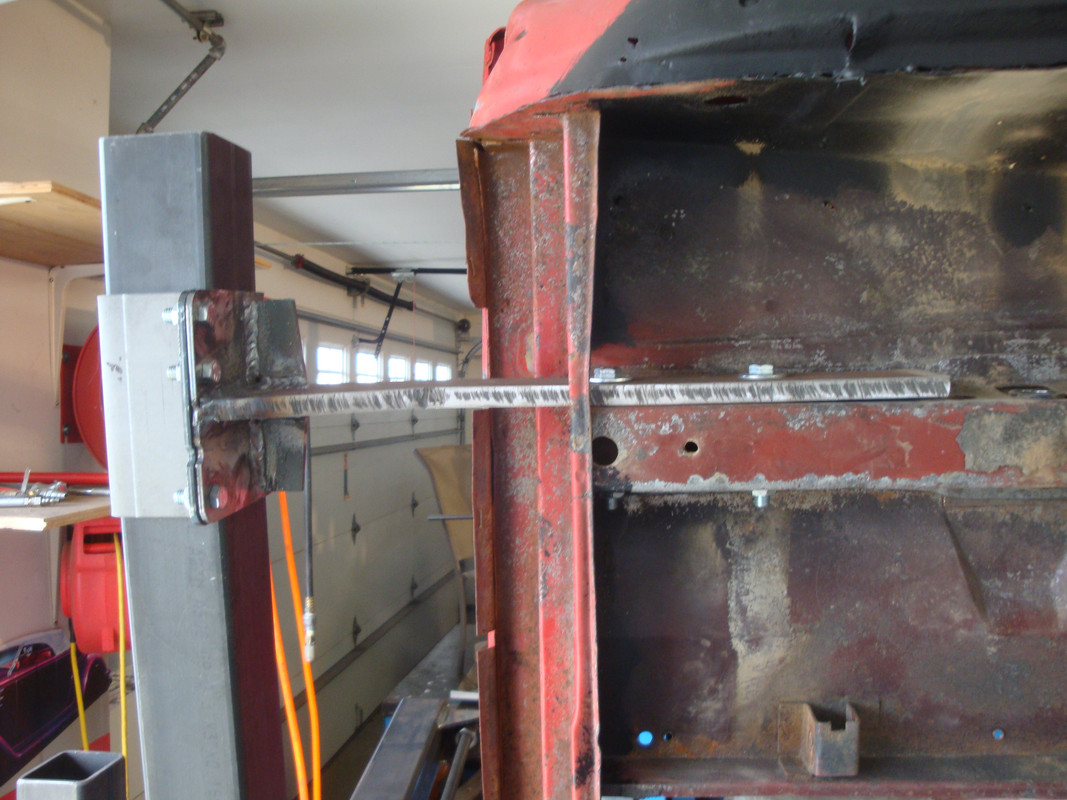
The above is the finished attachment at the front subframe. The connectors insert into the factory subframe 3" past the crossmember location.
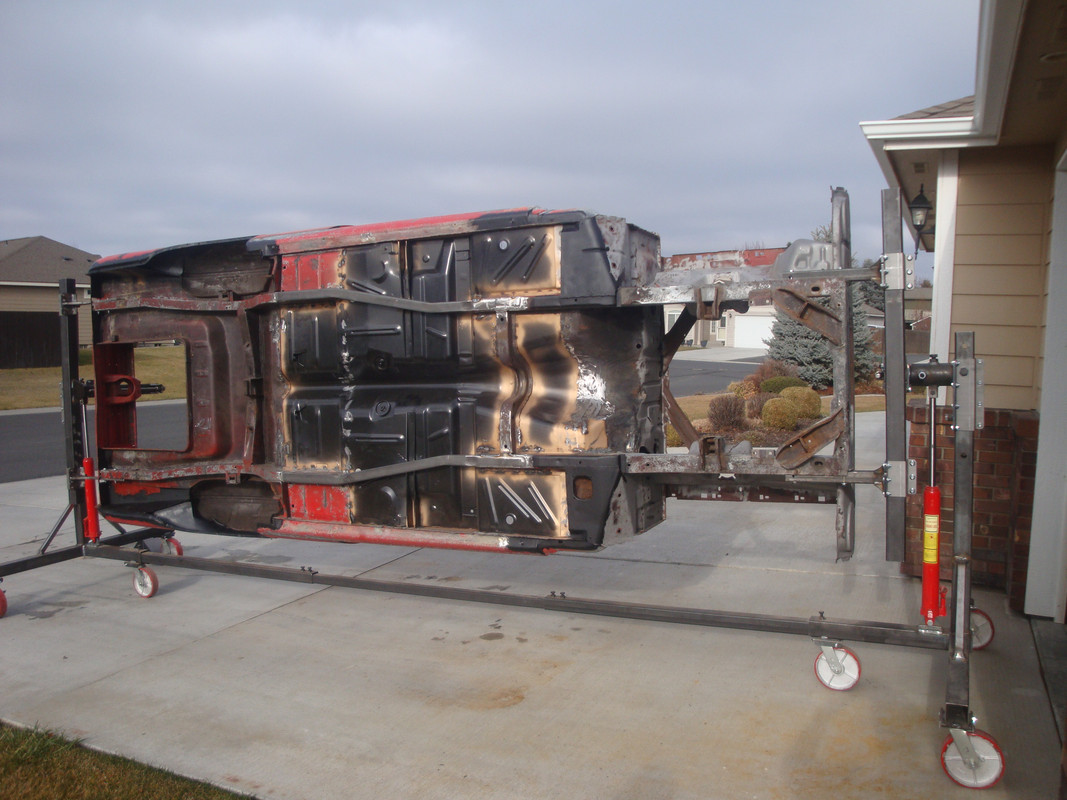
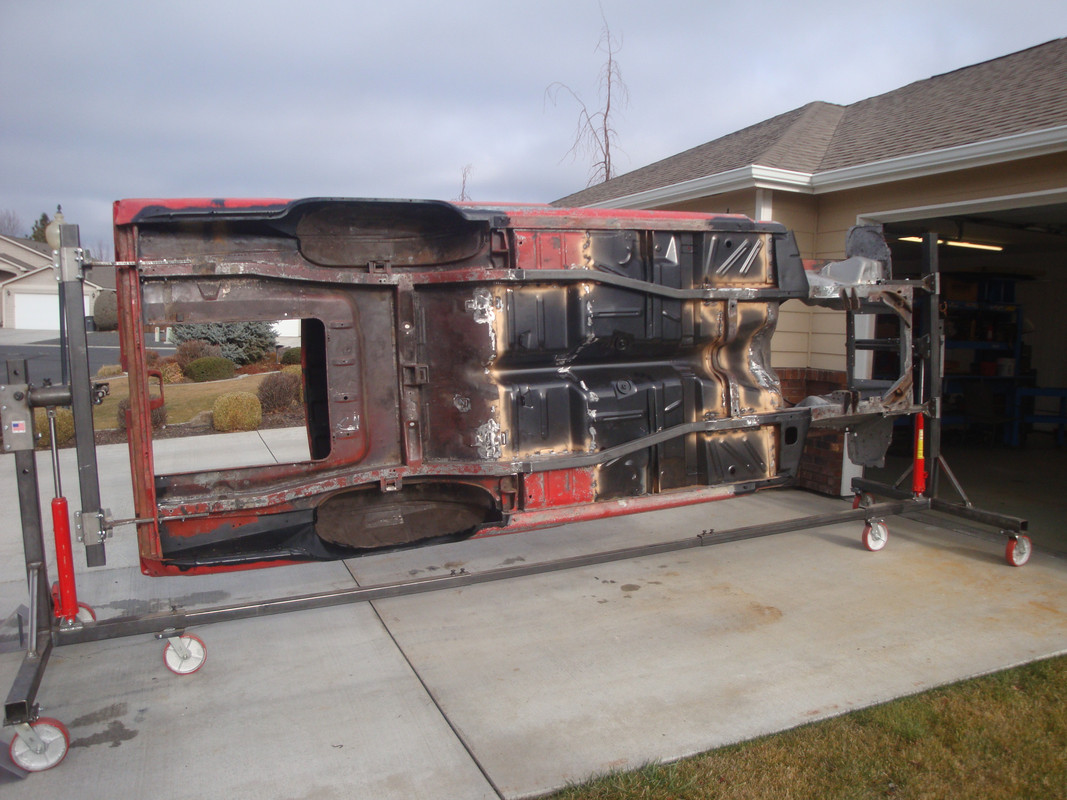
The above photo is after I have the car on the rotisserie and move it out into my driveway for inspection and production finish grinding. We put the car back in the garage after we were done. I salvaged all the factory attachment bits from the original floorpan and will blast, prime and reinstall them. Also I salvaged the factory front seat supports for clean and reinstall from the crossmember to the rocker. That will be in another post. Next up-putting the car on the rotisserie and fabricating and installing rear attachement points at the bumper bracket locations.
Cheers all--------------DR-------------out----------------
The ends of the front subframe are opened up while it is easy for me. I cut the bottom out after the floor was in.
The above are the finished attachment at the rear torque boxes.
The above is the finished attachment at the front subframe. The connectors insert into the factory subframe 3" past the crossmember location.
The above photo is after I have the car on the rotisserie and move it out into my driveway for inspection and production finish grinding. We put the car back in the garage after we were done. I salvaged all the factory attachment bits from the original floorpan and will blast, prime and reinstall them. Also I salvaged the factory front seat supports for clean and reinstall from the crossmember to the rocker. That will be in another post. Next up-putting the car on the rotisserie and fabricating and installing rear attachement points at the bumper bracket locations.
Cheers all--------------DR-------------out----------------
Oz never gave nothing to the tin man that he didn't-didn't already have-
-
Joe Travers

- Posts: 2435
- Joined: Mon Sep 21, 2020 6:23 pm
- Location: Louisiana
Re: Doug's 65 Cyclone build
Solid ride, Doug!
Thanks for the pics
JT
Thanks for the pics
JT

1963 1/2 Custom Hardtop
342 stroker, solid roller, T-10, 3.55 posi

Re: Doug's 65 Cyclone build
Looking good.
Roger
Roger
65 comet 7.61@96mph 1/8
Made in Canada, Built for speed.
Tweaked65 on instagram
https://youtu.be/JCVwEitXSi4

Made in Canada, Built for speed.
Tweaked65 on instagram
https://youtu.be/JCVwEitXSi4
Re: Doug's 65 Cyclone build
I agree with everyone it looks good, my subframe connectors are not so large but then again I am not anticipating that they need to be with how I am going to drive the car and my engine, the 250 is torquey but the sedan would have handled it with none, I almost wasn't going to make any and install them but after I had the car tipped up and I had the steel I decided to go ahead and my uncle that was there at the time encouraged me to go ahead and add them, I do think, even being small the connectors make the car a bit stiffer and more solid feel, I have no actual data to support anything but I also don't think they hurt anything (just a little weight I guess) I think mine are 1 1/2" steel, don't remember the gauge and they are welded to the floor plus I tied the rockers to them, there was no science involved or accepted practices I used just pie cut, bent and welded them to align with the sub frames and floow the floor contour that made sense to me
Keep posting the pics it helps to inspire and motivate me and most likely others
See Ya,
Mike
Keep posting the pics it helps to inspire and motivate me and most likely others
See Ya,
Mike
Re: Doug's 65 Cyclone build
Installing and verifying the AutoTwirler Pro rotisserie. Not a lot of text here but a lot of photos. From installing the car and balancing it to changing the rear mounts from spring hanger to bumper mount. The photos pretty much tell the story. She short version is that I wonder how I ever built a car without one of these. At my age it is an absolute requirement to have this. My old bones just don't get on the floor any more.
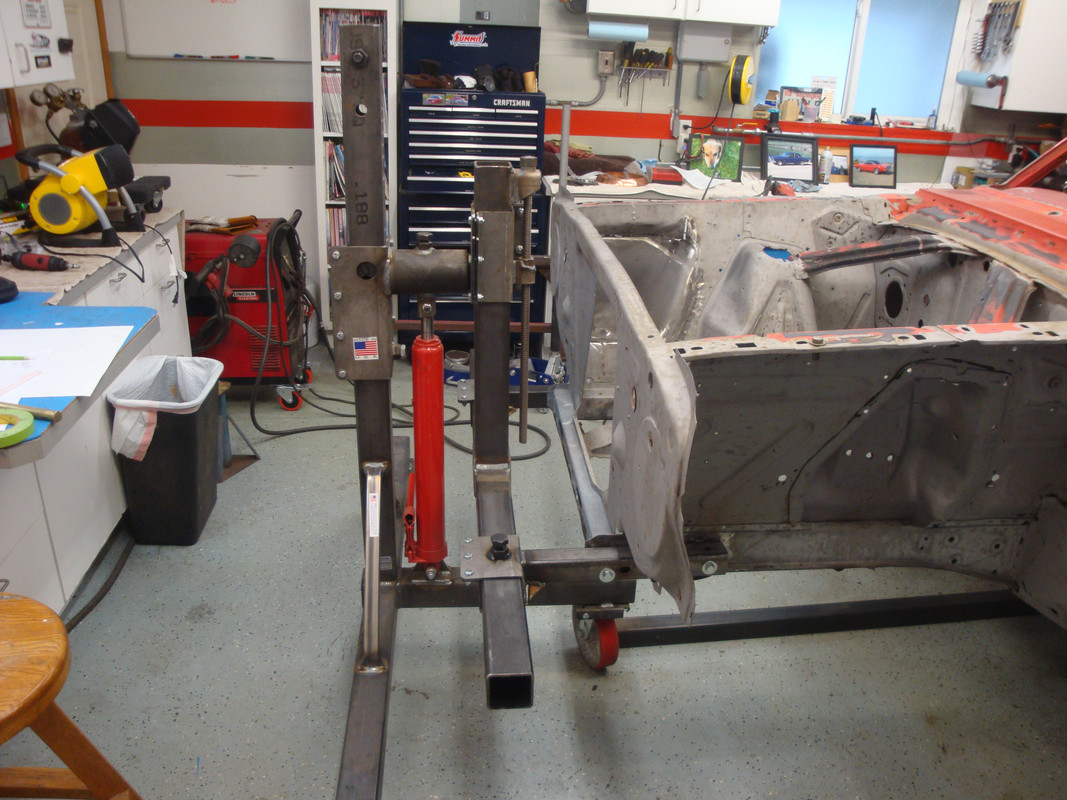

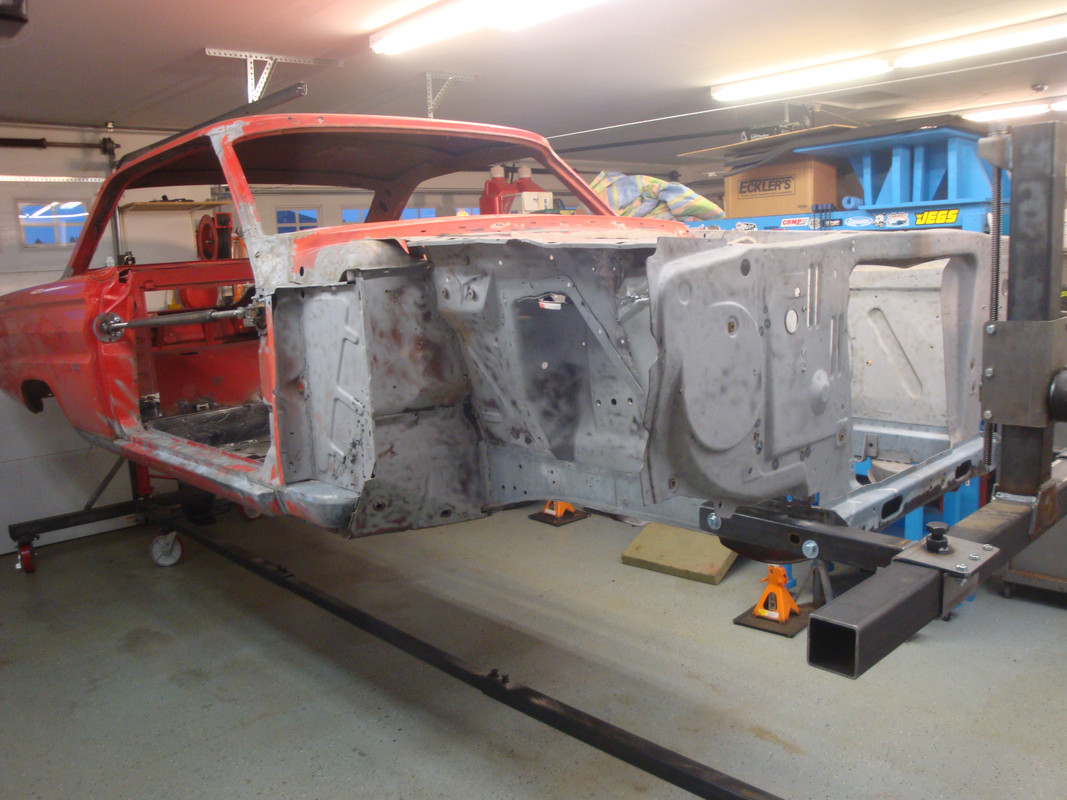


I know it's a lot of photos but we wont be coming back to this again. On to front suspension next.
-----------------DR-------------Out-----------------
I know it's a lot of photos but we wont be coming back to this again. On to front suspension next.
-----------------DR-------------Out-----------------
Oz never gave nothing to the tin man that he didn't-didn't already have-
-
65clevorcyclone
- Posts: 234
- Joined: Wed Jan 21, 2015 12:54 am
- Location: Vancouver, BC
Re: Doug's 65 Cyclone build
looking great. the floor pan and frame connectors turned out awesome!
Re: Doug's 65 Cyclone build
Did you make those frame connectors or did you buy them? looks good!
1964 Mercury Comet 404 with 347 stroker
Re: Doug's 65 Cyclone build
The subframe connectors I selected and bought from "Tin Man Fabrications". I saw them mentioned in a thread on this site and went to their website. I did wind up talking to the owner about the installation because their installation video only covers Mustangs. But the instructions sent with the connectors covered the Comet.
Oz never gave nothing to the tin man that he didn't-didn't already have-
Re: Doug's 65 Cyclone build
I saw those on summit and was wondering what they looked like installed, thanks for the reply!
DesertRat wrote: ↑Mon Feb 08, 2021 7:18 pmThe subframe connectors I selected and bought from "Tin Man Fabrications". I saw them mentioned in a thread on this site and went to their website. I did wind up talking to the owner about the installation because their installation video only covers Mustangs. But the instructions sent with the connectors covered the Comet.
1964 Mercury Comet 404 with 347 stroker
Re: Doug's 65 Cyclone build
The one piece floor pan install is awesome!
Those weren’t available when I did my Falcon floors a few years ago. Bummer.
Looking forward to your progress.
Joe
Those weren’t available when I did my Falcon floors a few years ago. Bummer.
Looking forward to your progress.
Joe
1965 Caliente HT- 289/4 speed
1964 Falcon HT- track car- 302/4 speed
1964 Falcon HT- track car- 302/4 speed
Re: Doug's 65 Cyclone build
The recent discussion of painting ect ect got me thinking about my late 70's Imron paint job of my 55 Bel Air, one of three that I have owned. This one was the keeper though-327/4 speed car with diamond tuck interior. But I digress. Below are before and after photos of the car with the finished Metallic Imron paint job painted by me in my own weld shop at the time----------------------
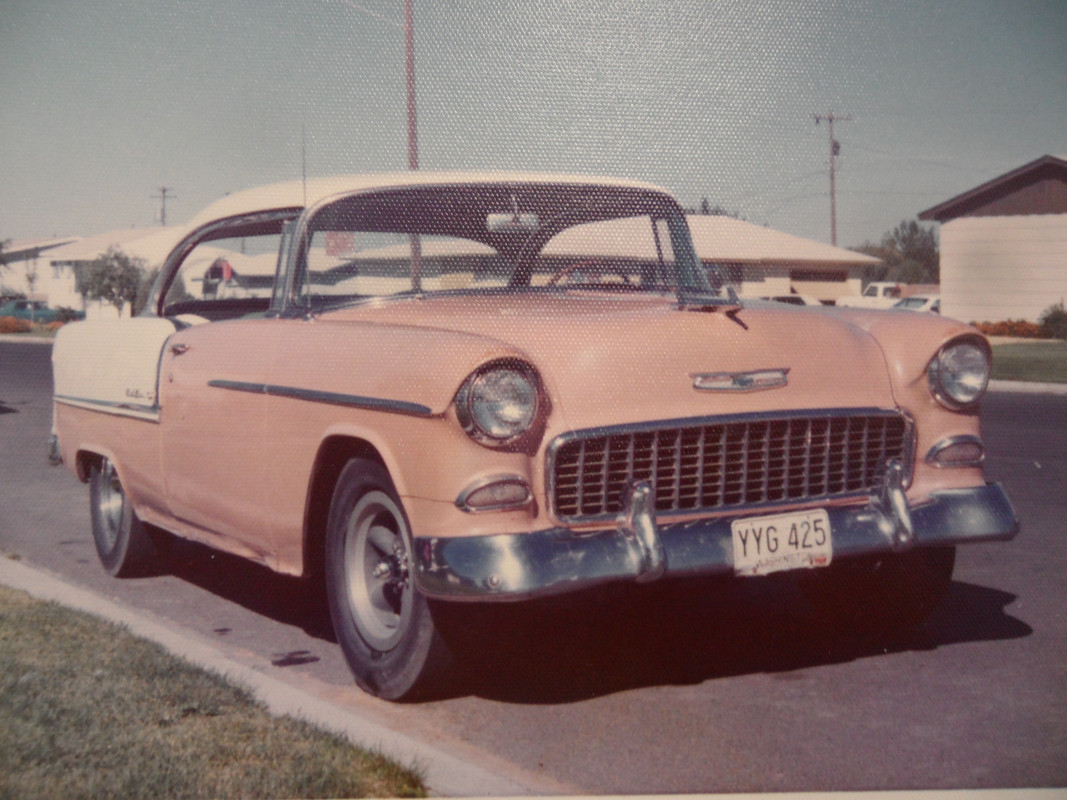

------------DR Out----------------
------------DR Out----------------
Oz never gave nothing to the tin man that he didn't-didn't already have-