Doug's 65 Cyclone build
Re: Doug's 65 Cyclone build
Nice work! Interested to see how install goes.
Geez, how do you get anything done and keep the shop looking unused??
Fred
Geez, how do you get anything done and keep the shop looking unused??
Fred
Re: Doug's 65 Cyclone build
Fred: Thanks for looking-I had this house built to our specifications. That meant having a garage large enough to build cars in. The saver for me is that I put in enough cabinets to maintain some order. I also wanted a finished floor and I put the epoxy/flake finish on myself. I am a little anal about my workspace hence the seeming order in the photos. Admittedly the rotisserie makes for careful navigation around the shop but I work alone so no problem. The blue parts shelf is a holdover from the first Comet I built and stores a lot of parts & tools.
DR
Re: Doug's 65 Cyclone build
Here are a few more of my progress replacing the floorpan. The damage was in the toeboard up the firewall so I had a decision to make. Reading about the issue convinced me that I had to make repairs there before I could install the new floor. I decided to cut up the firewall about half way and bend up some new steel to weld in and mate up. The alternative was to order more panels from AMD and I wasnt going to do that.
With the old floorpan out I had to re-construct the tunnel from the seam to the firewall. I made a template from the new floorpan tunnel and built my new stuff forward from that.
Here is where I added new steel to the toeboards and tied it into the subframe and firewall. Probably could have gone further but the car will outlast me so----------------
This one shows the back where I cut the verticals to R & R the new floorpan and seam it in the correct position. The torque boxes are pristine so I gave them a quick coat of por-15 and got ready to put the floorpan in for marking and drilling. My new Tin Man subframe connectors are shown in the trunk area.
Re: Doug's 65 Cyclone build
Your project looks like it is coming along nicely, I appreciate the precise cuts you made when removing the old sheet metal, it will make installation of the new floor so much easier, and with better results. One question: you had mentioned that you purchased a rotisserie, why are you installing the floor in the car without the car mounted on the rotisserie? When I replaced and built the panels for mine, the rotisserie made it so much easier to fit and weld the panels. I used a Lenco Spot welder and my mig when installing the panels.
Keep up the good work.
Jim
Keep up the good work.
Jim
Re: Doug's 65 Cyclone build
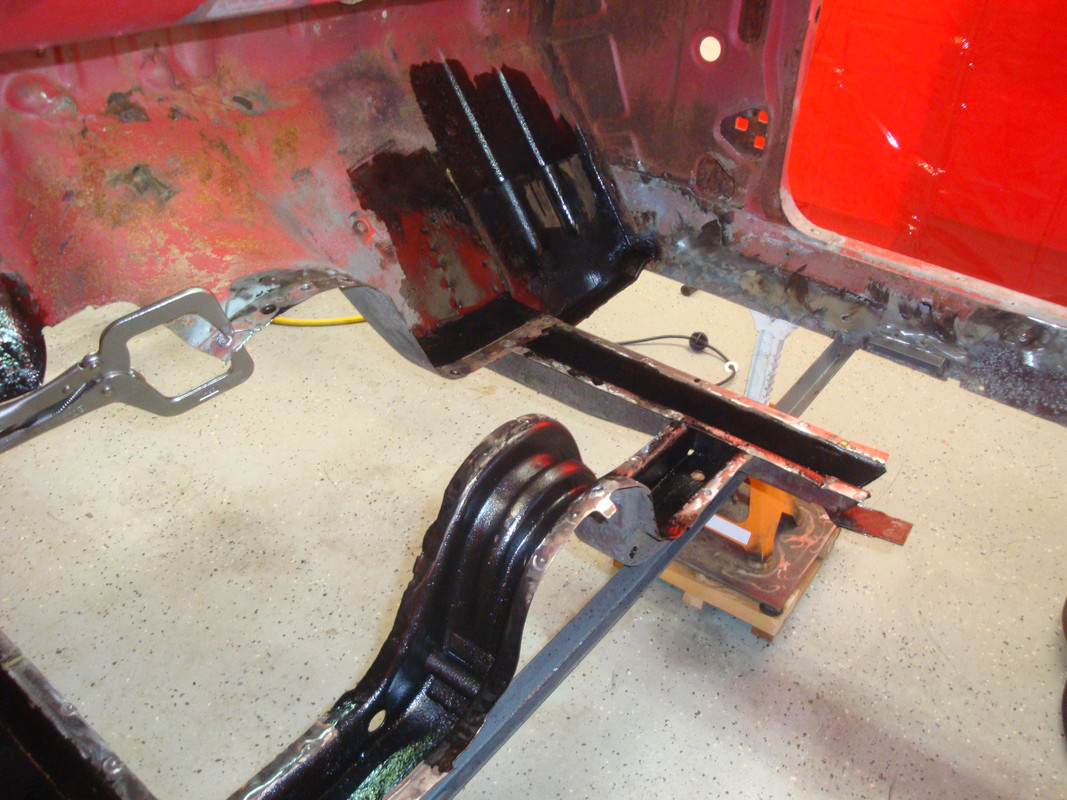
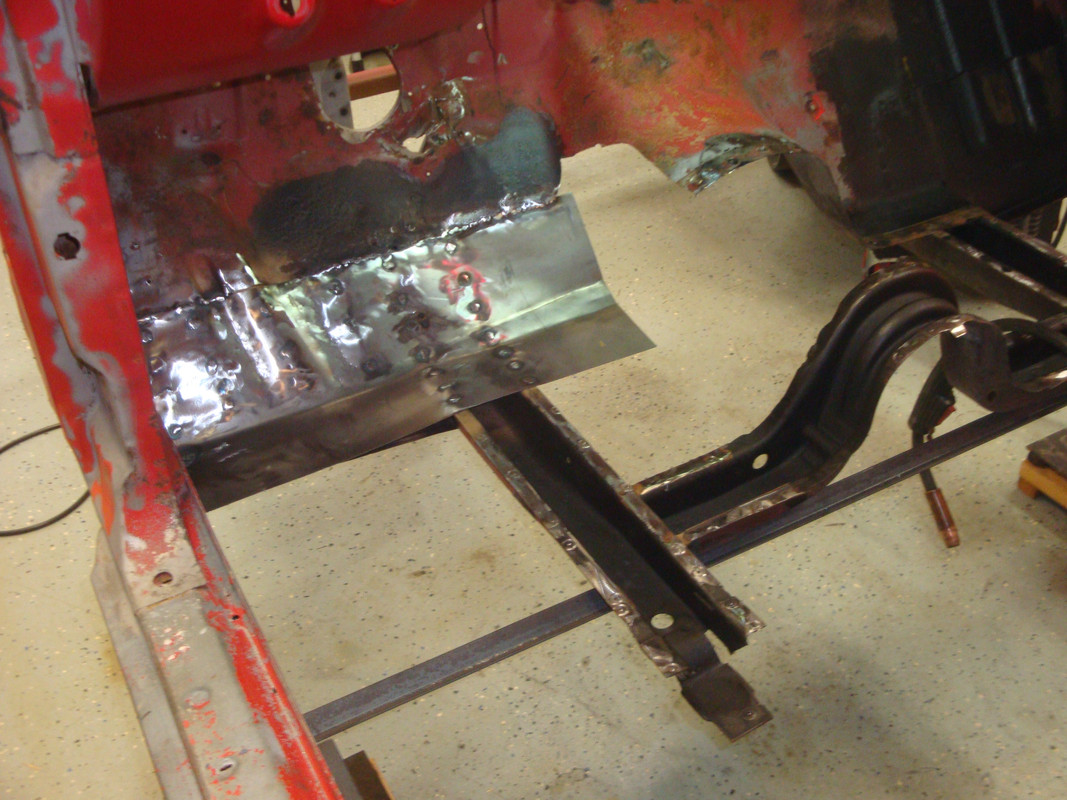
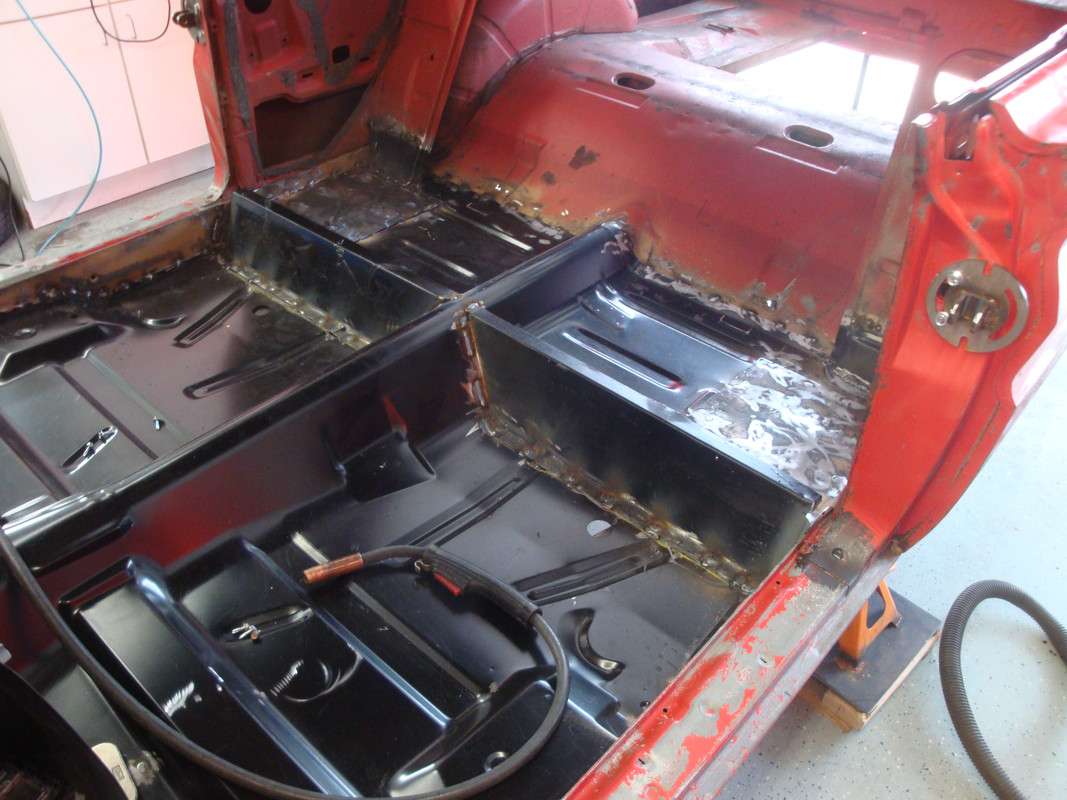
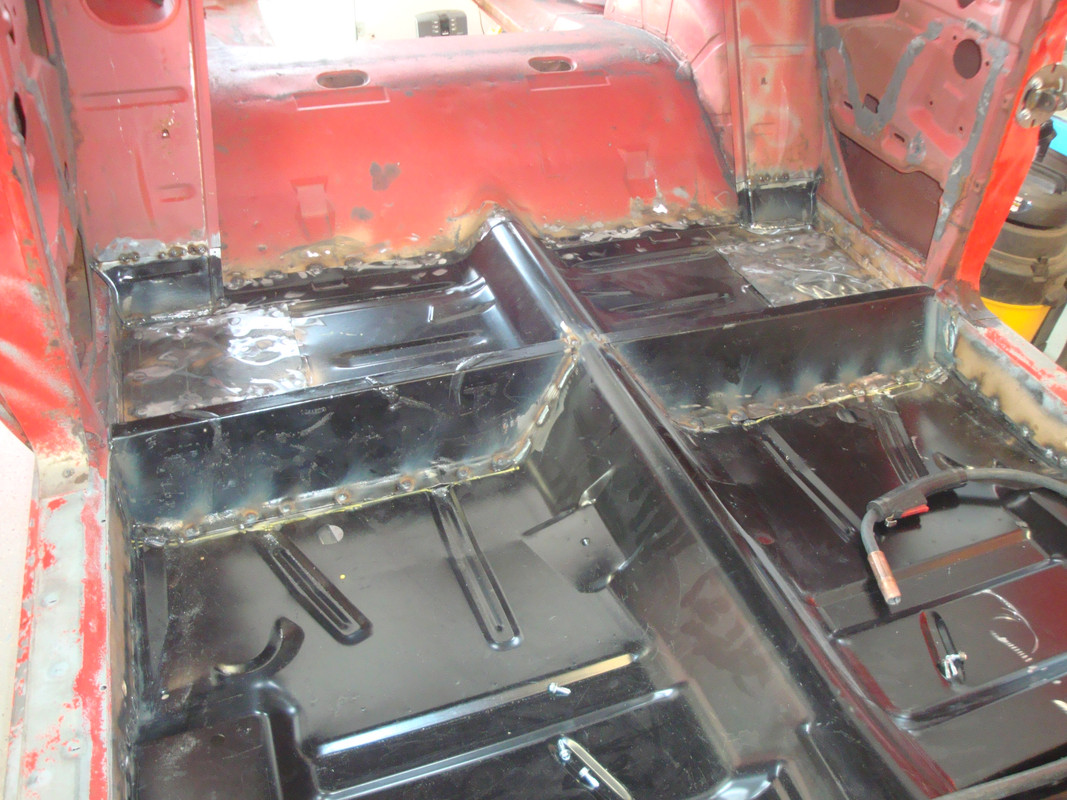
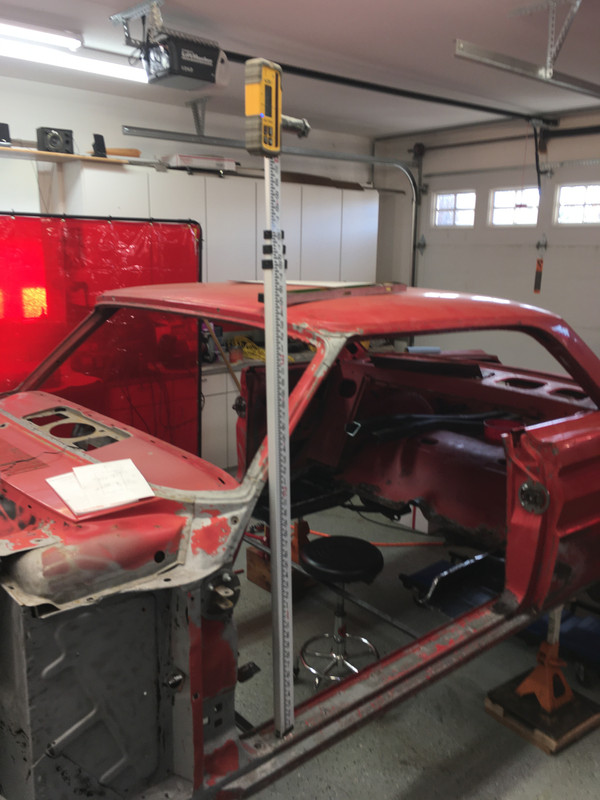
Jim: Yes I had the rotisserie in storage since June. My research led me to believe that without subframe connectors and an installed floorpan the car would have insufficient strength to be suspended from the fore & aft bumper brackets without potential damage. Believe me, it was hard for this old man to bite the bullet and put the car on stands, install the floorpan, install the subframe connectors before putting up on the rotisserie. But I did the work and when I put it on the rotisserie and checked for square & level the car was within 1/8" diagonal squaring. I'll post the next sequence of photos tomorrow morning-it will show more--------------------DR-------------------A/FX wrote: ↑Sat Jan 30, 2021 8:15 pmYour project looks like it is coming along nicely, I appreciate the precise cuts you made when removing the old sheet metal, it will make installation of the new floor so much easier, and with better results. One question: you had mentioned that you purchased a rotisserie, why are you installing the floor in the car without the car mounted on the rotisserie? When I replaced and built the panels for mine, the rotisserie made it so much easier to fit and weld the panels. I used a Lenco Spot welder and my mig when installing the panels.
Keep up the good work.
Jim
Re: Doug's 65 Cyclone build
To get the floor and subframe connectors installed and keep the integrity of the hard points of the car is tricky. I used a laserplane to get the level within 1/16" on all four corners. I did this operation twice, once before I did any welding and again before I plug welded the side flanges. I used door frame shims from a hardware store to accomplish this taking my time.
By now the car is fully prepped for the floorpan with cleaning and weld-thru primer.
Installation meant setting the floorpan into the car and marking it for drilling the plug weld locations.
Once the floor is in the car I went under it with a can of weld-thru primer and sprayed out the perimeter of all chassis components.
Then it was a matter of drilling all the plug weld locations and sanding off the black finish off where the welds go.
My wife helped me reinstall the prepped floor in the car and I fine tuned the location and started welding.
-------------DR---------------
- Joe Travers
- Posts: 2435
- Joined: Mon Sep 21, 2020 6:23 pm
- Location: Louisiana
Re: Doug's 65 Cyclone build
Nice work, Doug!
I'm sure you had that laser receiver on fine setting. I spent years working with those in the field. Great to have when you are working alone.
JT
- Boss/Cyclone
- Site Admin
- Posts: 2739
- Joined: Thu Oct 19, 2006 9:55 pm
- Location: South Central Michigan (Near Michigan International Speedway)
Re: Doug's 65 Cyclone build
I have used one piece floor pan from dynacorn in an early mustang, they fit great. How is the fit on that one piece floor pan fit and who makes it?
1965 Mercury Cyclone former drag car, 1971 Boss 351 engine, 4 speed, ladder bars, etc. Now returned to a street car.
Larry
Larry
Re: Doug's 65 Cyclone build
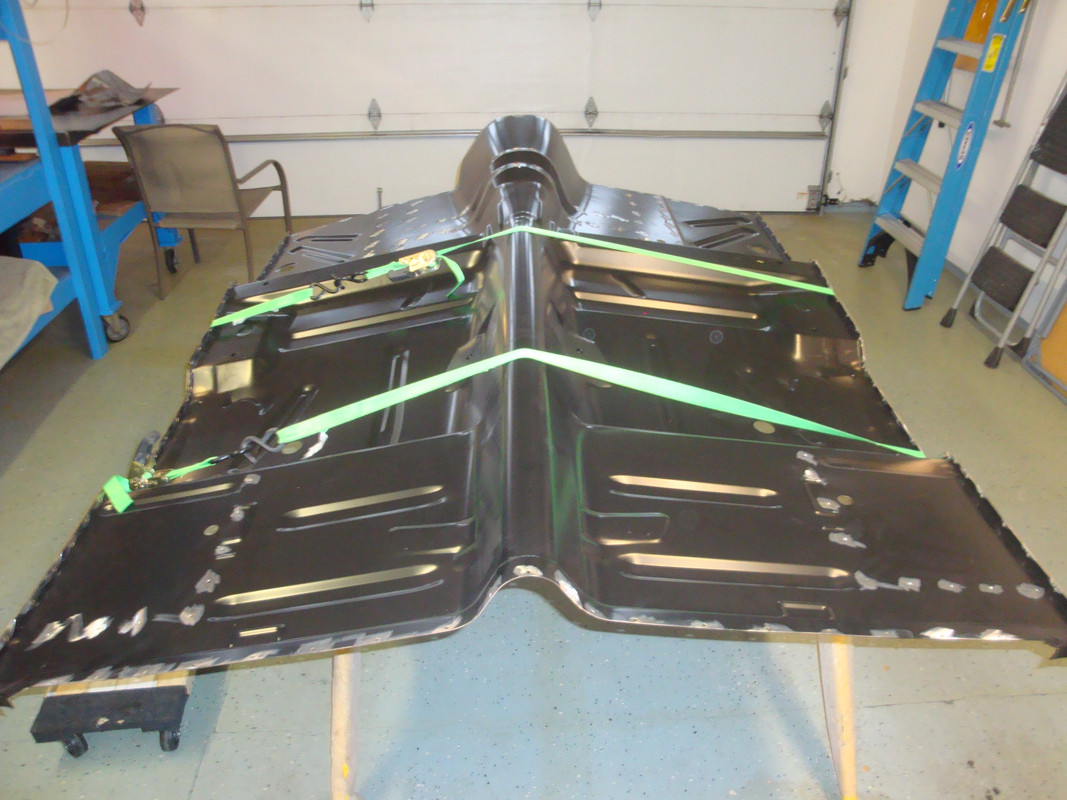
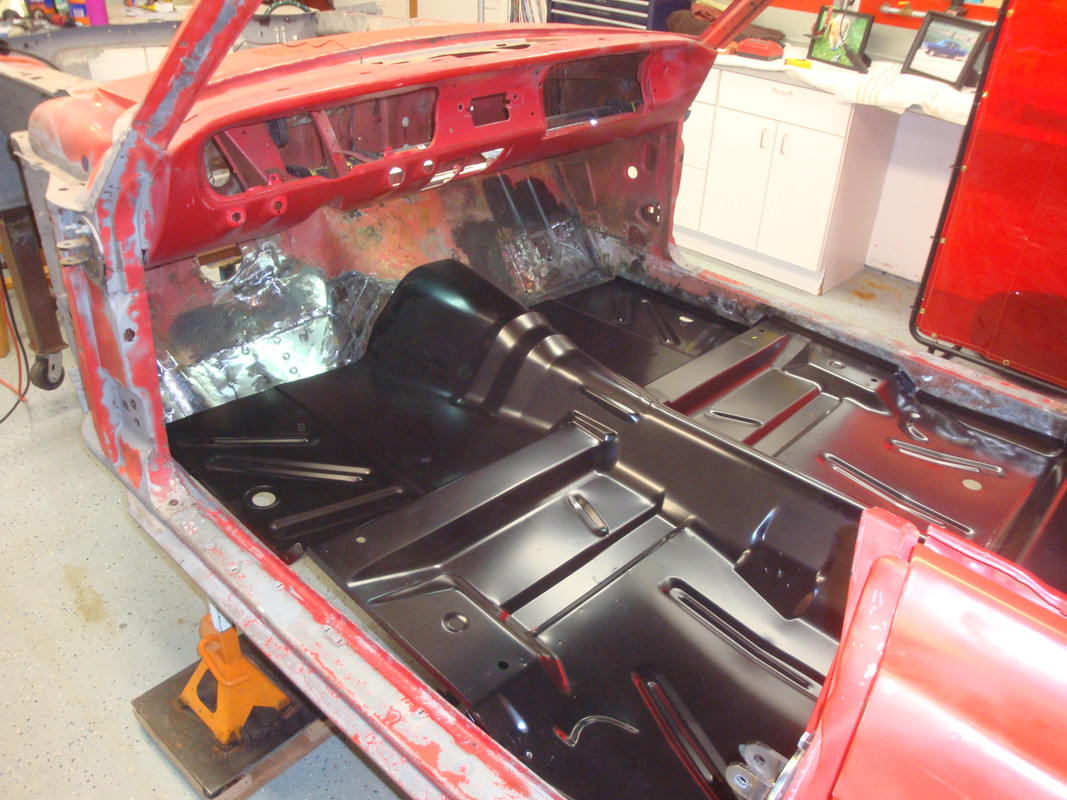
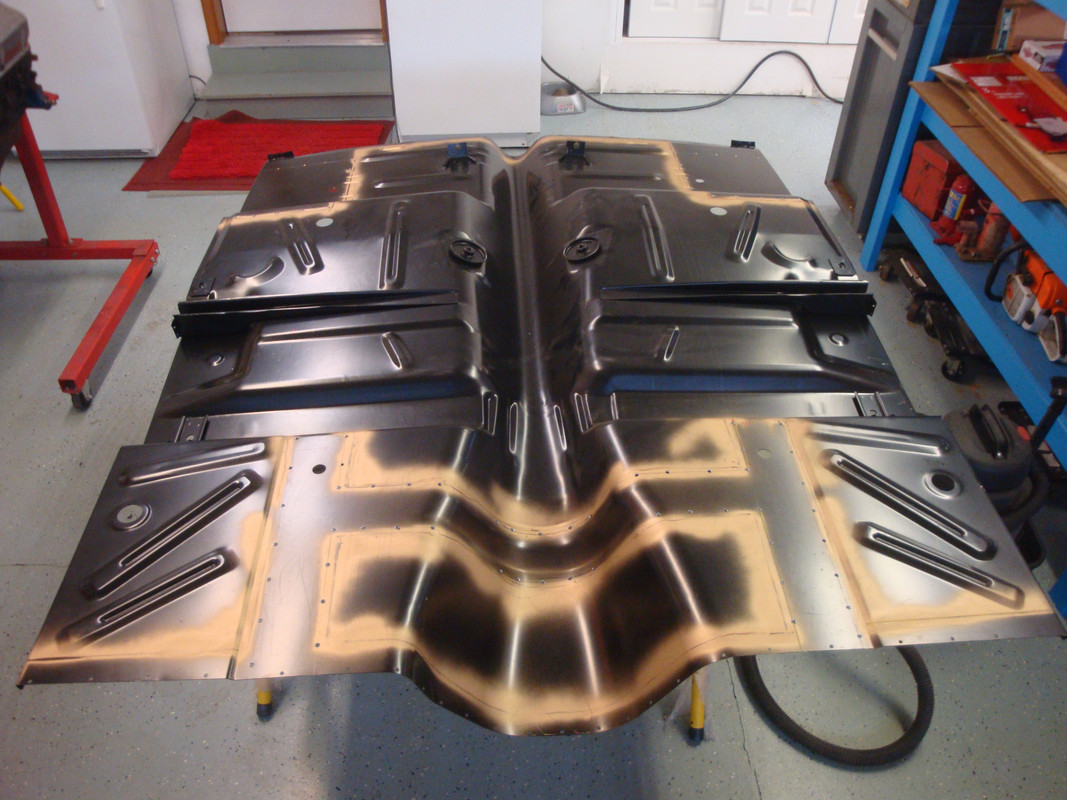
My Floorpan is a dynacorn unit for a falcon and the fit is perfect. I have more photos to post that show the rest of the install.Boss/Cyclone wrote: ↑Tue Feb 02, 2021 8:45 pmI have used one piece floor pan from dynacorn in an early mustang, they fit great. How is the fit on that one piece floor pan fit and who makes it?
-
- Posts: 234
- Joined: Wed Jan 21, 2015 12:54 am
- Location: Vancouver, BC
Re: Doug's 65 Cyclone build
Looks glad. Glad that youre using weld thru. So many people dont when doing panel replacements that are welded onto flanges.
Re: Doug's 65 Cyclone build
Lots of photos on this post. I will detail the completion of the floorpan install. The first photo shows how I got the piece in & out of the car through the side. Then I seated it where it is going to live and plug welded the floor bottom first.
Getting to weld in the flanges here I wanted the rockers as tight as I could get them.
Plug welding in the flanges after the second laser level procedure.
The factory had doublers over the rear torque boxes. Since I destroyed the originals I fabricated some and plug welded them into the floor.
After cleaning and painting the rear seat risors I reinstalled them. I took careful location measurements when I removed them on demolition.
I missed one photo if the plug welds on the torque boxes so I'll put it here.
The floorpan install is now complete and I am ready to crawl under the car and cut the front subframes open the the subframe connector install.
Re: Doug's 65 Cyclone build
Awesome install!
Looking forward to pics of connector install.
Thanks a ton for the pics! I realize the work to post them, much appreciated!
Fred
Looking forward to pics of connector install.
Thanks a ton for the pics! I realize the work to post them, much appreciated!
Fred
- Joe Travers
- Posts: 2435
- Joined: Mon Sep 21, 2020 6:23 pm
- Location: Louisiana
Re: Doug's 65 Cyclone build
Great thread, Doug!
Very thorough and neat work. Very good reference for future builds
Appreciate the pics!
JT
Very thorough and neat work. Very good reference for future builds
Appreciate the pics!
JT