Doug's 65 Cyclone build

The Era of The Square Body Racing Comets
A/FX
Comet Central Member
Posts: 1107
Joined: Tue Jan 06, 2004 8:07 pm
Location: S.E. Wisconsin

Re: Doug's 65 Cyclone build

Post by A/FX »

lavron wrote:
Sun Jan 24, 2021 3:32 am
I couldn't see your pictures earlier but see them now, isn't the hole in the transmission hump correct? I believe from the factory they were a kinda rough cut but the fiberglass? 4-speed hump should cover it, possibly someone with a factory 4-speed can confirm.

See Ya,
Mike
The hole shown in the photo is correct. The factory plate covers the hole completely and makes the round shifter boot mount parallel with the ground.
Jim
‘64 Cyclone/ Boss 302,quads,4spd, Winters 9”

Image

User avatar
SASSY
Moderator
Posts: 5149
Joined: Sat Jan 07, 2006 12:32 am
Location: Wynndel, BC CANADA

Re: Doug's 65 Cyclone build

Post by SASSY »

Ya I thought that it was a hack job when I first took that cover off,,, I think the hole might have been touched if I remember correctly.
That red metal hump from my car is still here somewhere,,?
Fred
I'd rather do it myself if it's done right or not,,,isn't that what hotrodding is all about

Image

DesertRat
Posts: 354
Joined: Sat May 02, 2020 11:23 am
Location: Moses Lake WA

Re: Doug's 65 Cyclone build

Post by DesertRat »

My car came with the original metal shifter hump. It is in tough shape but I will save it with a little metal work and some por-15. I saved the factory doubler that goes under the Floorpan as well for reinstall when the time comes. I'm post photos of the process when I get to that point in the build.
Oz never gave nothing to the tin man that he didn't-didn't already have-Image

A/FX
Comet Central Member
Posts: 1107
Joined: Tue Jan 06, 2004 8:07 pm
Location: S.E. Wisconsin

Re: Doug's 65 Cyclone build

Post by A/FX »

DesertRat wrote:
Sun Jan 24, 2021 10:32 am
My car came with the original metal shifter hump. It is in tough shape but I will save it with a little metal work and some por-15. I saved the factory doubler that goes under the Floorpan as well for reinstall when the time comes. I'm post photos of the process when I get to that point in the build.
One tip for mounting the shifter plate: they factory used sheet metal screws to hold it in place, if you have ever cut your hand on the sharp end of one of those screws when working under the car you know why I installed mine with nut-serts and used machine screws. Just drill out the punched holes to the size of the insert, works perfectly.
Jim
‘64 Cyclone/ Boss 302,quads,4spd, Winters 9”

Image

DesertRat
Posts: 354
Joined: Sat May 02, 2020 11:23 am
Location: Moses Lake WA

Re: Doug's 65 Cyclone build

Post by DesertRat »

I ordered a new drag link from summit and it came in wrong. It is longer than the original about 2 1/2". Research tells me that it is for a mustang. Now I have to return the wrong one and find a place to buy the correct one. One for a V8 manual steering Comet. PIA!
Oz never gave nothing to the tin man that he didn't-didn't already have-Image

DesertRat
Posts: 354
Joined: Sat May 02, 2020 11:23 am
Location: Moses Lake WA

Re: Doug's 65 Cyclone build

Post by DesertRat »

A/FX wrote:
Sun Jan 24, 2021 10:51 am
DesertRat wrote:
Sun Jan 24, 2021 10:32 am
My car came with the original metal shifter hump. It is in tough shape but I will save it with a little metal work and some por-15. I saved the factory doubler that goes under the Floorpan as well for reinstall when the time comes. I'm post photos of the process when I get to that point in the build.
One tip for mounting the shifter plate: they factory used sheet metal screws to hold it in place, if you have ever cut your hand on the sharp end of one of those screws when working under the car you know why I installed mine with nut-serts and used machine screws. Just drill out the punched holes to the size of the insert, works perfectly.
Jim
Thanks for the tip Jim. I had to fabricate the tunnel from the leading edge of the replacement Floorpan to the firewall so holes won't be a problem.
Oz never gave nothing to the tin man that he didn't-didn't already have-Image

A/FX
Comet Central Member
Posts: 1107
Joined: Tue Jan 06, 2004 8:07 pm
Location: S.E. Wisconsin

Re: Doug's 65 Cyclone build

Post by A/FX »

DesertRat wrote:
Sun Jan 24, 2021 10:55 am
I ordered a new drag link from summit and it came in wrong. It is longer than the original about 2 1/2". Research tells me that it is for a mustang. Now I have to return the wrong one and find a place to buy the correct one. One for a V8 manual steering Comet. PIA!
1965 Comet/ Falcon center links are the same, as you now know Mustangs are wider. All other front suspension parents interchange between Comet/ Falcon/ Mustang.
1964 Comet/Falcon center links are different from the ‘65 Parts and are less desirable.
Sometimes FoMoCo makes life difficult.
Jim
‘64 Cyclone/ Boss 302,quads,4spd, Winters 9”

Image

User avatar
Joe Travers
Posts: 2446
Joined: Mon Sep 21, 2020 6:23 pm
Location: Louisiana

Re: Doug's 65 Cyclone build

Post by Joe Travers »

A/FX wrote:
Sun Jan 24, 2021 2:43 pm
1964 Comet/Falcon center links are different from the ‘65 Parts and are less desirable.
Sometimes FoMoCo makes life difficult.
To the subject matter, '67 and '68 Mustang front suspension is also different.
FoMoCo was always working to make it better. Difficult, yes but striving for excellence. :wink:

JT
Image

1963 1/2 Custom Hardtop
342 stroker, solid roller, T-10, 3.55 posi

DesertRat
Posts: 354
Joined: Sat May 02, 2020 11:23 am
Location: Moses Lake WA

Re: Doug's 65 Cyclone build

Post by DesertRat »

After the Tampa/green bay game it will time to see whats involved returning a $110 part to summit and find the right drag link. Today I got the outboard tower/frame supports welded in. That process will be a future post to my build thread.
Oz never gave nothing to the tin man that he didn't-didn't already have-Image

DesertRat
Posts: 354
Joined: Sat May 02, 2020 11:23 am
Location: Moses Lake WA

Re: Doug's 65 Cyclone build

Post by DesertRat »

It was at this stage I realized that I was going to have to replace the entire floor pan. I bought a one piece Dyancorn unit for a Falcon but I learned here that the Falcon one would work. I tried to hire a local hot rod shop to do the work but they wouldn't come look at it after 3 appointments It became obvious that I would be doing it myself if I wanted it done. I bought a small HF sandblaster and blasted the firewall forward to see what I had to work with. It was with no small amount of trepidation that I augured onward--------------------
Image
Image
Image
Image
Image
Oz never gave nothing to the tin man that he didn't-didn't already have-Image

User avatar
Joe Travers
Posts: 2446
Joined: Mon Sep 21, 2020 6:23 pm
Location: Louisiana

Re: Doug's 65 Cyclone build

Post by Joe Travers »

Pretty solid, Doug.
Toe panels are poop but the rest looks pretty good from here.

JT
Image

1963 1/2 Custom Hardtop
342 stroker, solid roller, T-10, 3.55 posi

User avatar
poboyjo65
Moderator
Posts: 7069
Joined: Thu Oct 20, 2011 9:40 pm
Location: Camden, Tenn.

Re: Doug's 65 Cyclone build

Post by poboyjo65 »

Joe Travers wrote:
Sun Jan 24, 2021 11:19 pm
Pretty solid, Doug.
Toe panels are poop but the rest looks pretty good from here.

JT
what I thought ! :shock: :lol:

On those rear seat risers, mine was rough around those .terrible behind them. after repairs I made some metal tops to seal off the pocket behind the risers, sealed with 3m panel adhesive. kind of made it like half beams across there.Had thought of a ds loop under it to tie them together beter but it hasn't happened.
Image
Johno

DesertRat
Posts: 354
Joined: Sat May 02, 2020 11:23 am
Location: Moses Lake WA

Re: Doug's 65 Cyclone build

Post by DesertRat »

The new floorpan did not have the rear seat risor, the console bracket or the back seat cushion fasteners. I removed them all and blasted and saved them. The key is where the front and rear seams match up. I saw that the rear seam was behind the rear seat verticals so I had to cut them out from the floorpan up about 6" so I could get the new pan in for marking and out for drilling. After prep I was able to install the new floorpan and reinstall the rear seat risor and rear seat cushion clips. I like the idea of boxing in the rear seat risor like PBJoe did on his. Hmmmmm------we'll see----------
Oz never gave nothing to the tin man that he didn't-didn't already have-Image

User avatar
poboyjo65
Moderator
Posts: 7069
Joined: Thu Oct 20, 2011 9:40 pm
Location: Camden, Tenn.

Re: Doug's 65 Cyclone build

Post by poboyjo65 »

I bent a couple pieces of metal to glue it to the floor so it curled up & to glue to the back of the riser & still left the riser top for the seat to hook on it.you can click on the pic to blow it up.I also used the 3m panel adhesive to glue on trunk seal-gutters. I love that stuff because I was burned out on welding ,grinding & it made it easy by attaching & sealing all in one step. You can use it as seam sealer too,it's sand-able & paint-able. A tip passed on from Lou'scomet on here, who restores old cars for a living. Thanks again Lou! all I had to do was sand off the primer & glue it!!!
Image
Image
Image
Johno

DesertRat
Posts: 354
Joined: Sat May 02, 2020 11:23 am
Location: Moses Lake WA

Re: Doug's 65 Cyclone build

Post by DesertRat »

After studying the situation and being advised against replacing the floorpan myself I put the car up on stands and checked the level to make sure it was within tolerance to remove the existing floorpan. Full disclosure------YouTube video was very enlightening and helpful in starting down this road. Although no one did a Comet, there were several with Mustang and Falcon videos.
Image
Image
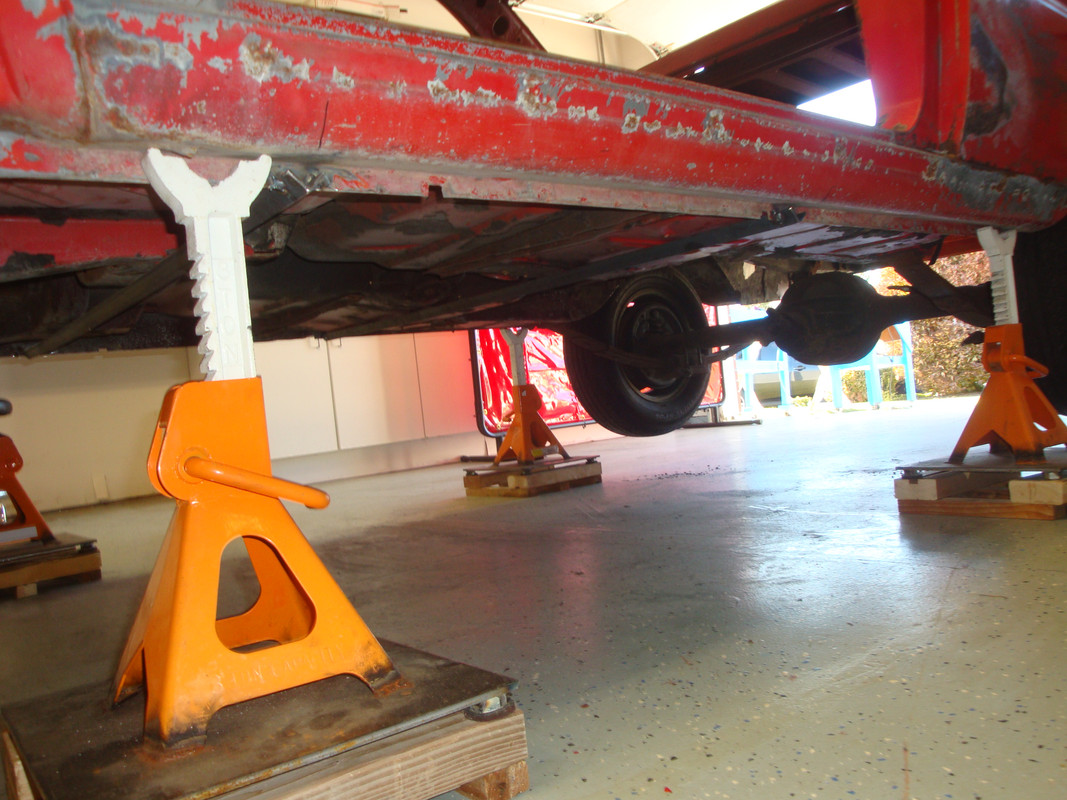
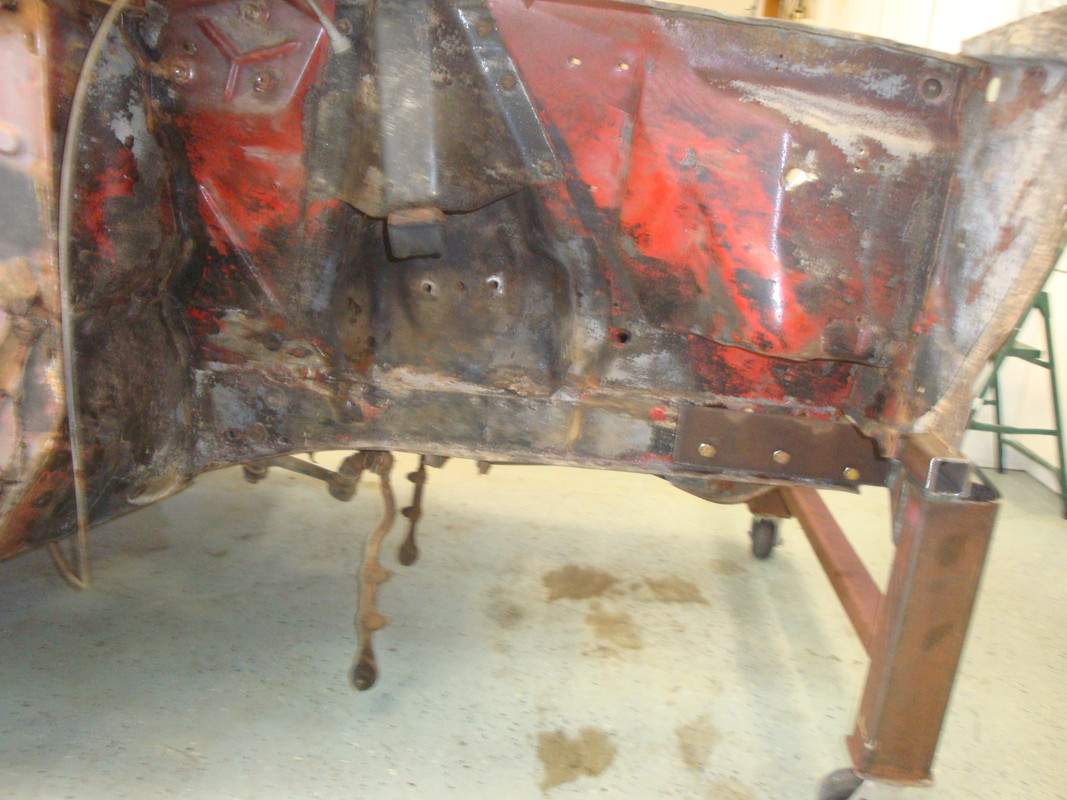
I got some 1" X 1/8" angle and welded in crossbraces to the rocker flanges to help steady things.
Image
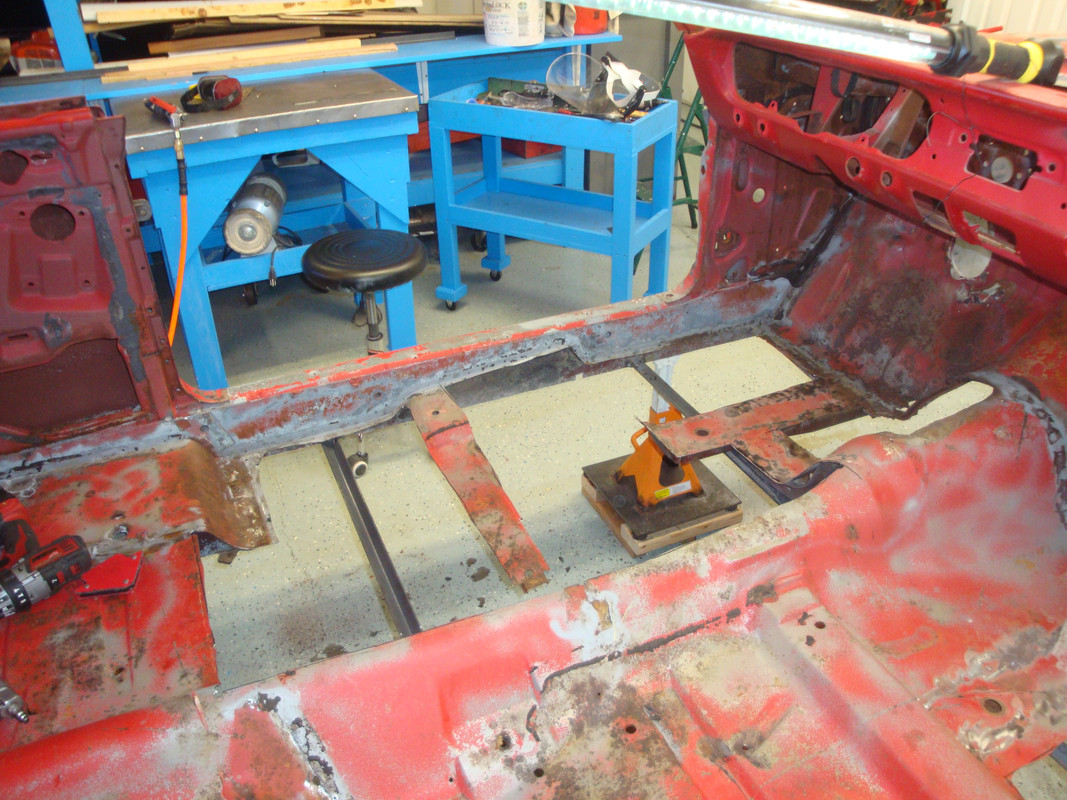
Using my air saw and an impact chisel I started cutting the offending floorpan out.
Image
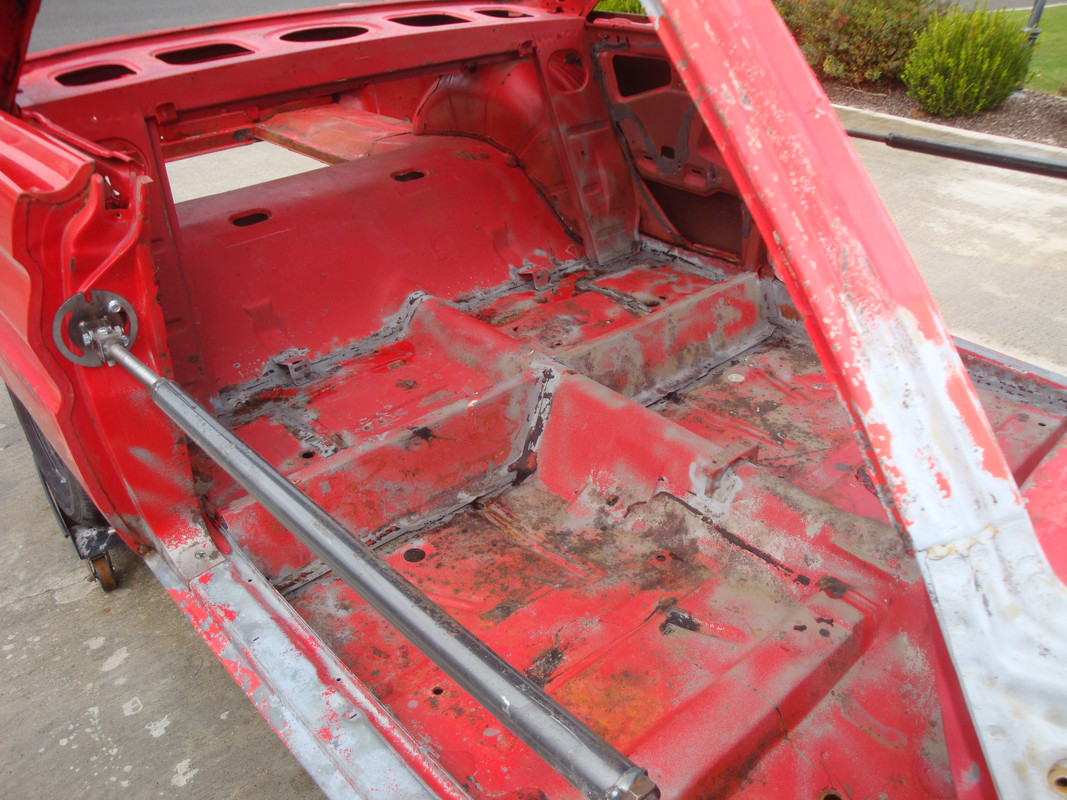
Working in small pieces I slowly cut out the entire floorpan so I could prep it for the new one.
Image
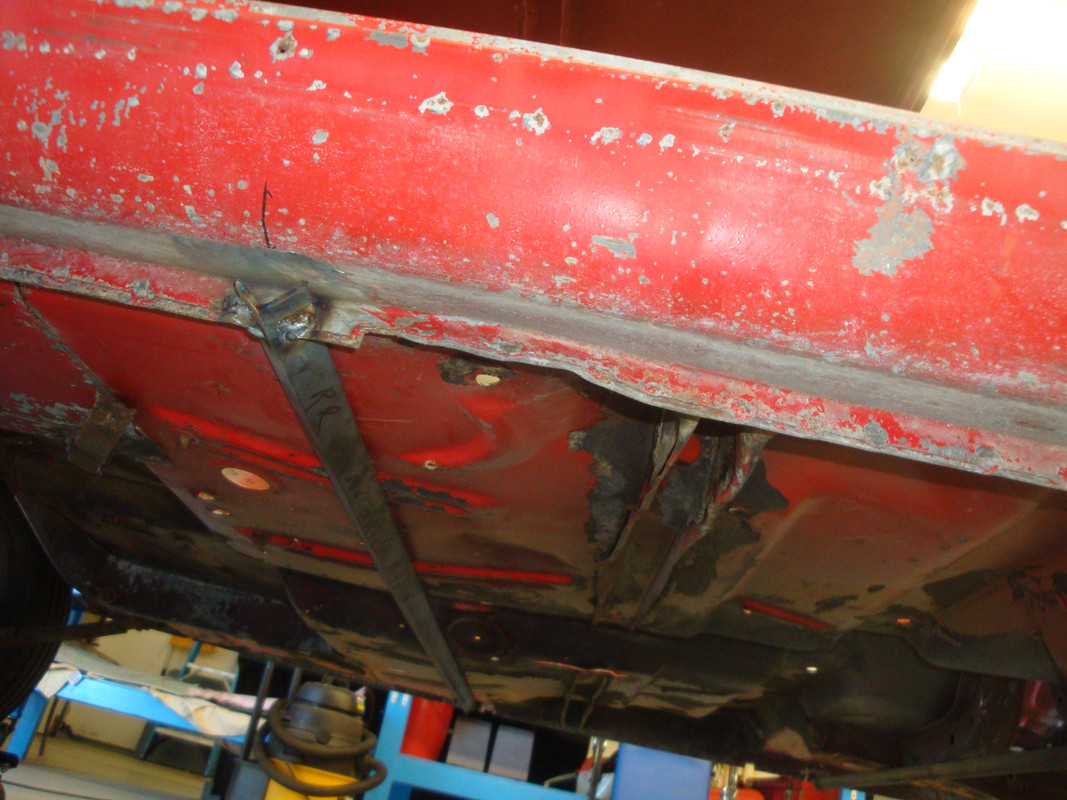
The above photo shows how I cut the rear vertical panel to get the new floorpan to seat at the original seam joint.
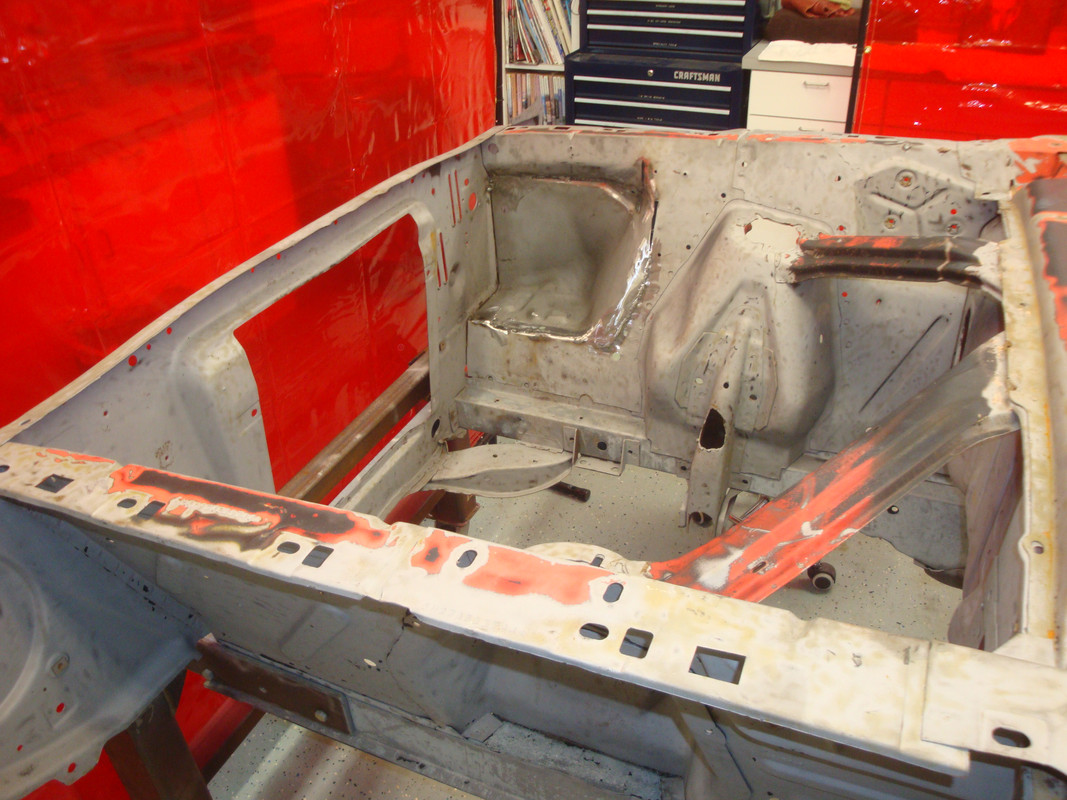
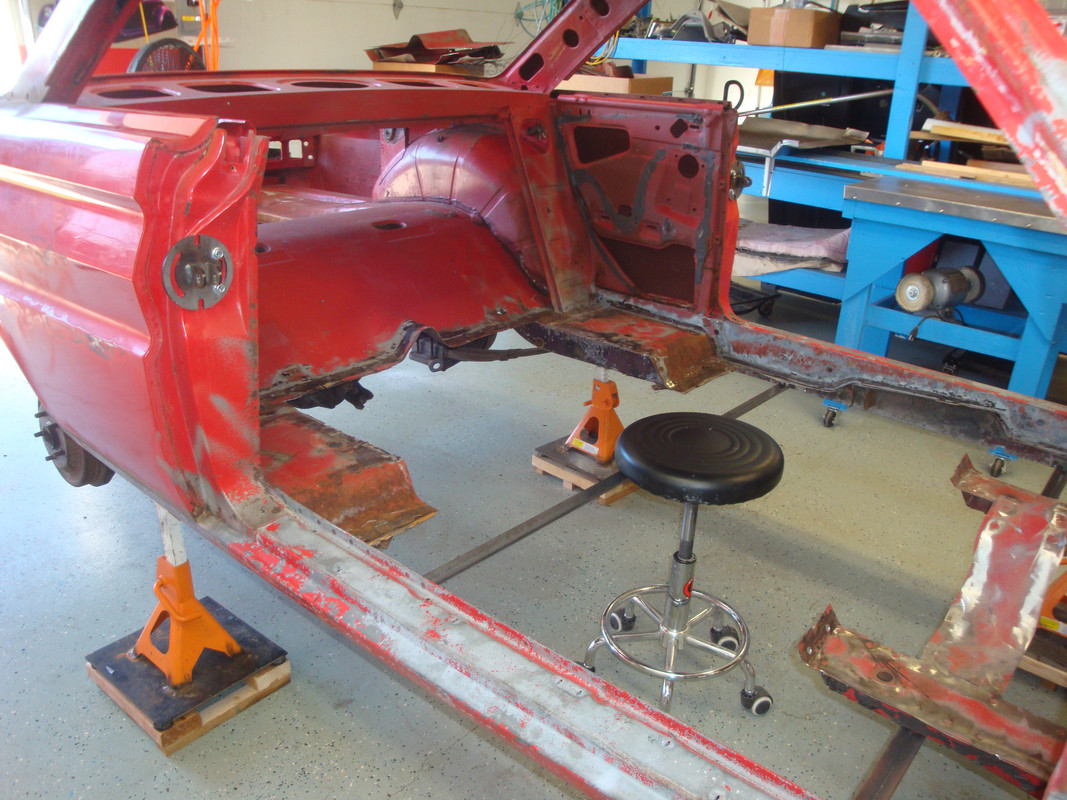
The car is now ready to prep all the mating surfaces note how the rear torque boxes are integrated into the system.
I have the new floorpan and subframe connectors in hand at this point to help the decision making process.
Oz never gave nothing to the tin man that he didn't-didn't already have-Image

Post Reply