Lou's 65 Comet Build

The Era of The Square Body Racing Comets
A/FX
Comet Central Member
Posts: 1119
Joined: Tue Jan 06, 2004 8:07 pm
Location: S.E. Wisconsin

Re: Lou's 65 Comet Build

Post by A/FX »

SASSY wrote:
Wed Nov 01, 2023 2:29 pm
This blade may be the same as Jim's. It was on my '71 351C. Old 3 core copper out of a Galaxie no shroud never a problem.
I think the blade was stock to motor but who knows what I did back then,,lol.

Image
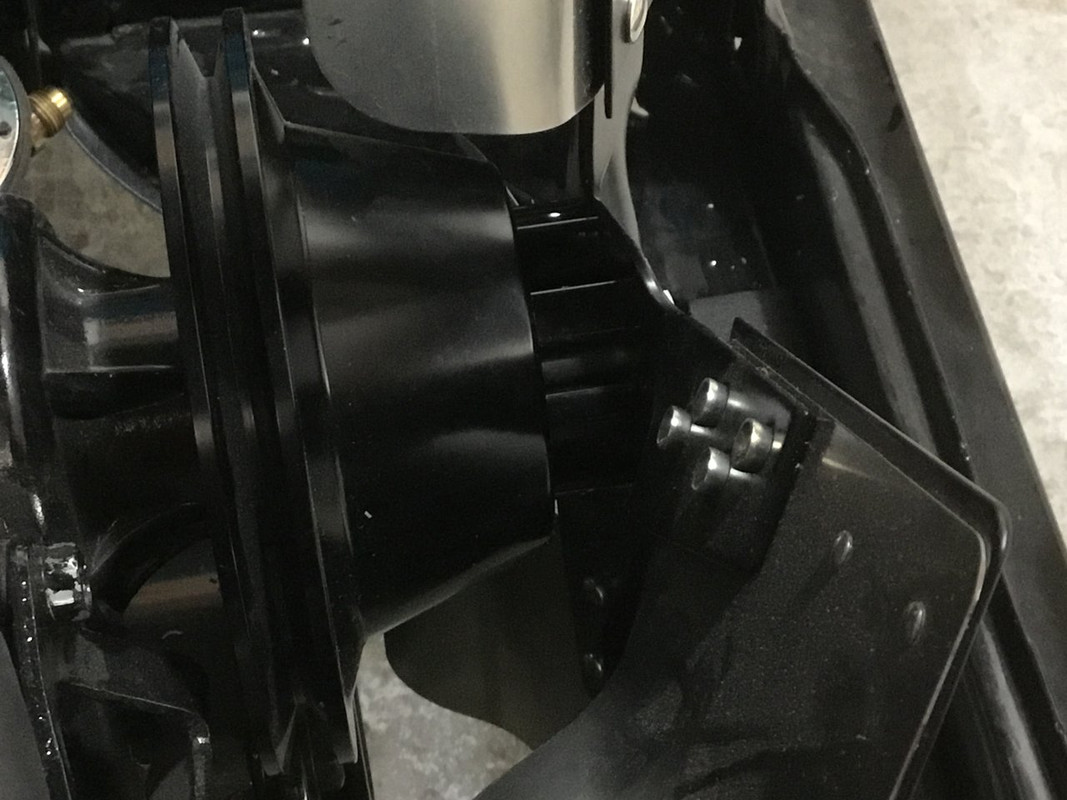
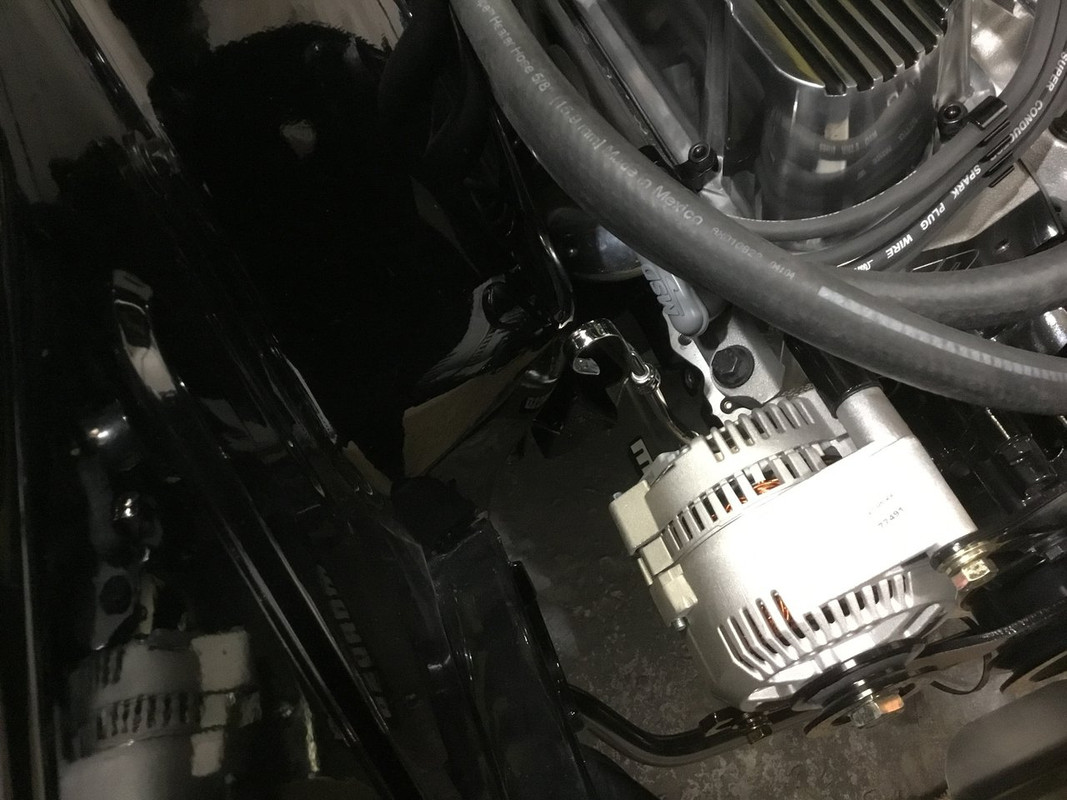
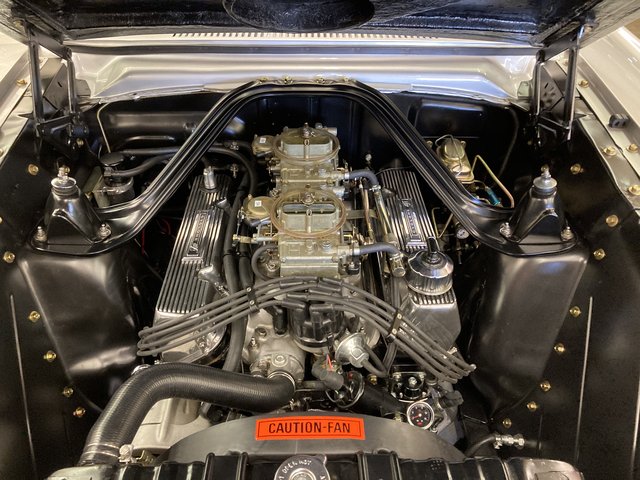
Yes, your fan is very close to what mine is.
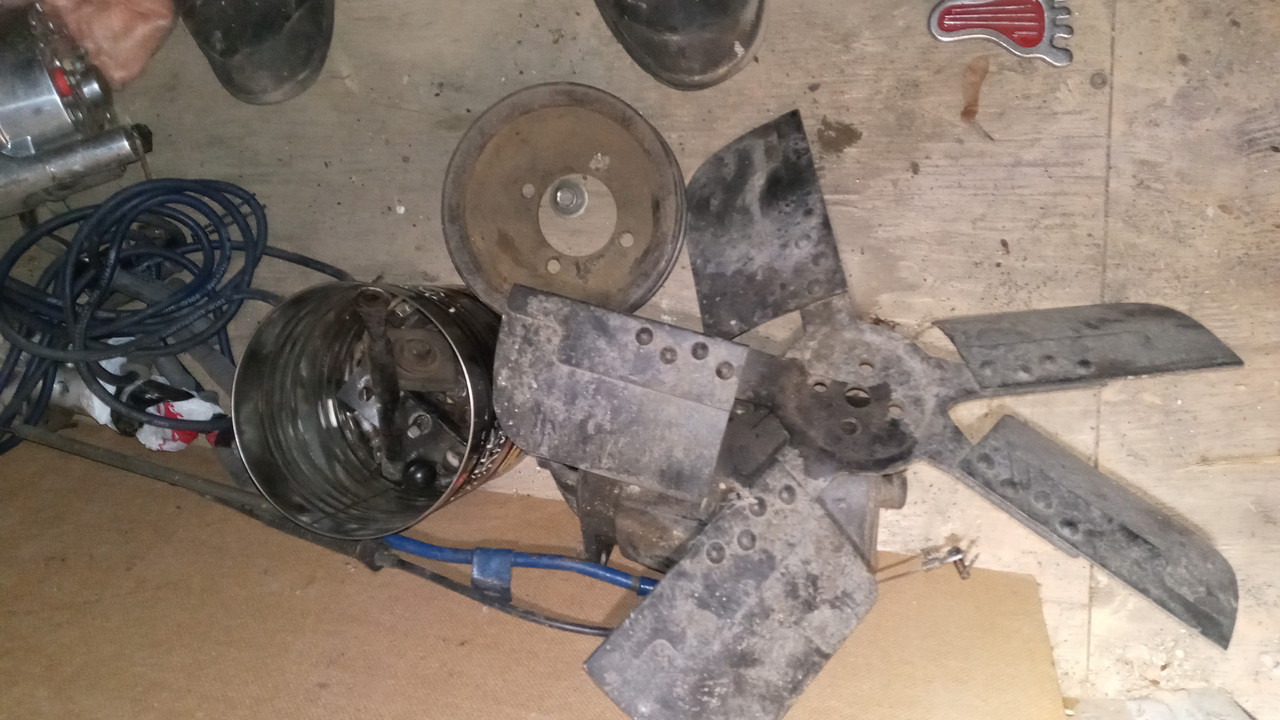
As for the blades being splayed, I am not sure of the reasoning but it sure pulls the air. No issues with balance. I also do not notice any increase in noise using this type of fan.
Jim
‘64 Cyclone/ Boss 302,quads,4spd, Winters 9”

Image

Lou's Comet
Posts: 1562
Joined: Sat Nov 26, 2011 8:56 pm
Location: Jeannette, Pa.

Re: Lou's 65 Comet Build

Post by Lou's Comet »

Jims65cyclone wrote:
Wed Nov 01, 2023 4:56 pm
This is an aside, but what was the purpose of the non-symmetrical placement of the blades on those fans? Seems like it would throw the balance out of whack. :?

Jim
For noise. The different gaps help keep fan noise down.

Lou
Image

User avatar
poboyjo65
Moderator
Posts: 7081
Joined: Thu Oct 20, 2011 9:40 pm
Location: Camden, Tenn.

Re: Lou's 65 Comet Build

Post by poboyjo65 »

Those gaps came in handy,made it easier to put belts on & off too, & for other stuff,cant remember what :roll: but I do remember spinning the fan around to the gap for more room, maybe changing hoses.
Image
Johno

User avatar
Jims65cyclone
Posts: 2777
Joined: Sun Nov 23, 2014 10:29 pm
Location: Lexington, SC

Re: Lou's 65 Comet Build

Post by Jims65cyclone »

It still seems out of balance. If you ran a screw driver through the center hole and held it sideways, I'd bet money the three blades would sink to the bottom. Bolt that to the front of an engine and spin it at a couple thousand rpm, I'd expect it to tear something up. Is it counterbalanced some way? :?

Jim
Image

User avatar
Joe Travers
Posts: 2460
Joined: Mon Sep 21, 2020 6:23 pm
Location: Louisiana

Re: Lou's 65 Comet Build

Post by Joe Travers »

I wouldn't be concerned about noise.

Good gracious, solid roller cam, headers, straight through mufflers...........
I don't think a fan would be an issue. Back in the day when Ford put rubber grommets in their Hurst shifters for vibration and feel.

Joe
Image

1963 1/2 Custom Hardtop
342 stroker, solid roller, T-10, 3.55 posi

User avatar
poboyjo65
Moderator
Posts: 7081
Joined: Thu Oct 20, 2011 9:40 pm
Location: Camden, Tenn.

Re: Lou's 65 Comet Build

Post by poboyjo65 »

Jims65cyclone wrote:
Wed Nov 01, 2023 8:04 pm
It still seems out of balance. If you ran a screw driver through the center hole and held it sideways, I'd bet money the three blades would sink to the bottom. Bolt that to the front of an engine and spin it at a couple thousand rpm, I'd expect it to tear something up. Is it counterbalanced some way? :?

Jim
I'd bet you'd loose that money Jim. it can be balanced & not be symmetrical. It's the way the blades are placed, they counter balance each other. lots of vehicles were built with these.
Image
Johno

User avatar
Jims65cyclone
Posts: 2777
Joined: Sun Nov 23, 2014 10:29 pm
Location: Lexington, SC

Re: Lou's 65 Comet Build

Post by Jims65cyclone »

poboyjo65 wrote:
Wed Nov 01, 2023 10:34 pm
I'd bet you'd loose that money Jim. it can be balanced & not be symmetrical. It's the way the blades are placed, they counter balance each other. lots of vehicles were built with these.
Obviously it must be balanced or there'd be millions of them out there flying apart. There must be some counter balance weights built into the two-blade side of the fan. However they did it, it works.

Jim
Image

User avatar
SASSY
Moderator
Posts: 5155
Joined: Sat Jan 07, 2006 12:32 am
Location: Wynndel, BC CANADA

Re: Lou's 65 Comet Build

Post by SASSY »

Oh ya it be balanced! That C I had in Sassy back in the 70s was to the moon and back many a time on missed shifts!!
Busted everything behind the motor at least once but the C just had to catch its breath and was ready to go.
I'd rather do it myself if it's done right or not,,,isn't that what hotrodding is all about

Image

Lou's Comet
Posts: 1562
Joined: Sat Nov 26, 2011 8:56 pm
Location: Jeannette, Pa.

Re: Lou's 65 Comet Build

Post by Lou's Comet »

WOW been awhile since I posted any updates. Been making progress mostly odds and ends, little detail stuff. Got my hood pins and lanyards finished. First took the lanyards and put some heat shrink over the crimps, think it looks cleaner.

Image

Also used some cable clamps to have a place to put the hairpins when hood is up.

Image

Mounted them to the nut. That holds on the headlight extension trim pieces. Kind of hidden

Image

Here is what they look like with the hood open and clips in the clamps

Image

And hood closed

Image

Piece by piece lol

Lou
Image

Lou's Comet
Posts: 1562
Joined: Sat Nov 26, 2011 8:56 pm
Location: Jeannette, Pa.

Re: Lou's 65 Comet Build

Post by Lou's Comet »

Going with couple smaller update post instead of long one. One of the other loose ends I still had to deal with was the heater hoses. With the tall valve covers the bottom heater hose didn't work. I bought the plastic 90 degree elbows but didn't really like them. Decided to go with preform hoses. Couldn't find any long enough to work so I made my own by sectioning them.

Image

I used some high tack on the adaptor where I spliced them and used heat shrink hose clamps instead of worm clamps for a cleaner look.

I also install some split loom on the bends where they go thru the fire wall to tighten up the gap and give the hose some protection. Used some larger heat shrink wire tubing to clean up the ends of the split loom and to keep it from fraying. Here they are on the car

Image

Image

Will get a nice clamp or 2 too mount them to the fender apron.

Lou
Image

Lou's Comet
Posts: 1562
Joined: Sat Nov 26, 2011 8:56 pm
Location: Jeannette, Pa.

Re: Lou's 65 Comet Build

Post by Lou's Comet »

More little stuff.

Really want the engine compartment to look simple, minimalistic. Which involves making things blend in instead of sticking out.

Finally got the right fan spacer for my setup, but it is open and you can see the mounting bolts shaft.

Image

Was just going to paint the bolt black, but paint has a tendency to chip on bolts. So I used heat shrink to make the shank black.

Image

Looks much better.

Image

Another thing on the list was mark the inside of hood where I want to cut it for air cleaner. Tried marking it thru the rad opening but that was a pain. The cleaner lid was really close to the inside of hood so I placed a couple washers under carb so lid just touched inside of hood. Then put couple pieces of 2-sided scotch tape on lid.

Image

Cut a piece of the dynamat sticky foam same size as aircleaner lid and stuck it to lid sticky side up.

Image

Then closed hood.

Image

Now I know where the air cleaner is on inside of hood. Still haven't decided on how much larger to cut it. 1.5" or 2" bigger?

Lou
Image

Lou's Comet
Posts: 1562
Joined: Sat Nov 26, 2011 8:56 pm
Location: Jeannette, Pa.

Re: Lou's 65 Comet Build

Post by Lou's Comet »

Some more detail stuff for engine.

Wasn't happy with how long the oil dip stick stuck up so I cut 5" out of it.

Image

Still thinking of blacking it out,,, but for now leave it chrome.

Bent up the fuel line from pump to carb, used 3/8 steel tubing

Image

It was a dark green color. I like black so I covered it with heat shrink.

Image

Was a pain but it came out really nice.

Image

Also got my new glass, the windshield is factory tint/shaded, all the rest is smoked

Image

After three tries got the windshield in

Image

1st try the stainless trim was off, took it back out and found the slit for the trim in the rubber gasket wasn't finished the whole way across.

Then put it 2nd time and it dint seat all the way done one the drivers side. Took it back out and found the lower flange was bent up on the drivers side. Made a gauge from the pass side and bent the drivers side to match.

Image

Still got a pretty big list but I have been crossing things off and making progress.

Lou
Image

User avatar
poboyjo65
Moderator
Posts: 7081
Joined: Thu Oct 20, 2011 9:40 pm
Location: Camden, Tenn.

Re: Lou's 65 Comet Build

Post by poboyjo65 »

I so very much needed to see this.especially that last pic! :D my flange was wavy & not put together right in places with one side of flange higher than the other. I had been trimming it & getting the waves out a while back. Now I know how I will check it all . So Thanks again. been in the back of my mind trying to figure out how I could do it better than just eyeballing it. All the other updates are cool too, might borrow some of them. really like those hoses, did you take notice what they were for? or have a part#?

How far is your breather going up in the snorkel Lou? all the way? Are you going with some sort of rubber flap to seal it off from engine heat? I was looking at a radiator support to hood seal post a while back ,cant remember where, but I thought something like that on the hole in my hood would let me get rid of the bigger breather base & foam seal that I have now that stays on carb & It would look so much better with some kind of seal on the hood.
Image
Johno

A/FX
Comet Central Member
Posts: 1119
Joined: Tue Jan 06, 2004 8:07 pm
Location: S.E. Wisconsin

Re: Lou's 65 Comet Build

Post by A/FX »

Looking good Lou! It’s the little details that make a difference.

When I was building my Comet I wanted to keep the heater but the rubber hoses interfered with the valve cover. I decided to move the hose tubing location, I soldered copper tubing to the core and moved the holes in the firewall. I used threaded 90 degree fittings and two Dayco 80398 heater hoses. The hoses were longer than I needed which was good. ( they may work well for some of you who need an option, they have a molded 90 degree end)
The hoses run along the valve cover near the intake, so they are not real visible.
I do not have a seal between the hood plenum and the air cleaners but the air cleaners do protrude into the cavity of the hood. I have about 1/2” of clearance around the air cleaners.
Jim

Image


Image
‘64 Cyclone/ Boss 302,quads,4spd, Winters 9”

Image

Caveman49
Posts: 482
Joined: Mon Aug 17, 2015 12:15 am
Location: South Alabama

Re: Lou's 65 Comet Build

Post by Caveman49 »

Looking real good Lou, the heat shrink makes it nice and clean, how does it hold up?
Image
Motor Safe,
Lee

Post Reply