Which studs did those AFR's have originally? I thought most of them were set up for 7/16ths from new.Changed to better valve springs, and changed to 7/16 studs.
Lou's 65 Comet Build
-
Boss/Cyclone

- Site Admin
- Posts: 2739
- Joined: Thu Oct 19, 2006 9:55 pm
- Location: South Central Michigan (Near Michigan International Speedway)
Re: Lou's 65 Comet Build
1965 Mercury Cyclone former drag car, 1971 Boss 351 engine, 4 speed, ladder bars, etc. Now returned to a street car.

Larry
Larry

Re: Lou's 65 Comet Build
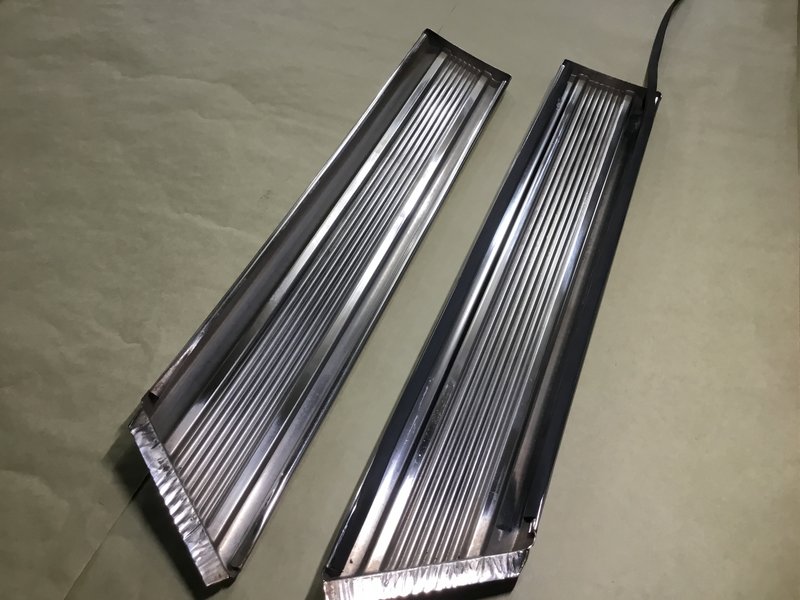
Lou that's a good looking set of turntables! & even better lookin set of rear trim! hard to find in that condition. I felt lucky when I found my set for $200,even though it had a cyclone badge. it had the anodized coating already stripped & polished.
Lou are you going back stock parts on the suspension?
Lou are you going back stock parts on the suspension?

Johno
-
Lou's Comet
- Posts: 1540
- Joined: Sat Nov 26, 2011 8:56 pm
- Location: Jeannette, Pa.
Re: Lou's 65 Comet Build
The original studs had 7/16 threads going into the heads and 3/8 thread/shaft where the rocker arms slide on. The ones I got to replace them are 7/16ths going into the head and 7/16ths where the rocker arms slide on.Boss/Cyclone wrote: ↑Sat Jun 11, 2022 9:52 amWhich studs did those AFR's have originally? I thought most of them were set up for 7/16ths from new.Changed to better valve springs, and changed to 7/16 studs.
Lou
-
Lou's Comet
- Posts: 1540
- Joined: Sat Nov 26, 2011 8:56 pm
- Location: Jeannette, Pa.
Re: Lou's 65 Comet Build
The turn tables were a buy!poboyjo65 wrote: ↑Sat Jun 11, 2022 3:19 pmLou that's a good looking set of turntables! & even better lookin set of rear trim! hard to find in that condition. I felt lucky when I found my set for $200,even though it had a cyclone badge. it had the anodized coating already stripped & polished.
Lou are you going back stock parts on the suspension?
The rear trim and the grille have been re-anodized. The guy had a set of re-anodized Cyclone trim on display. Which were nice and I was going to buy them because that was all I seen and I need the rear trim. When I went back to get them I told him I would prefer Caliente trim, but since all he had was the Cyclone I would take them. He looked at me for a moment or two then said he had a set of Caliente trim in the truck. They were just as nice and a lot cheaper. Was a good day!
I got the rear trim, grille and front hood trim for $50 more than what he wanted for the Cyclone rear trim.
Yea for now going with stock parts just because I already have everything new for the suspension and steering. Drilled for the Shelby drop. But the rest is all stock stuff. If I was to upgrade I would probably look at adjustable control arms. But for now just want to get the car running.
Lou
-
Joe Travers

- Posts: 2437
- Joined: Mon Sep 21, 2020 6:23 pm
- Location: Louisiana
Re: Lou's 65 Comet Build
Love to hear stories like this one. It was meant to beLou's Comet wrote: ↑Sat Jun 11, 2022 8:24 pmThe rear trim and the grille have been re-anodized. The guy had a set of re-anodized Cyclone trim on display. Which were nice and I was going to buy them because that was all I seen and I need the rear trim. When I went back to get them I told him I would prefer Caliente trim, but since all he had was the Cyclone I would take them. He looked at me for a moment or two then said he had a set of Caliente trim in the truck. They were just as nice and a lot cheaper. Was a good day!
I got the rear trim, grille and front hood trim for $50 more than what he wanted for the Cyclone rear trim.
You say the 7/16" studs are a simple swap (no drilling & tapping)? Asking in case I break a 3/8" one but it hasn't happened yet.
Joe

1963 1/2 Custom Hardtop
342 stroker, solid roller, T-10, 3.55 posi
-
Lou's Comet
- Posts: 1540
- Joined: Sat Nov 26, 2011 8:56 pm
- Location: Jeannette, Pa.
Re: Lou's 65 Comet Build
Yep, no drilling or tapping, just screw the 7/16" studs into existing holes. You would need to get 7/16 rockers to go with the studs.Joe Travers wrote: ↑Sat Jun 11, 2022 9:13 pmLove to hear stories like this one. It was meant to beLou's Comet wrote: ↑Sat Jun 11, 2022 8:24 pmThe rear trim and the grille have been re-anodized. The guy had a set of re-anodized Cyclone trim on display. Which were nice and I was going to buy them because that was all I seen and I need the rear trim. When I went back to get them I told him I would prefer Caliente trim, but since all he had was the Cyclone I would take them. He looked at me for a moment or two then said he had a set of Caliente trim in the truck. They were just as nice and a lot cheaper. Was a good day!
I got the rear trim, grille and front hood trim for $50 more than what he wanted for the Cyclone rear trim.
You say the 7/16" studs are a simple swap (no drilling & tapping)? Asking in case I break a 3/8" one but it hasn't happened yet.
Joe
Yea when he said he had a set for a Caliente I was thrilled. When I seen they were basically half the price of the Cyclone trim, I was more than thrilled. Now I need to finish the gas door so I can put the trim on
Lou
-
Joe Travers
- Posts: 2437
- Joined: Mon Sep 21, 2020 6:23 pm
- Location: Louisiana
Re: Lou's 65 Comet Build
Thanks, Lou! No problem there. Running stamped steel roller tips now. They don't recommend thoseLou's Comet wrote: ↑Sat Jun 11, 2022 10:42 pmYep, no drilling or tapping, just screw the 7/16" studs into existing holes. You would need to get 7/16 rockers to go with the studs.
I've read a lot about the full roller rockers. Comps don't fit but the Scorpions they recommend do, from what I know.
Finding good pieces like you did is like hitting gold for me. Almost as good as finding the car.
Joe
1963 1/2 Custom Hardtop
342 stroker, solid roller, T-10, 3.55 posi
-
Lou's Comet
- Posts: 1540
- Joined: Sat Nov 26, 2011 8:56 pm
- Location: Jeannette, Pa.
Re: Lou's 65 Comet Build
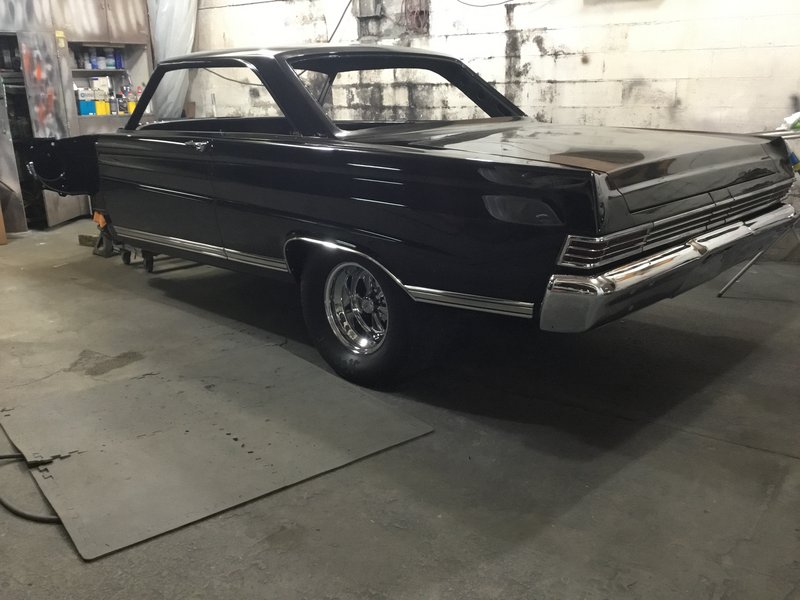
Couple updates on progress of my Comet.
Still sand blasting , epoxy, primer, and painting small parts. Just when I think I am almost done with them I find more.

I sandblasted the inner chrome windshield trim cause the chrome was pitting and really would prefer them black anyways. Also sandblasted the front turn signal housings cause one had some damage and haven't been able to find a nice set. So I blasted them, epoxied them, fixed the damage, and painted them black. Think they will look ok and if I do find a good set can always swap them later.
Epoxied
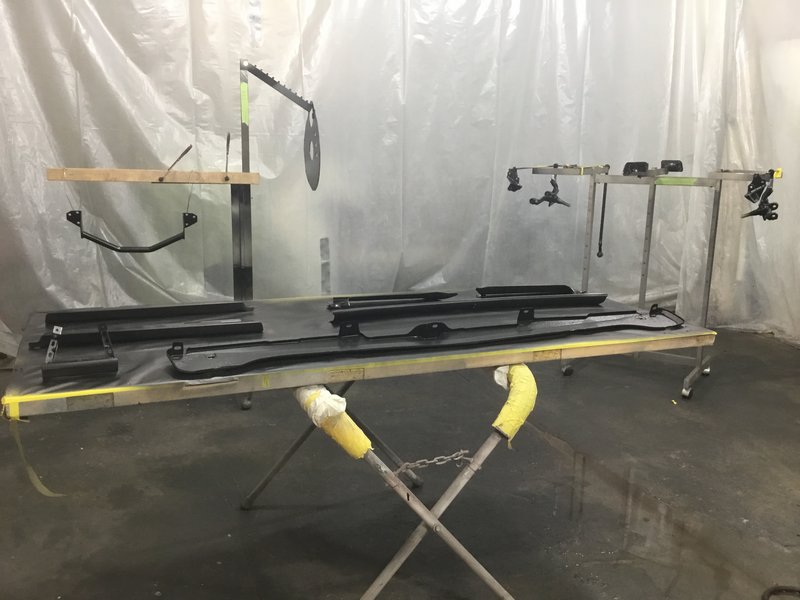
Most of the parts went from epoxy straight to paint. I prepped the inside of my rechromed bumpers years ago with the POR system and primered them. So prepped those to paint with the other parts.
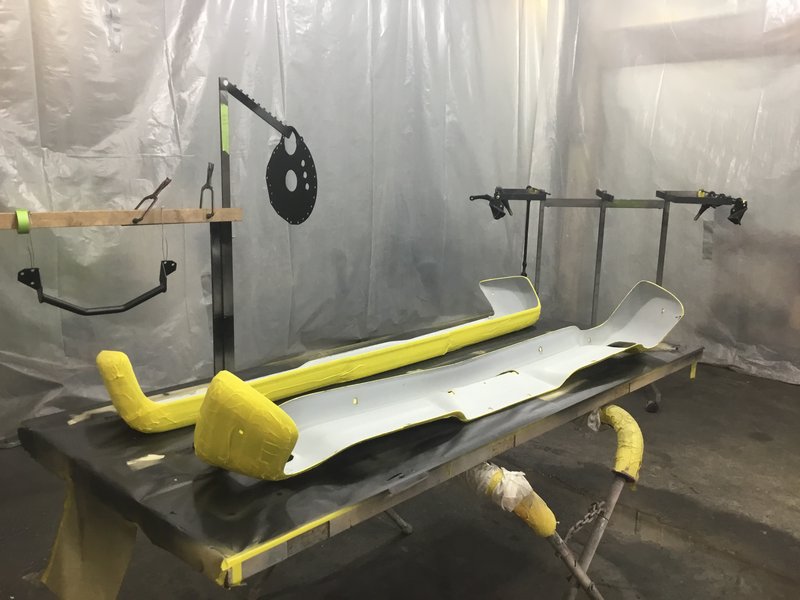
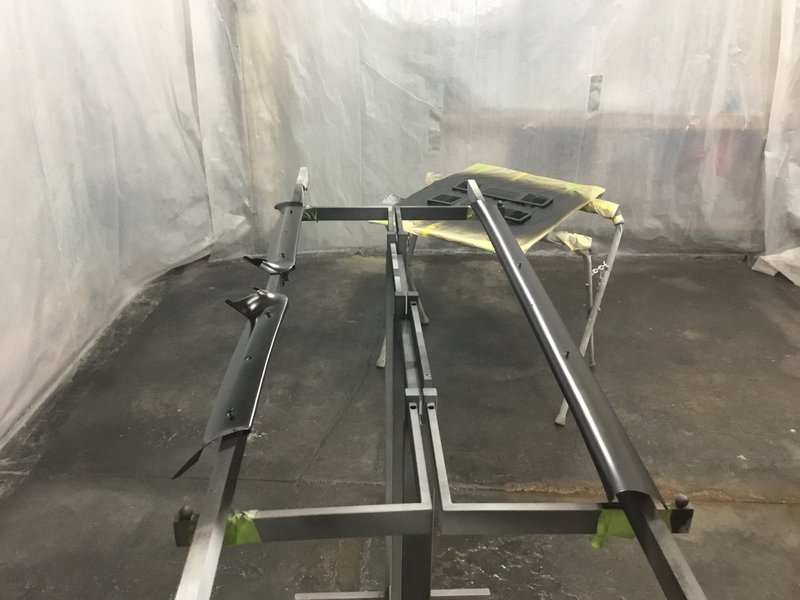
Black

Also decided (after talking to you guys) to change the top of my dash from gloss to satin. I repaint the black and used a flatting agent in my clear to make it satin.

Also did a couple speaker grill's and the inside windshield trim in black with satin clear.
Bought a new black dash cover, the same one John got, still need to order the clips.
Got my spindles painted and was going to start the front suspension, the decided to do the roller perches and pitman arm so ordered those from opentracker. So moved on to the trim stuff.
Lou
Still sand blasting , epoxy, primer, and painting small parts. Just when I think I am almost done with them I find more.
I sandblasted the inner chrome windshield trim cause the chrome was pitting and really would prefer them black anyways. Also sandblasted the front turn signal housings cause one had some damage and haven't been able to find a nice set. So I blasted them, epoxied them, fixed the damage, and painted them black. Think they will look ok and if I do find a good set can always swap them later.
Epoxied
Most of the parts went from epoxy straight to paint. I prepped the inside of my rechromed bumpers years ago with the POR system and primered them. So prepped those to paint with the other parts.
Black
Also decided (after talking to you guys) to change the top of my dash from gloss to satin. I repaint the black and used a flatting agent in my clear to make it satin.
Also did a couple speaker grill's and the inside windshield trim in black with satin clear.
Bought a new black dash cover, the same one John got, still need to order the clips.
Got my spindles painted and was going to start the front suspension, the decided to do the roller perches and pitman arm so ordered those from opentracker. So moved on to the trim stuff.
Lou
-
Lou's Comet
- Posts: 1540
- Joined: Sat Nov 26, 2011 8:56 pm
- Location: Jeannette, Pa.
Re: Lou's 65 Comet Build
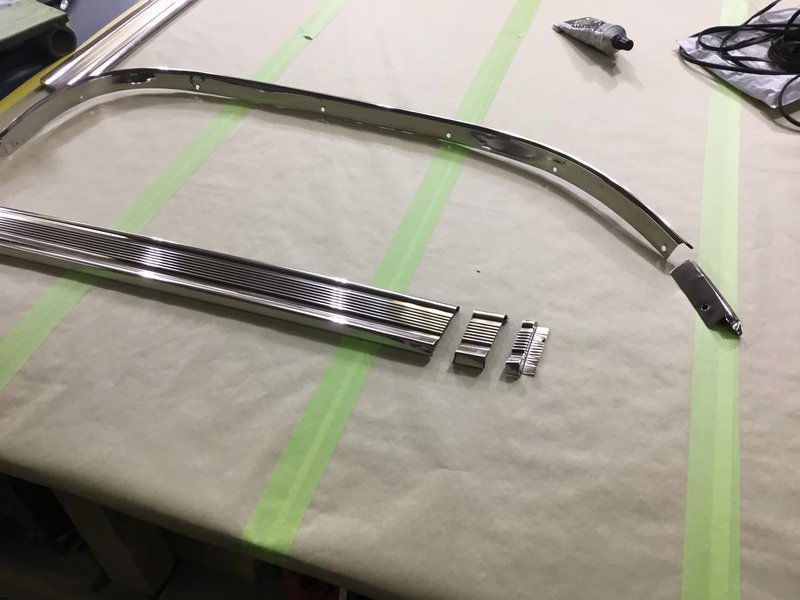
Started putting the trim on the car. I got a nice set of redone panels for the rear of the car at Carlisle this year, and already mounted my rechromed tail light housings. The tail light housings have two rubber seals between them and the body, a thick inner one and a thinner one for the outside edge. Little weatherstrip adhesive held them in place for mounting. The 3 trim pieces in between the tail lights didn't have any seals. I used commercial rubber cove base moulding I got fro local Home Depot to put between the trim and the body. The rubber cove was the correct height all I had to do was cut the length and put holes in it for the clips. Came out real nice the the edge looks factory.

Still need to fine tune the alignment on trunk, bumper and gas door. Missing outer brackets for bumper
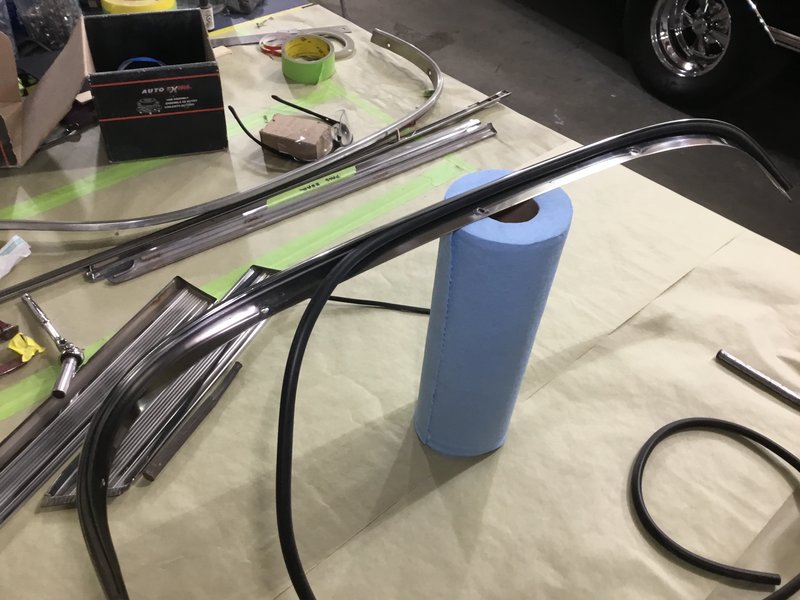
Started on the drivers rear quarter panel trim. Took some small dings out and polished the pieces. I used black pinstripe tape for the recessed part instead of painting.

Did get them to fit pretty nice. Maybe a little tweaking still needs done to the front one on the qtr,(behind door) but pretty happy with results.

The one between the door and front of wheel opening needed to be 1.5" shorter and the wheel opening moulding need to be about 2" longer.
I cut a piece out of the front trim, saving the edge to reinstall. The wheel opening moulding I cut the end off and cut a small piece off of a scrap one to add length
Then seamed them back together at right length.
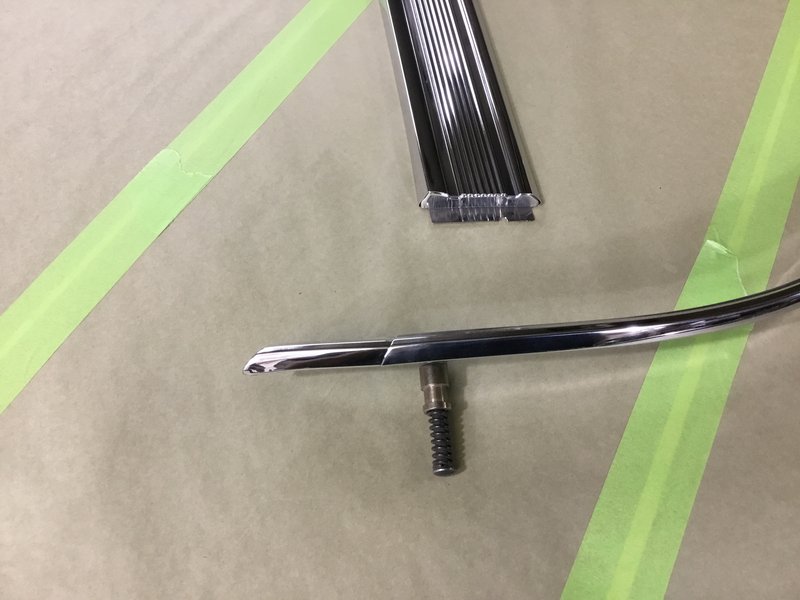
Wanted to hide the seams the best I could. And kind of hide the seams in the shadows. The front moulding I seamed at the very edge where it meets the wheel opening moulding.

The wheel opening moulding I seamed at the rear where it meets the rear qtr moulding to help hide it a little

Also made some rubber seals for the trim. Don't want any squeaks or rattles and will help protect the paint. For the straight mouldings I had some small rubber "u" trim that's fit well
And for the wheel opening moulding I found 7/32 vacuum hose fits perfect to seal it with body
Also a little black silicone on the wheel opening moulding where the screws go into body. The straight moulding's have universal clips with studs to mount. Since the inside of the doors have Dynamat and the inside of the quarters have the summit brand mat, I use larger washers under the nuts so when they were tightened it would squeeze the butyl into the body holes to seal.
Couple pictures showing alignment and gaps. The door to quarter lined up real nice.
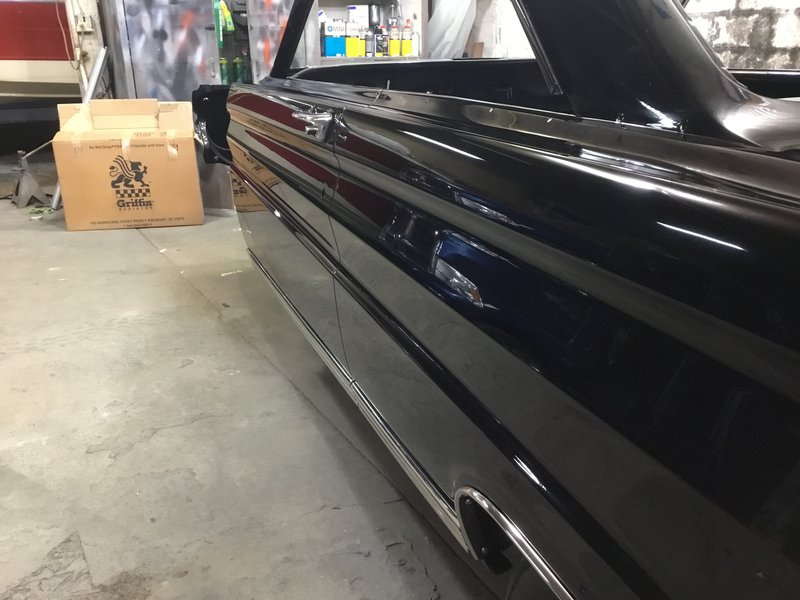
Still need a little work on trunk and rear bumper. Plus still need to polish trunk.

Starting to look like something!
Lou
Still need to fine tune the alignment on trunk, bumper and gas door. Missing outer brackets for bumper
Started on the drivers rear quarter panel trim. Took some small dings out and polished the pieces. I used black pinstripe tape for the recessed part instead of painting.
Did get them to fit pretty nice. Maybe a little tweaking still needs done to the front one on the qtr,(behind door) but pretty happy with results.
The one between the door and front of wheel opening needed to be 1.5" shorter and the wheel opening moulding need to be about 2" longer.
I cut a piece out of the front trim, saving the edge to reinstall. The wheel opening moulding I cut the end off and cut a small piece off of a scrap one to add length
Then seamed them back together at right length.
Wanted to hide the seams the best I could. And kind of hide the seams in the shadows. The front moulding I seamed at the very edge where it meets the wheel opening moulding.
The wheel opening moulding I seamed at the rear where it meets the rear qtr moulding to help hide it a little
Also made some rubber seals for the trim. Don't want any squeaks or rattles and will help protect the paint. For the straight mouldings I had some small rubber "u" trim that's fit well
And for the wheel opening moulding I found 7/32 vacuum hose fits perfect to seal it with body
Also a little black silicone on the wheel opening moulding where the screws go into body. The straight moulding's have universal clips with studs to mount. Since the inside of the doors have Dynamat and the inside of the quarters have the summit brand mat, I use larger washers under the nuts so when they were tightened it would squeeze the butyl into the body holes to seal.
Couple pictures showing alignment and gaps. The door to quarter lined up real nice.
Still need a little work on trunk and rear bumper. Plus still need to polish trunk.
Starting to look like something!
Lou
-
Boss/Cyclone
- Site Admin
- Posts: 2739
- Joined: Thu Oct 19, 2006 9:55 pm
- Location: South Central Michigan (Near Michigan International Speedway)
Re: Lou's 65 Comet Build
That looks great!
1965 Mercury Cyclone former drag car, 1971 Boss 351 engine, 4 speed, ladder bars, etc. Now returned to a street car.
Larry
Larry
-
Jims65cyclone

- Posts: 2764
- Joined: Sun Nov 23, 2014 10:29 pm
- Location: Lexington, SC

-
Joe Travers
- Posts: 2437
- Joined: Mon Sep 21, 2020 6:23 pm
- Location: Louisiana
Re: Lou's 65 Comet Build
Looking great and bringing back a lot of memories, Lou!
There was a black drag car w/ Cragers sitting on a trailer in a little town just 15 minutes South of me many years ago. Got to know the owner well and he always gave me parts for my car. I tried to find him again during the lockdown 2 years ago and the police station wasn't even open!
He had bought the car new but sold it when he went to Vietnam. When he came back home, he found the car had been wrecked and he bought it back and fully restored it. Being the shop foreman @ the Ford dealership really helped matters a lot.
Joe
1963 1/2 Custom Hardtop
342 stroker, solid roller, T-10, 3.55 posi
Re: Lou's 65 Comet Build

Lou is it the little bumper to quarter bracket s that you need? I have one but it is rusty.i was going to.make a set they are just flat metal.ill get a picture of it today.they pretty much have to be bent to fit any way
Johno
-
Lou's Comet
- Posts: 1540
- Joined: Sat Nov 26, 2011 8:56 pm
- Location: Jeannette, Pa.
Re: Lou's 65 Comet Build
Thanks guys!
John yea the little bumper to qtr brackets. I have seen pictures of them just don't know the dimensions.. I was going to make some. But haven't got that ambitious yet. They look like they are thicker steel, 3/16 - 1/4 "?
Lou
John yea the little bumper to qtr brackets. I have seen pictures of them just don't know the dimensions.. I was going to make some. But haven't got that ambitious yet. They look like they are thicker steel, 3/16 - 1/4 "?
Lou
Re: Lou's 65 Comet Build
Awesome work Lou. Fun to see pictures of somebody's work that knows what there doing.
Tom
Tom
tomb's 65