I worked in the parts department of a Ford dealership in the 80's while I was in college. It was one of the bigger Ford Motorsports part dealers. Picked them up then and been using them ever since. It is a girdle and a valve cover in one, I just thought it looked cooler than some huge Moroso valve covers that everyone was running back then to cover up their valvetrain girdles. Sorry if this is off topic but I think we all understand that this site is like a bunch of us sitting around a bonfire drinking a beer, the conversation can go anywhere.A/FX wrote: ↑Tue Dec 27, 2022 9:46 pmNot to hijack this thread but I had a NOS pair of those valve covers. They were never installed, the nuts, studs, etc. were still in the shrink packaging. I sold them a few years ago when I decided to use the stock Boss valve covers on my Cyclone.
I was told they only made about 100 sets in a few different versions.
Jim
Lou's 65 Comet Build
-
Boss/Cyclone

- Site Admin
- Posts: 2739
- Joined: Thu Oct 19, 2006 9:55 pm
- Location: South Central Michigan (Near Michigan International Speedway)
Re: Lou's 65 Comet Build
1965 Mercury Cyclone former drag car, 1971 Boss 351 engine, 4 speed, ladder bars, etc. Now returned to a street car.

Larry
Larry
-
Lou's Comet
- Posts: 1540
- Joined: Sat Nov 26, 2011 8:56 pm
- Location: Jeannette, Pa.
Re: Lou's 65 Comet Build
That's pretty cool. I never seen valve covers with a girdle built it..Boss/Cyclone wrote: ↑Wed Dec 28, 2022 4:42 pm
......... It is a girdle and a valve cover in one, I just thought it looked cooler than some huge Moroso valve covers that everyone was running back then to cover up their valvetrain girdles.............
Lou
Re: Lou's 65 Comet Build
Not sure if you installed the specific studs for the rockers that protrude out of the valve cover and are capped with the concave washers and chrome acorn nut. I have seen them installed but I believe they just used a fine thread bolt through the cover with the acorn nut. From what I was told it was a real SOB to adjust the valves and install the cover.
But they sure have the cool factor going when you open the hood. I did not use them because I thought they looked too modern for the build theme I had for my Comet, and the sale of them let me splurge a little more on my build.
Jim
Now back to regular scheduled programming.............
But they sure have the cool factor going when you open the hood. I did not use them because I thought they looked too modern for the build theme I had for my Comet, and the sale of them let me splurge a little more on my build.
Jim
Now back to regular scheduled programming.............
‘64 Cyclone/ Boss 302,quads,4spd, Winters 9”
-
Boss/Cyclone
- Site Admin
- Posts: 2739
- Joined: Thu Oct 19, 2006 9:55 pm
- Location: South Central Michigan (Near Michigan International Speedway)
Re: Lou's 65 Comet Build
I have the complete kit, with special studs, copper washers and an aluminum shere that drops in before the washers. Boss 351's have the lash set cold "from memory" at .22 so no problems, just set it and install.A/FX wrote: ↑Wed Dec 28, 2022 6:47 pmNot sure if you installed the specific studs for the rockers that protrude out of the valve cover and are capped with the concave washers and chrome acorn nut. I have seen them installed but I believe they just used a fine thread bolt through the cover with the acorn nut. From what I was told it was a real SOB to adjust the valves and install the cover.
But they sure have the cool factor going when you open the hood. I did not use them because I thought they looked too modern for the build theme I had for my Comet, and the sale of them let me splurge a little more on my build.
Jim
Now back to regular scheduled programming.............
1965 Mercury Cyclone former drag car, 1971 Boss 351 engine, 4 speed, ladder bars, etc. Now returned to a street car.
Larry
Larry
-
Lou's Comet
- Posts: 1540
- Joined: Sat Nov 26, 2011 8:56 pm
- Location: Jeannette, Pa.
Re: Lou's 65 Comet Build
My shaft is good! Yea I read the FAQ, and do agree that the sealed would be better. But I think the roller will work just fine for me. Not like the bearings are spinning like a hub bearing. And really don't think the dirt from under the dash will hurt them. Plus I think the roller make for a cleaner installation. Also the kit for the roller has a replacement shaft if the original was bad.poboyjo65 wrote: ↑Tue Dec 27, 2022 8:18 pmMight want to look at your shaft before you order it Lou. I think this is the one Joe used, read down at the bottom the FAQ where he says which is better;
https://mustangsteve.com/product/Ball-B ... Shaft-Kit/
I think someone like Fred or Mike could go find the bearings & washers at the partstore for a lot less. & Joe63 this is the one that needs a little welding,just weld the washers on I think.
But thanks for the additional info, appreciate it!!
Lou
-
Lou's Comet
- Posts: 1540
- Joined: Sat Nov 26, 2011 8:56 pm
- Location: Jeannette, Pa.
Re: Lou's 65 Comet Build
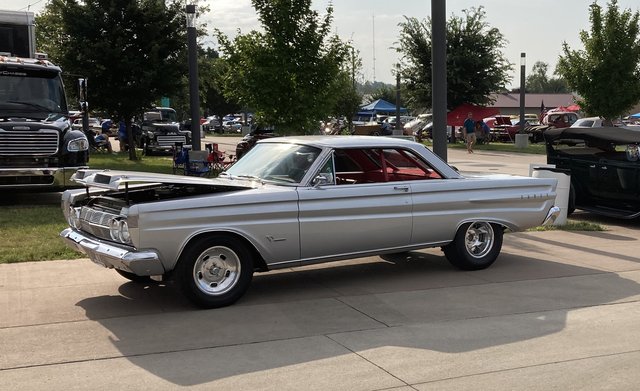
Been getting work done on my Comet, still bouncing around but I am making progress!.
Got the front brakes on and most of the front suspension.


Also started to test fit headers and bell housing on engine.

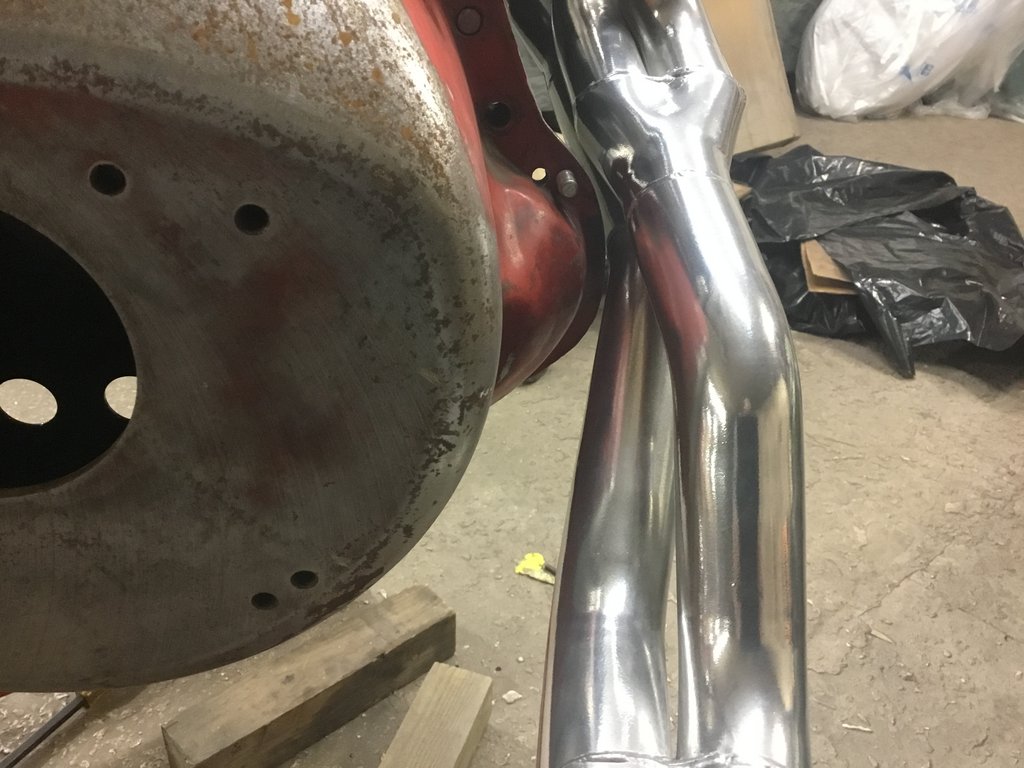
For the drivers side header had to grind on the block some for it to fit, and for the pass side header I had to grind on the block plate and bellhousing.
Then painted the bellhousing. Had some red caliper pint so just used that.

Still need to round up all the bolts for the bellhousing. And figure what fork to use. Also may have a problem with where the ball for the clutch bell crank is on engine block. Might not miss header and may have to make a bracket. But I am making progress !!
Got the front brakes on and most of the front suspension.
Also started to test fit headers and bell housing on engine.
For the drivers side header had to grind on the block some for it to fit, and for the pass side header I had to grind on the block plate and bellhousing.
Then painted the bellhousing. Had some red caliper pint so just used that.
Still need to round up all the bolts for the bellhousing. And figure what fork to use. Also may have a problem with where the ball for the clutch bell crank is on engine block. Might not miss header and may have to make a bracket. But I am making progress !!
-
Lou's Comet
- Posts: 1540
- Joined: Sat Nov 26, 2011 8:56 pm
- Location: Jeannette, Pa.
Re: Lou's 65 Comet Build
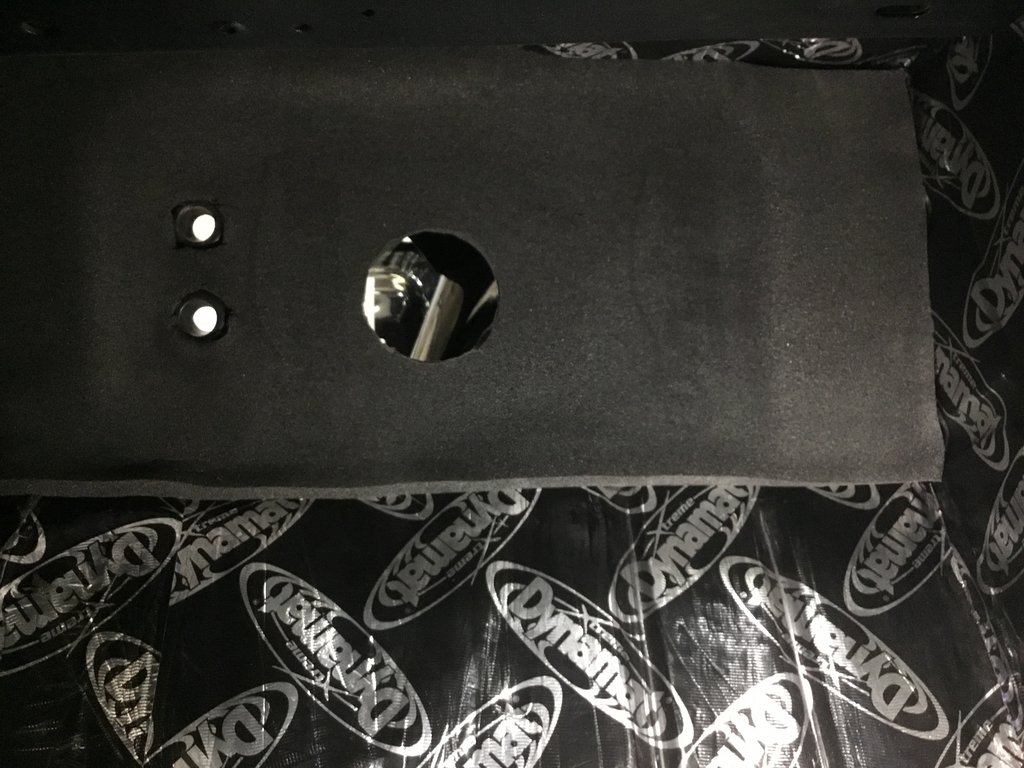
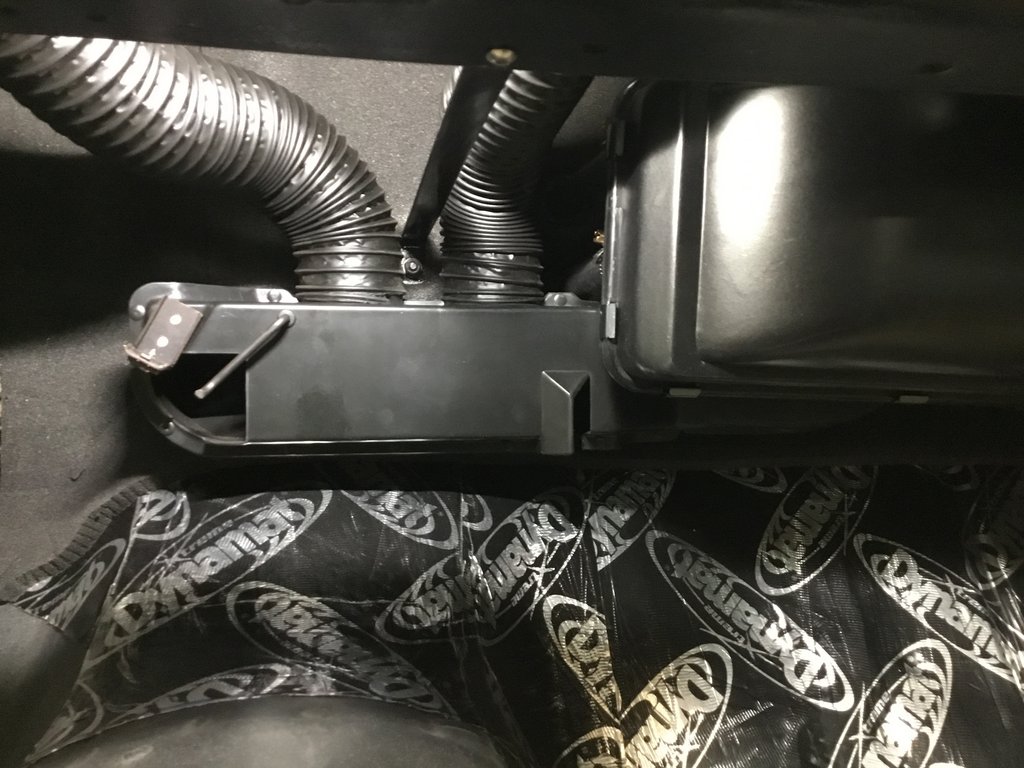
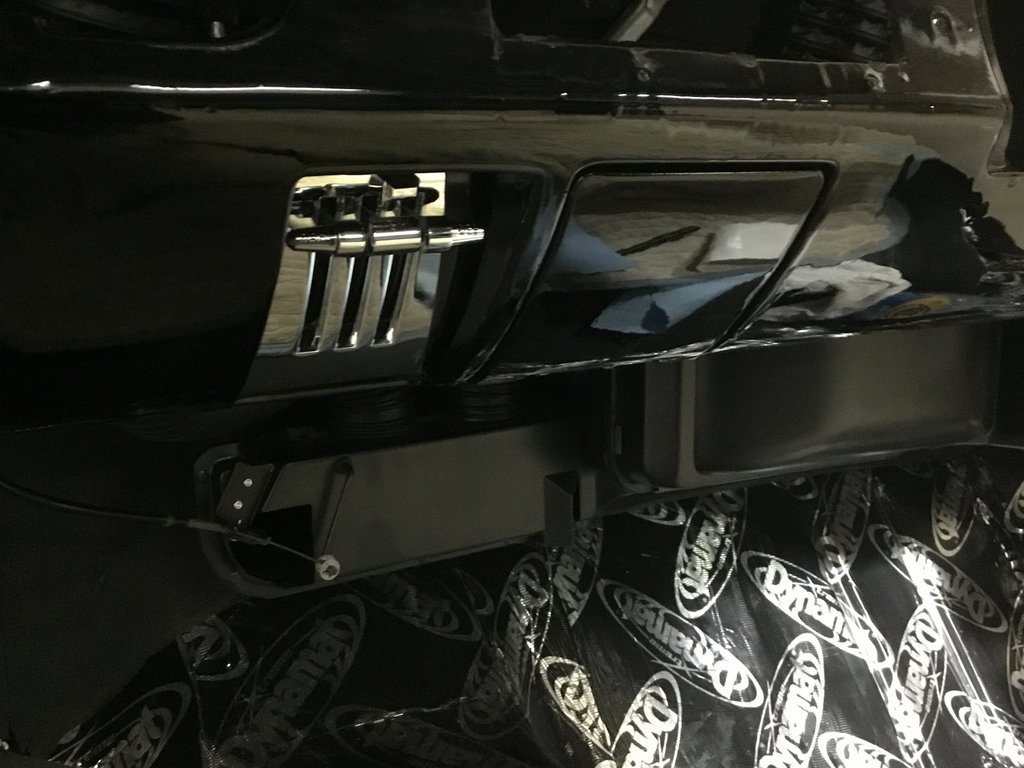
Also been getting some work done on inside.Instead of buying the inner firewall pad I decided to just use the Dynomat, and cover it with 1/2" Dynaliner.
Assembled heat box with new core and got the other parts to install heater.
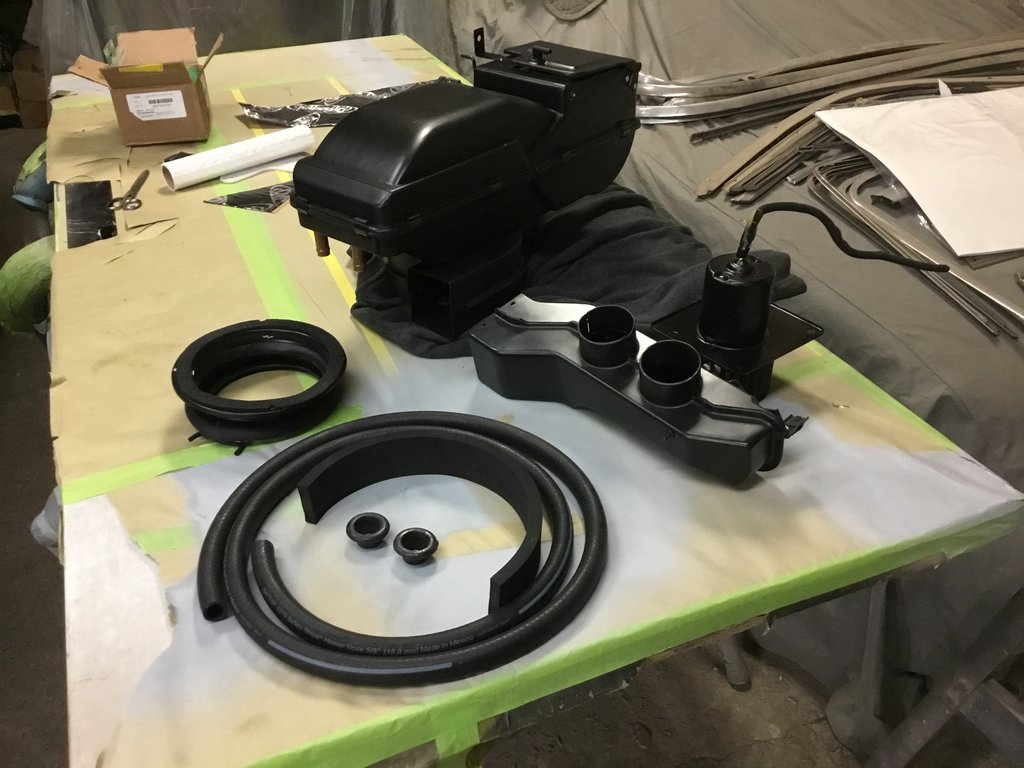
The new plastic defroster plenum didn't fit that great to I ran some rubber U Chanel around the opening so it fit tight.

And mounted the assembly with heater hose's into car. While I was playing with the dash area I decided to add a extra support brace from dash to firewall. My new gauge bezel is steel instead of plastic and thinking I may be adding weight to the dash so a extra support wouldn't hurt.

Here it is installed, the hole in the firewall was already there.
Also installed the wiper motor and wiper linkage, but didn't take pictures.
Installed the heater control panel. Bought new chrome for the bezel and knobs, cables were fine. Before installing it I ran some of the rubber U channel on the edge of the opening to tighten it up and make sure no squeaks.

Then mounted the controls
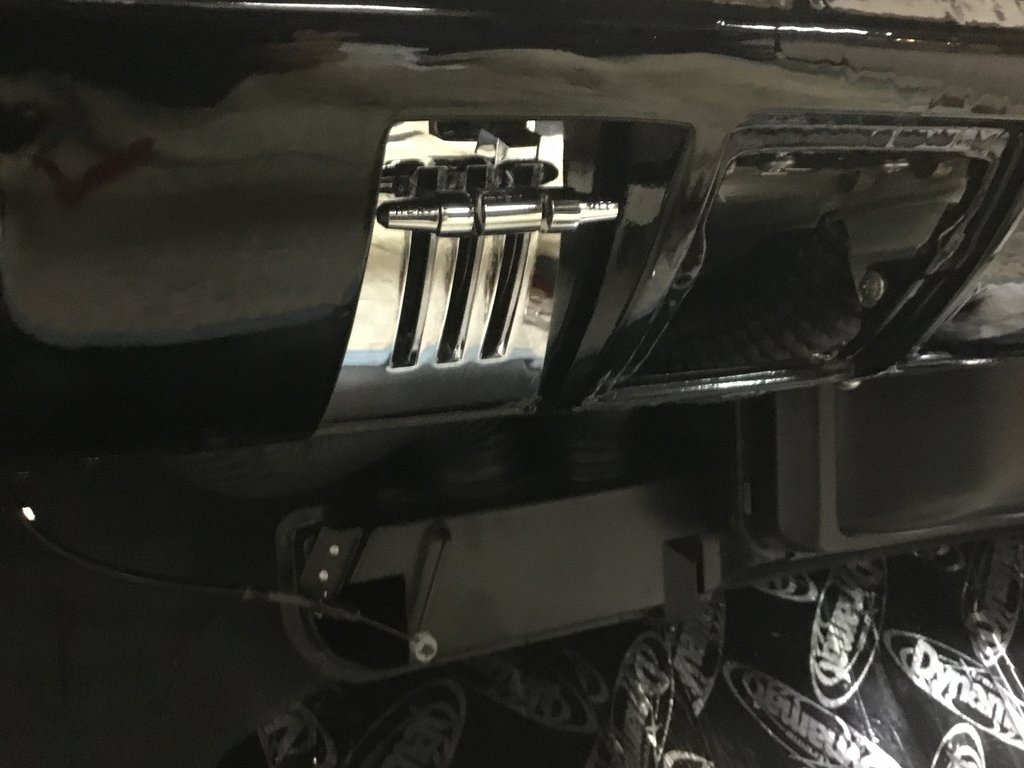
For some reason I haven't been able to find the rubber bumpers for the ash tray. So until I can find them I made some out of dynaliner with my gasket cutter.
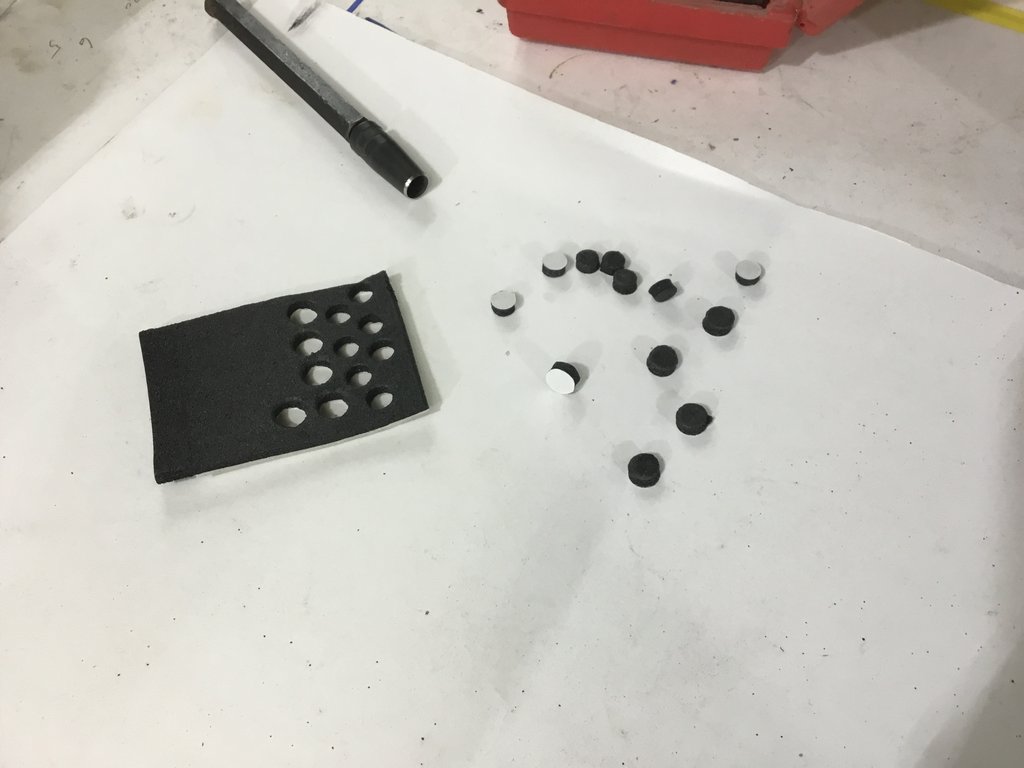
And just stuck them on for the time being.
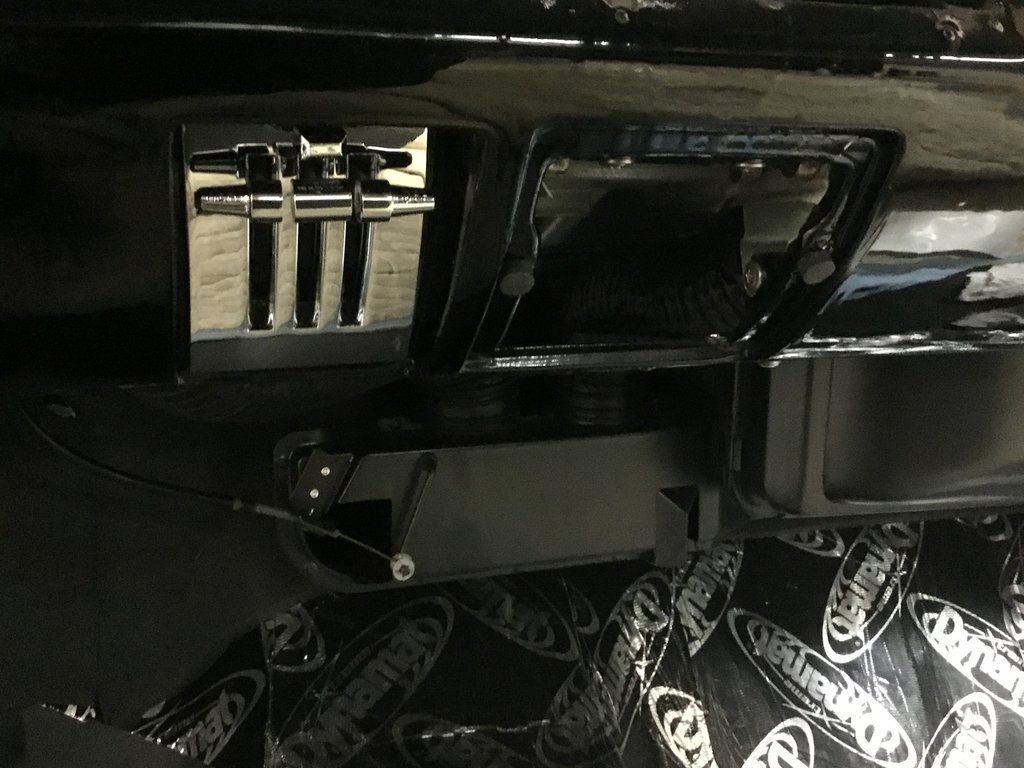
With the ash tray in place.
Think I can start placing the wiring in the dash and figuring where to put the fuse box. I decided to just get a Ron Francis harness instead of making my own, can change a few things but it will give me a good solid start to the wiring. Would like to put the dash pad on and get the gauge bezel, and glove box in. But not sure if I want to put the pad in before I do the windshield. And can't do the windshield until my vinyl top comes. I will just move onto something else for now.
Lou
Assembled heat box with new core and got the other parts to install heater.
The new plastic defroster plenum didn't fit that great to I ran some rubber U Chanel around the opening so it fit tight.
And mounted the assembly with heater hose's into car. While I was playing with the dash area I decided to add a extra support brace from dash to firewall. My new gauge bezel is steel instead of plastic and thinking I may be adding weight to the dash so a extra support wouldn't hurt.
Here it is installed, the hole in the firewall was already there.
Also installed the wiper motor and wiper linkage, but didn't take pictures.
Installed the heater control panel. Bought new chrome for the bezel and knobs, cables were fine. Before installing it I ran some of the rubber U channel on the edge of the opening to tighten it up and make sure no squeaks.
Then mounted the controls
For some reason I haven't been able to find the rubber bumpers for the ash tray. So until I can find them I made some out of dynaliner with my gasket cutter.
And just stuck them on for the time being.
With the ash tray in place.
Think I can start placing the wiring in the dash and figuring where to put the fuse box. I decided to just get a Ron Francis harness instead of making my own, can change a few things but it will give me a good solid start to the wiring. Would like to put the dash pad on and get the gauge bezel, and glove box in. But not sure if I want to put the pad in before I do the windshield. And can't do the windshield until my vinyl top comes. I will just move onto something else for now.
Lou

Re: Lou's 65 Comet Build
Lou I dont remember you frenching in the heater controls,have you mentioned it? looks smooth! cool!
these say ''in stock'' for a stang ,,,,aren't they the same? ;
https://www.cjponyparts.com/scott-drake ... 70QAvD_BwE
these say ''in stock'' for a stang ,,,,aren't they the same? ;
https://www.cjponyparts.com/scott-drake ... 70QAvD_BwE

Johno
-
Lou's Comet
- Posts: 1540
- Joined: Sat Nov 26, 2011 8:56 pm
- Location: Jeannette, Pa.
Re: Lou's 65 Comet Build
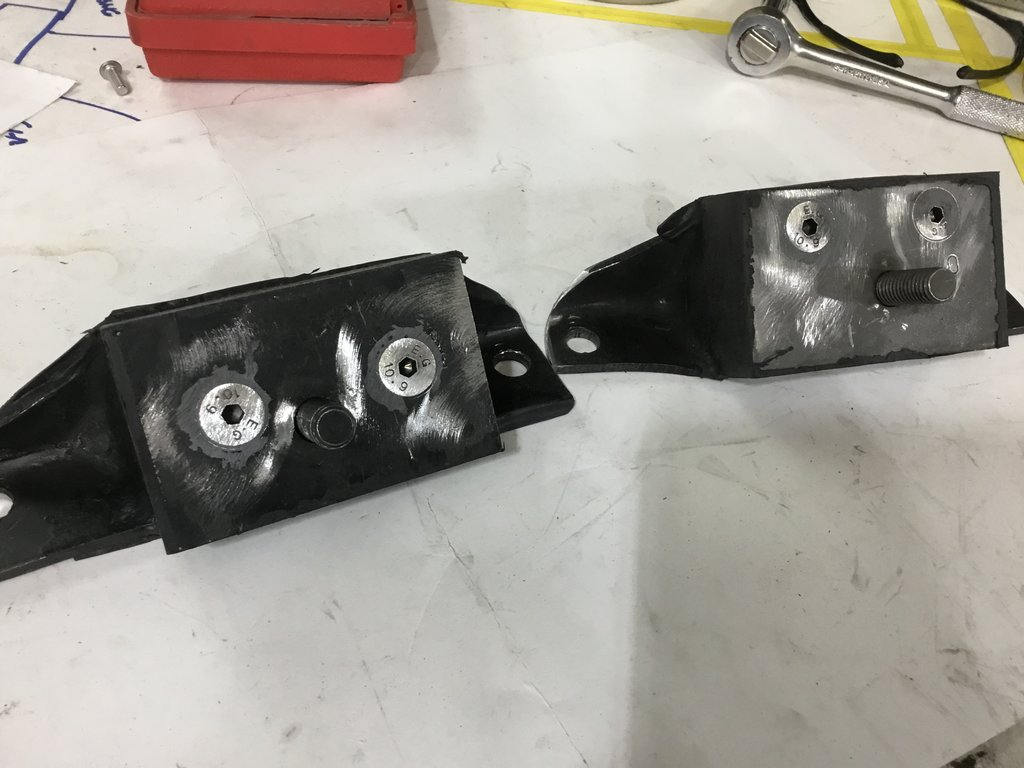
Moved back to the engine. After I figure where I am running front brake lines I hopefully be ready to install engine. Didn't really know what to do about mounts. Didn't want solid ones, vibration and all. Didn't want to spend the money on 289 hi-po mounts, and really didn't trust the stock mounts. Was worried if I broke one I may screw up my hood and I really, really don't want that to happen. So I got the stock mounts and pinned?? them. And yes I know I really didn't have to do the pass side but hey,,why not.
Here is test fitting.

Got the bolts on Amazon, and cut down some rubber bushings from a sway arm link kit for the insulators. After I got everything to fit I glued the tapered heads in with 08115 adhesive and used mechanical lock nuts on the insulator side, used the washers from the link kit too.
Finished product

Hopefully this won't cause vibrations like solid mounts would. If it don't work the stock mounts were really cheap will try something else.
Going to figure out the master and brake line routing, then hopefully install engine and trans soon. Need to order the brake stuff and trans crossmember but I can move back inside the car while waiting on parts.
Lou
Here is test fitting.
Got the bolts on Amazon, and cut down some rubber bushings from a sway arm link kit for the insulators. After I got everything to fit I glued the tapered heads in with 08115 adhesive and used mechanical lock nuts on the insulator side, used the washers from the link kit too.
Finished product
Hopefully this won't cause vibrations like solid mounts would. If it don't work the stock mounts were really cheap will try something else.
Going to figure out the master and brake line routing, then hopefully install engine and trans soon. Need to order the brake stuff and trans crossmember but I can move back inside the car while waiting on parts.
Lou
Re: Lou's 65 Comet Build
Do the dash pad BEFORE you install windshield in my most humble but experienced opinion.
I'd rather do it myself if it's done right or not,,,isn't that what hotrodding is all about

-
Lou's Comet
- Posts: 1540
- Joined: Sat Nov 26, 2011 8:56 pm
- Location: Jeannette, Pa.
Re: Lou's 65 Comet Build
Pretty sure I put it in my thread somewhere, that was when I filled in the holes for the headlight switch, wiper switch and cigarette lighter. Only hole I left in lower dash was for ignition switch and I moved that down some because of the overhang on my new gauge bezel. (Edit, on page 37 of my build)poboyjo65 wrote: ↑Thu Dec 29, 2022 8:51 pmLou I dont remember you frenching in the heater controls,have you mentioned it? looks smooth! cool!
these say ''in stock'' for a stang ,,,,aren't they the same? ;
https://www.cjponyparts.com/scott-drake ... 70QAvD_BwE
Thanks for the link. I have been limiting my buying to Summit, Autokrafters, and Amazon. Really haven't looked at the mustang sites. But now that I got a part # I see that Summit Carrie's them!! Thanks!!
Lou
Last edited by Lou's Comet on Thu Dec 29, 2022 9:16 pm, edited 1 time in total.
-
Lou's Comet
- Posts: 1540
- Joined: Sat Nov 26, 2011 8:56 pm
- Location: Jeannette, Pa.
Re: Lou's 65 Comet Build
I also pinned my motor mounts, had the same concerns as you about possibly having the engine do damage if a mount broke.
It seems no one has a use for an ash tray these days, mine used to be for keeping my loose change. So for this build I split the face from the bin and made it bolt into the opening, the face of the ash tray now holds my power window switches. All the other switches are in their original location, I tossed the keyed ignition switch in the trash and now use “a pull to start” switch that uses a matching knob.
Jim
‘64 Cyclone/ Boss 302,quads,4spd, Winters 9”
-
Lou's Comet
- Posts: 1540
- Joined: Sat Nov 26, 2011 8:56 pm
- Location: Jeannette, Pa.
Re: Lou's 65 Comet Build
When you pinned your mounts did it increase feeling any vibrations from the engine??A/FX wrote: ↑Thu Dec 29, 2022 11:05 pmI also pinned my motor mounts, had the same concerns as you about possibly having the engine do damage if a mount broke.
It seems no one has a use for an ash tray these days, mine used to be for keeping my loose change. So for this build I split the face from the bin and made it bolt into the opening, the face of the ash tray now holds my power window switches. All the other switches are in their original location, I tossed the keyed ignition switch in the trash and now use “a pull to start” switch that uses a matching knob.
Jim
Yea really haven't found a use for the ashtray., was thinking cup holder, or using just the face as you did and installing fuse box behind it. But for now just use the ashtray to fill the hole.
Lou
-
Lou's Comet
- Posts: 1540
- Joined: Sat Nov 26, 2011 8:56 pm
- Location: Jeannette, Pa.
Re: Lou's 65 Comet Build
Took your advice, and glad I did. Thanks Fred!
Installed the dash pad yesterday. Took my time and everything went good. Then when I went to install the chrome trim the dash clip on the pass end popped, it came out of the pad. Was trying to reinstall it and the next one popped.
Had to remove the pad, going to re-install it today. May try some glue.....fun stuff
Lou