Tom
poboyjos ride
Re: poboyjos ride
I should learn how to use all the capabilities of the thing and then I would feel better about the money I spent 
Tom
Tom
tomb's 65

Re: poboyjos ride
We used this guy to convert our AM to AM/FM/BT. Very satisfied with the product and I think the price is cheaper than $700. I put two speakers under the dash (convertible, so no package tray).
http://garytayman.com/prices.htm
http://garytayman.com/prices.htm

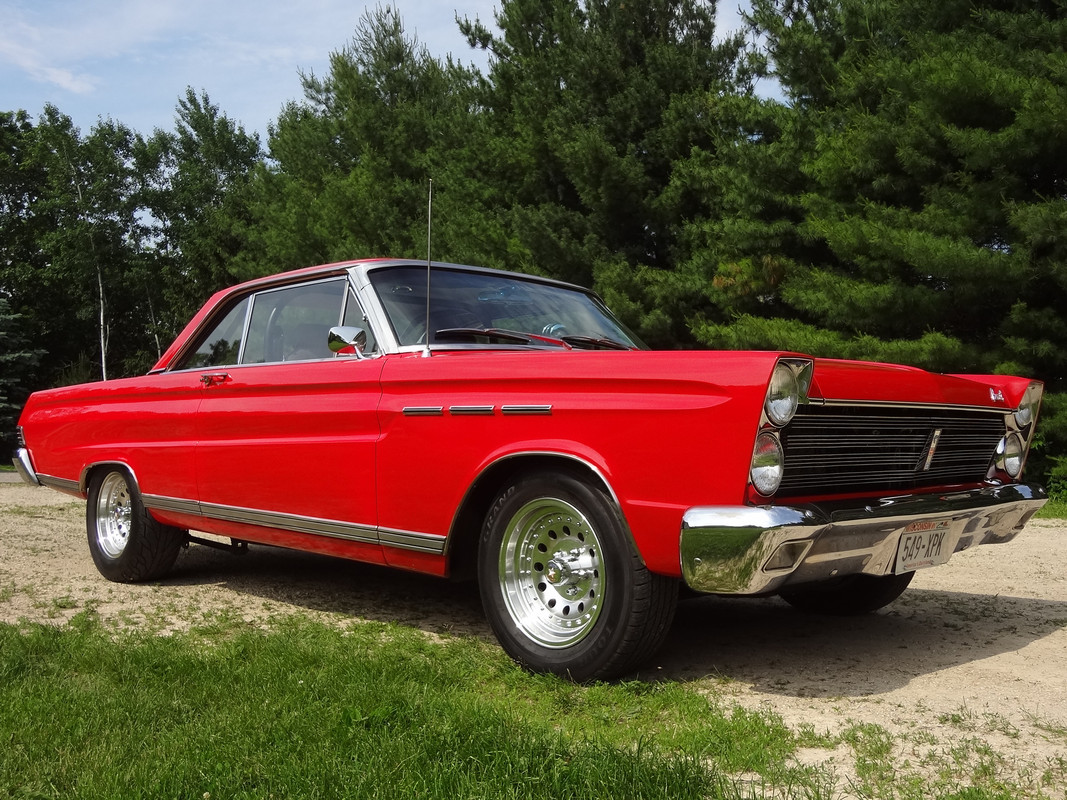
1964 Comet Caliente Convertible
30,000 miles on our rebuild
All Comets start out as dreams...

Re: poboyjos ride
Groover does yours have blue tooth? I noticed he had that listed as an option and would add to the price

Johno
Re: poboyjos ride
yes it does have blue tooth and an Aux in jack. It works quite well.
1964 Comet Caliente Convertible
30,000 miles on our rebuild
All Comets start out as dreams...
Re: poboyjos ride
Groover Not sure but taymans looks to add up to pretty close to the 700,which is probably closer to 600 without the speakers that Tom got & tax probably shipping added in there.
taymans is 385 +220 for the bluetooth & usb option plus tax & shipping, right? or am I looking at it wrong?
taymans is 385 +220 for the bluetooth & usb option plus tax & shipping, right? or am I looking at it wrong?
Johno
Re: poboyjos ride
Well... I went back through my emails and found my string with Gary from 2013. Price back then was $385 for the radio and $200 for the BT. So Poboy you're right. It's about the same price. Looks like he's raised the price of the BT by $20 (not bad). I didn't order speakers so I guess the price is about equal. Looks like my memory on 10 year old purchases is now subject to review 
1964 Comet Caliente Convertible
30,000 miles on our rebuild
All Comets start out as dreams...
Re: poboyjos ride
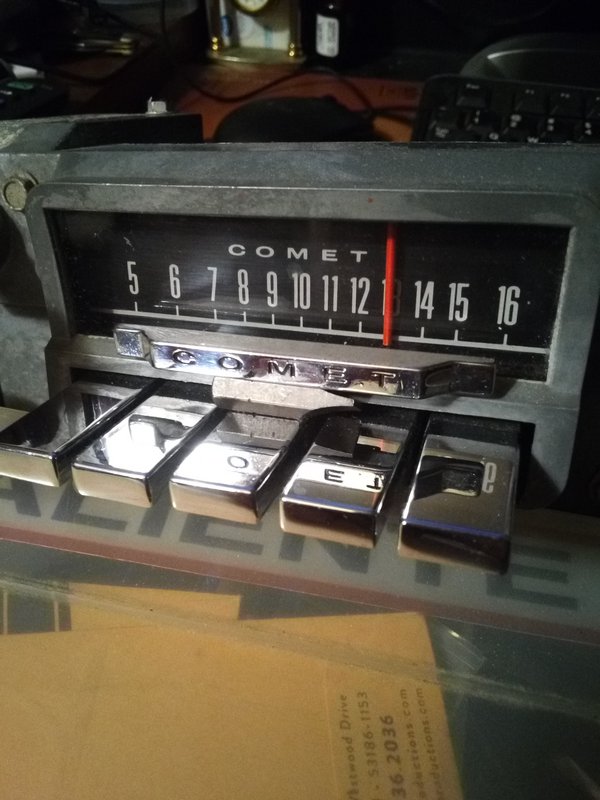
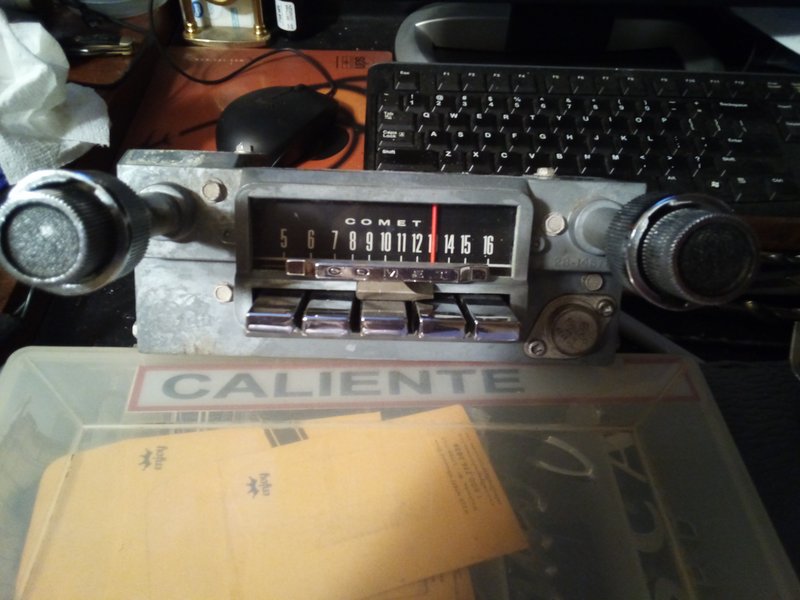
Thinking after learning how to operate all of the settings on the updated stock radio I could do it in the dark by feel ,it'll feel like old times turning real knobs & pushing the old buttons!  & my radio has nice chrome buttons

& I have an am/fm slider bar I hope he can find a lens that can use with it.
Lou I'm not going to have the dash speaker either. & I have two of the covers also, like you ,but both mine haven't been painting. I was piddling in the shop thinking about the tach & radio. & where that speaker was would make a good area for a compartment for the usb port & maybe an extra one to charge a phone , & could make it a good place to set the phone.
I could cut the hole out of the speaker cover & use the other speaker cover (just the center part of it)
as the cover in the recess of the bottom one,
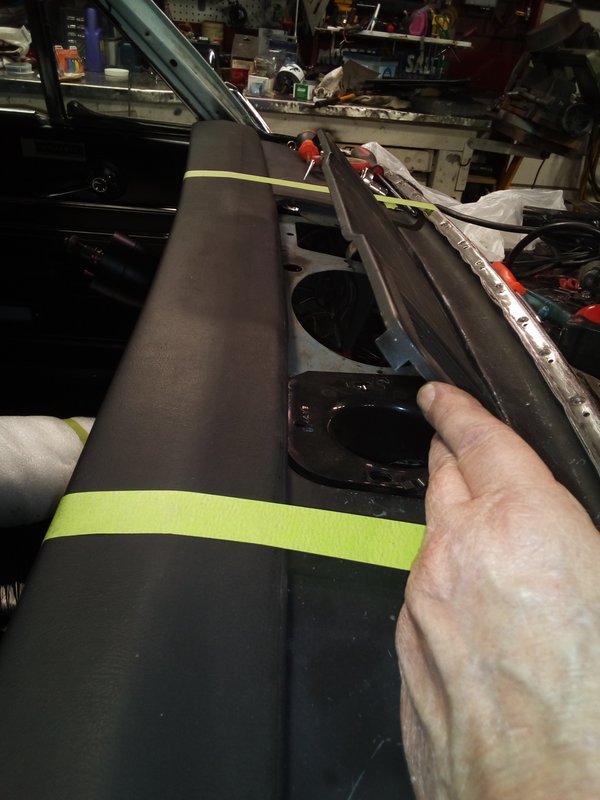
I put my phone case in there for a model to get an idea.(tape simulating the windshield)

I think I could cut the center section out & make a lid. But I reserve the right to chicken out, it'd be a lot of tedious work but sure would make the wiring easier by keeping the usb & aux ports close to the radio as well as less standing on head & wiring underdash .

& I have an am/fm slider bar I hope he can find a lens that can use with it.
Lou I'm not going to have the dash speaker either. & I have two of the covers also, like you ,but both mine haven't been painting. I was piddling in the shop thinking about the tach & radio. & where that speaker was would make a good area for a compartment for the usb port & maybe an extra one to charge a phone , & could make it a good place to set the phone.
I could cut the hole out of the speaker cover & use the other speaker cover (just the center part of it)
as the cover in the recess of the bottom one,
I put my phone case in there for a model to get an idea.(tape simulating the windshield)
I think I could cut the center section out & make a lid. But I reserve the right to chicken out, it'd be a lot of tedious work but sure would make the wiring easier by keeping the usb & aux ports close to the radio as well as less standing on head & wiring underdash .
Johno
-
Lou's Comet
- Posts: 1562
- Joined: Sat Nov 26, 2011 8:56 pm
- Location: Jeannette, Pa.
Re: poboyjos ride
Radio is in nice shape!! Will look good in the dash. The flip up speaker grill is a really cool Idea! But as you say would be a little tedious. What are you doing with your ash tray?
Maybe put the USB ports in the ash tray and you can just close it to hide them?? And then you won't be limited on where you can mount your tach.
I Was thinking of trying to make my ash tray into a drink holder, but that is later.
Lou
Maybe put the USB ports in the ash tray and you can just close it to hide them?? And then you won't be limited on where you can mount your tach.
I Was thinking of trying to make my ash tray into a drink holder, but that is later.
Lou
Re: poboyjos ride
Well ashtray was first choice ,but that port he showed in the video looked kinda big for the ashtray & might be tough to make it where you could close it with a jumpdrive sticking out of it. then wires getting in the sliders & shoring out. (I had a flashback of a big power wire to a stereo getting caught in a seat track & blowing up a system) I would like to be able to close the compartment with jumpdrive in . but nothing is ruled out,,, still in the planning stage & input is very welcome,I'll stew on it a while. but even if I ruin these spkr grills I could find another one pretty easy if I chicken out right in the middle of doing it.. & a lot of the tedius work could be done on the workbench. or thru the windshield hole.& I like that type stuff more than under the dash work.
plenty of room where the speaker was ,I could attach the ports to the lid & they would rise with the lid
plenty of room where the speaker was ,I could attach the ports to the lid & they would rise with the lid
Johno
Re: poboyjos ride
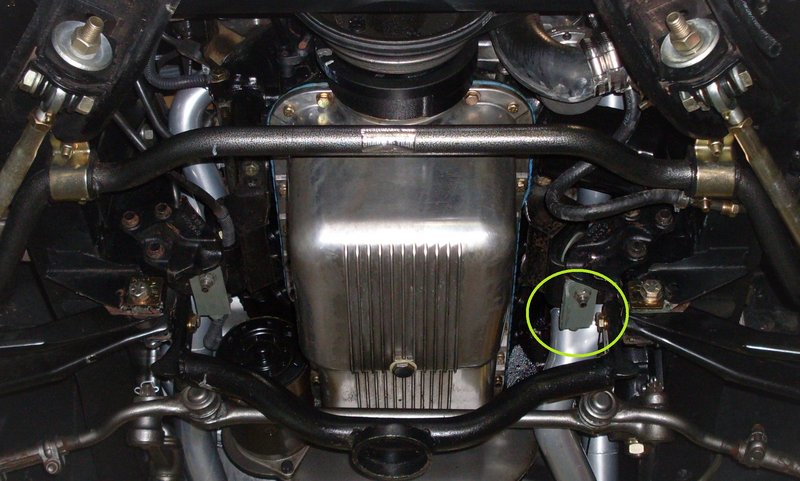
Joe T you mentioned your engine sat low on the z bar side. when I first got this car it sat low on one side. when I pulled the moter the MM just fell or came out in pieces.
with new motor mounts I still had fitment problems with the borgesen ps box & trying to alter the z bar to clearance the box & headers. it whipped me good for a few days. I'd think I had it & something would touch & make awful sounds from vibes. get it to back out of the driveway without vibes & it'd vibrate when going forward. I was moving the engine back & forth side to side & up & down with washers for shims, & variations from side to side. I finally made some adjusters so I could at least keep track of which way & how much I moved it forwards & backwards. & they really helped to keep track of where you move it.
If a header can touch body or frame anything, IT WILL LET YOU KNOW!!!
the green flat things have a nut welded on the top at the rear with bolts screwed in there to push against the frame mounts & pull the studs of the intermediate V mount pulling the motor back & hold it there. I remember wallering out the holes in the frame mounts for a tad more range too & welded an angle to the bottom of the adjuster to make it more rigid,looks like I didnt put that on the pass side, or paint them. I guess when I finally won the fight I fell out of the ring ;
if you look close you can see the bolt heads at the back of the green adj's .
with new motor mounts I still had fitment problems with the borgesen ps box & trying to alter the z bar to clearance the box & headers. it whipped me good for a few days. I'd think I had it & something would touch & make awful sounds from vibes. get it to back out of the driveway without vibes & it'd vibrate when going forward. I was moving the engine back & forth side to side & up & down with washers for shims, & variations from side to side.
If a header can touch body or frame anything, IT WILL LET YOU KNOW!!!
the green flat things have a nut welded on the top at the rear with bolts screwed in there to push against the frame mounts & pull the studs of the intermediate V mount pulling the motor back & hold it there. I remember wallering out the holes in the frame mounts for a tad more range too & welded an angle to the bottom of the adjuster to make it more rigid,looks like I didnt put that on the pass side, or paint them. I guess when I finally won the fight I fell out of the ring
if you look close you can see the bolt heads at the back of the green adj's .
Johno
-
Joe Travers

- Posts: 2460
- Joined: Mon Sep 21, 2020 6:23 pm
- Location: Louisiana
Re: poboyjos ride
Wouldn't surprise me if mine were the same. The pinning tip is cool, I don't like solid mounts.
The old chain trick might work well. Haven't seen that one in a very long time.
Joe
1963 1/2 Custom Hardtop
342 stroker, solid roller, T-10, 3.55 posi
-
Jims65cyclone

- Posts: 2777
- Joined: Sun Nov 23, 2014 10:29 pm
- Location: Lexington, SC
Re: poboyjos ride
I had a chain on my first Comet. That was circa 1972.Joe Travers wrote: ↑Sun Jan 01, 2023 9:16 pmThe old chain trick might work well. Haven't seen that one in a very long time.
Jim

-
Lou's Comet
- Posts: 1562
- Joined: Sat Nov 26, 2011 8:56 pm
- Location: Jeannette, Pa.
Re: poboyjos ride
Had a few cars with the chain safety when I was young,, thought about it for the Comet, but not the look I wanted under the Hood. But the chain does work.Jims65cyclone wrote: ↑Wed Jan 04, 2023 11:21 amI had a chain on my first Comet. That was circa 1972.Joe Travers wrote: ↑Sun Jan 01, 2023 9:16 pmThe old chain trick might work well. Haven't seen that one in a very long time.
Jim
Lou
Re: poboyjos ride
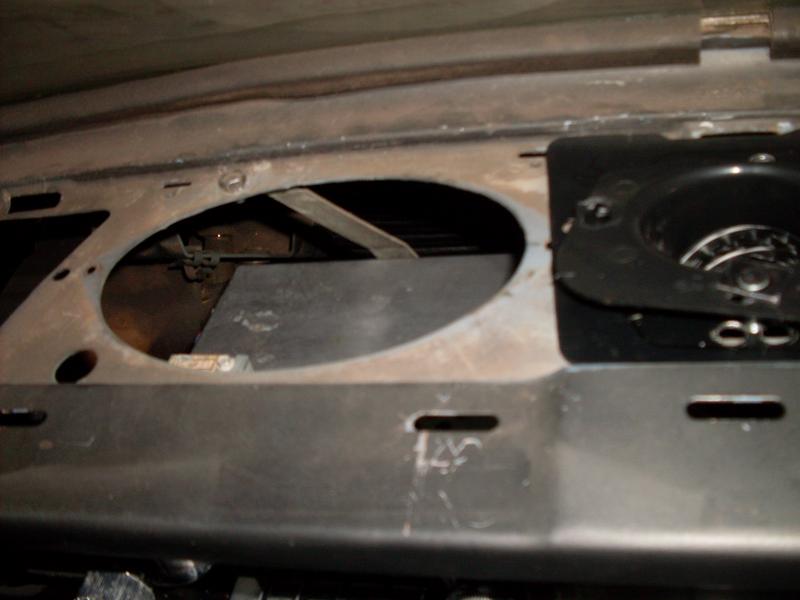
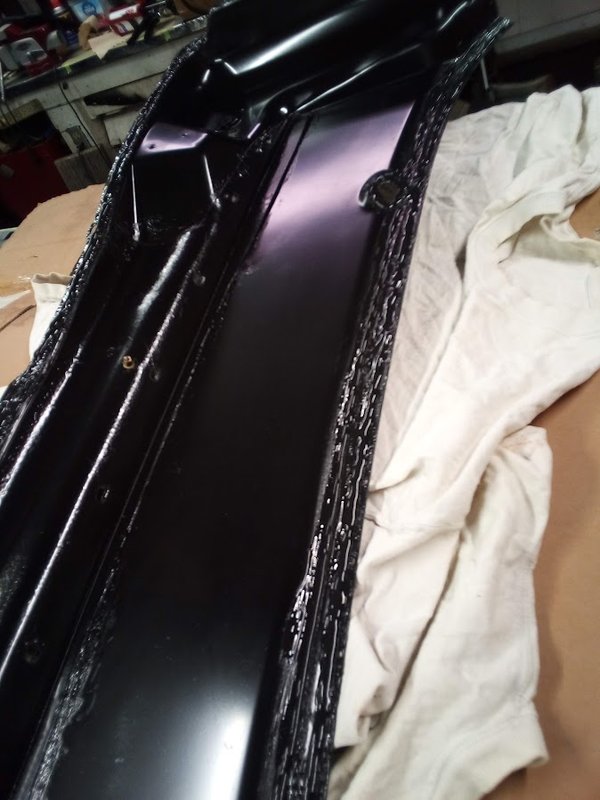
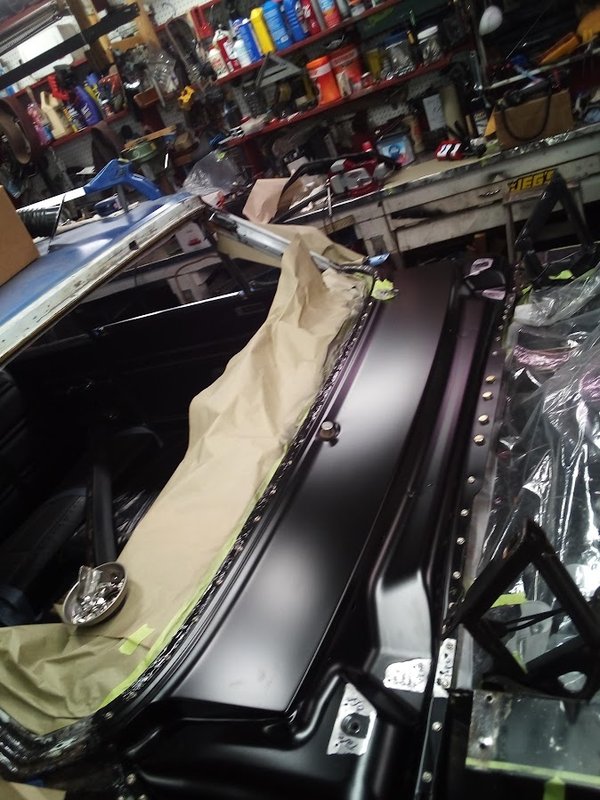
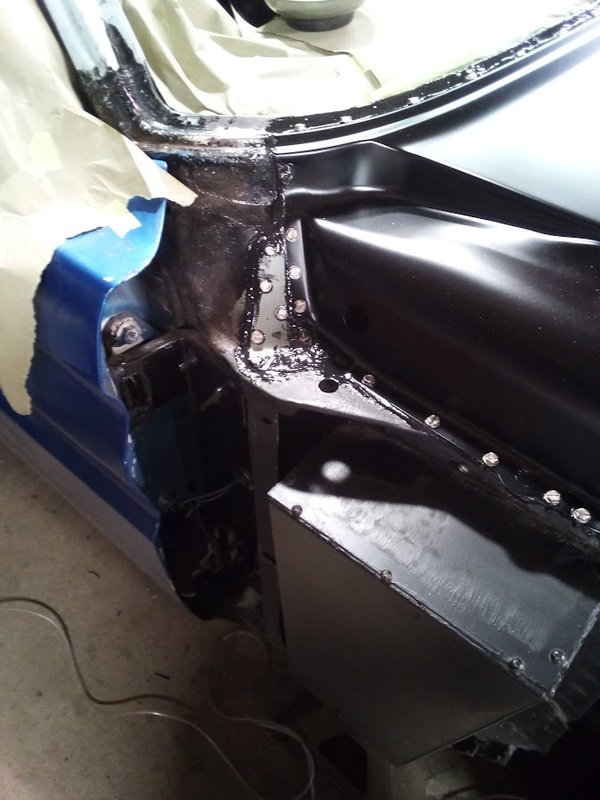
Finally made some progress ,I glued my cowl top on last night. Man it was kinda hectic, but barely got er done within the 90 min work time of the epoxy. I used 3M 8115 , an old friend now & I still love it, but it had been so long I had to hit up Lou again for some refresher advice. Thanks again Lou. the whole job took about 3 hours. but a lot of the last hour & a half was smearing off the glue that got squished out to make it look better & so I'd have minimal sanding of the excess after it hardened, especially around the windshield pinch. I still have to remove the screws at the pinch & fill with the glue but the other three sides of the cowl I'm leaving the screws in. only a few will show to the sides of the export brace.
I put epoxy paint on the insides of the cowl ;
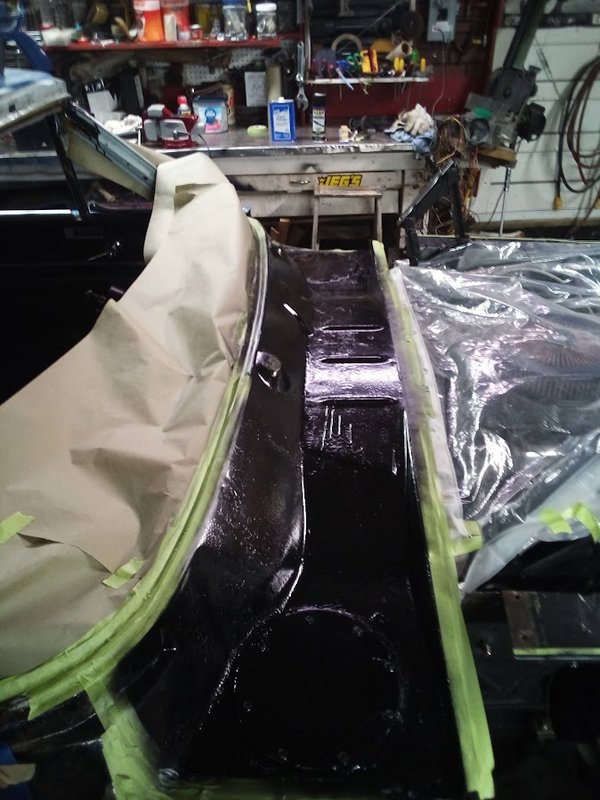
then a coat of the glue on both surfaces ,brushed to cover the tape line of bare metal ,then a 1/4'' bead on the cowl before assembly. actually 2 1/4'' beads at the windshield pinch in each grove. I wanted plenty there, & from what gushed out I'm confident there is.
A lot of screwing started them all, then tightened them. the 2 areas around the wipers got glue too. bolts were kind of a pain for one man.

I also patched a small area next to the cowl.
I almost forgot to mention I had a guy paint the cowl last fall to match the black hood. lol it doesn't look much different than the e coat in the pics. After I was done I was thinking well I lost my tool tray, that open cowl made a good one but glad to have this done!
I put epoxy paint on the insides of the cowl ;
then a coat of the glue on both surfaces ,brushed to cover the tape line of bare metal ,then a 1/4'' bead on the cowl before assembly. actually 2 1/4'' beads at the windshield pinch in each grove. I wanted plenty there, & from what gushed out I'm confident there is.
A lot of screwing
I also patched a small area next to the cowl.
I almost forgot to mention I had a guy paint the cowl last fall to match the black hood. lol it doesn't look much different than the e coat in the pics. After I was done I was thinking well I lost my tool tray, that open cowl made a good one but glad to have this done!
Johno
Re: poboyjos ride
That cowl ain’t going nowhere, and should be water tight. Looks good Johno.
Motor Safe,
Lee